
If you're new to charcoal grilling, lighting the grill for the first time can feel a little scary and intimidating. I've totally been there. There's fire, smoke, airflow, heat zones, and a lot of advice out there that assumes you already know what you're doing and you already know grill talk.
The good news though is that charcoal grilling is actually much simpler than it looks once you understand a few basic things.
This written guide and video will show you how to light a charcoal grill (without a chimney starter) step-by-step while also explaining why each step matters so you can feel confident when you grill instead of feeling clueless and overwhelmed.
The biggest thing to remember when it comes to grilling is this: Charcoal grilling is mostly about airflow, heat control, and patience
Once you understand those three things, lighting a grill with or without a chimney starter will start making a lot more sense. And with this knowledge you'll be able to grill with confidence. Looking for a grilling recipe? Try How to Reverse Sear a Steak on a Charcoal Grill.
Jump To Recipe
What You'll Need
Charcoal briquettes: They burn more evenly and are usually easier for beginners to manage
2 to 3 pages of paper: Acts like a candle wick that slowly burns underneath the charcoal
Cooking oil: Used to ensure the charcoal properly catches and ignites
Lighter fluid: An extremely flammable accelerant to ensure the charcoal ignites
Long lighter or grill lighter: Safely lights the oil-soaked paper in several spots
Heat-resistant gloves (recommended): Safely handles hot surfaces and tools
This guide is written mainly for charcoal briquettes because they burn more evenly and are usually easier for beginners to manage.
You can use lump charcoal but the thing about them is that they burn hotter and light faster. They also tend to burn less predictably.
How to Light a Charcoal Grill Without a Chimney Starter
Check out these step-by-step instructions with images. Just so you know, you'll find all the details and exact ingredients of this recipe on the printable recipe card below!
Step 1: Clean Out the Grill
Before lighting the grill, remove the old ash from your previous cook.
Note: Doing this matters more than most beginners realize because old ash absorbs moisture from the air, which can trap dampness inside your grill and eventually lead to rust over time. Ash is also slightly acidic, which can slowly wear down the inside of the grill if it sits in there too long.
Cleaning out the ash also improves airflow under the charcoal. If the bottom of the grill is packed with old ash, the charcoal might struggle to light or may keep going out which tends to be very frustrating.
Step 2: Open the Vents
Open both the bottom vents and the top lid vents completely before lighting the charcoal.
Note: The grill is like a chimney. The bottom vents pull fresh oxygen into the grill and the top vents allow heat and smoke to escape. This constant movement of air feeds the fire and helps the charcoal burn properly. If the vents stay closed, the fire will go out before the charcoal fully catches.

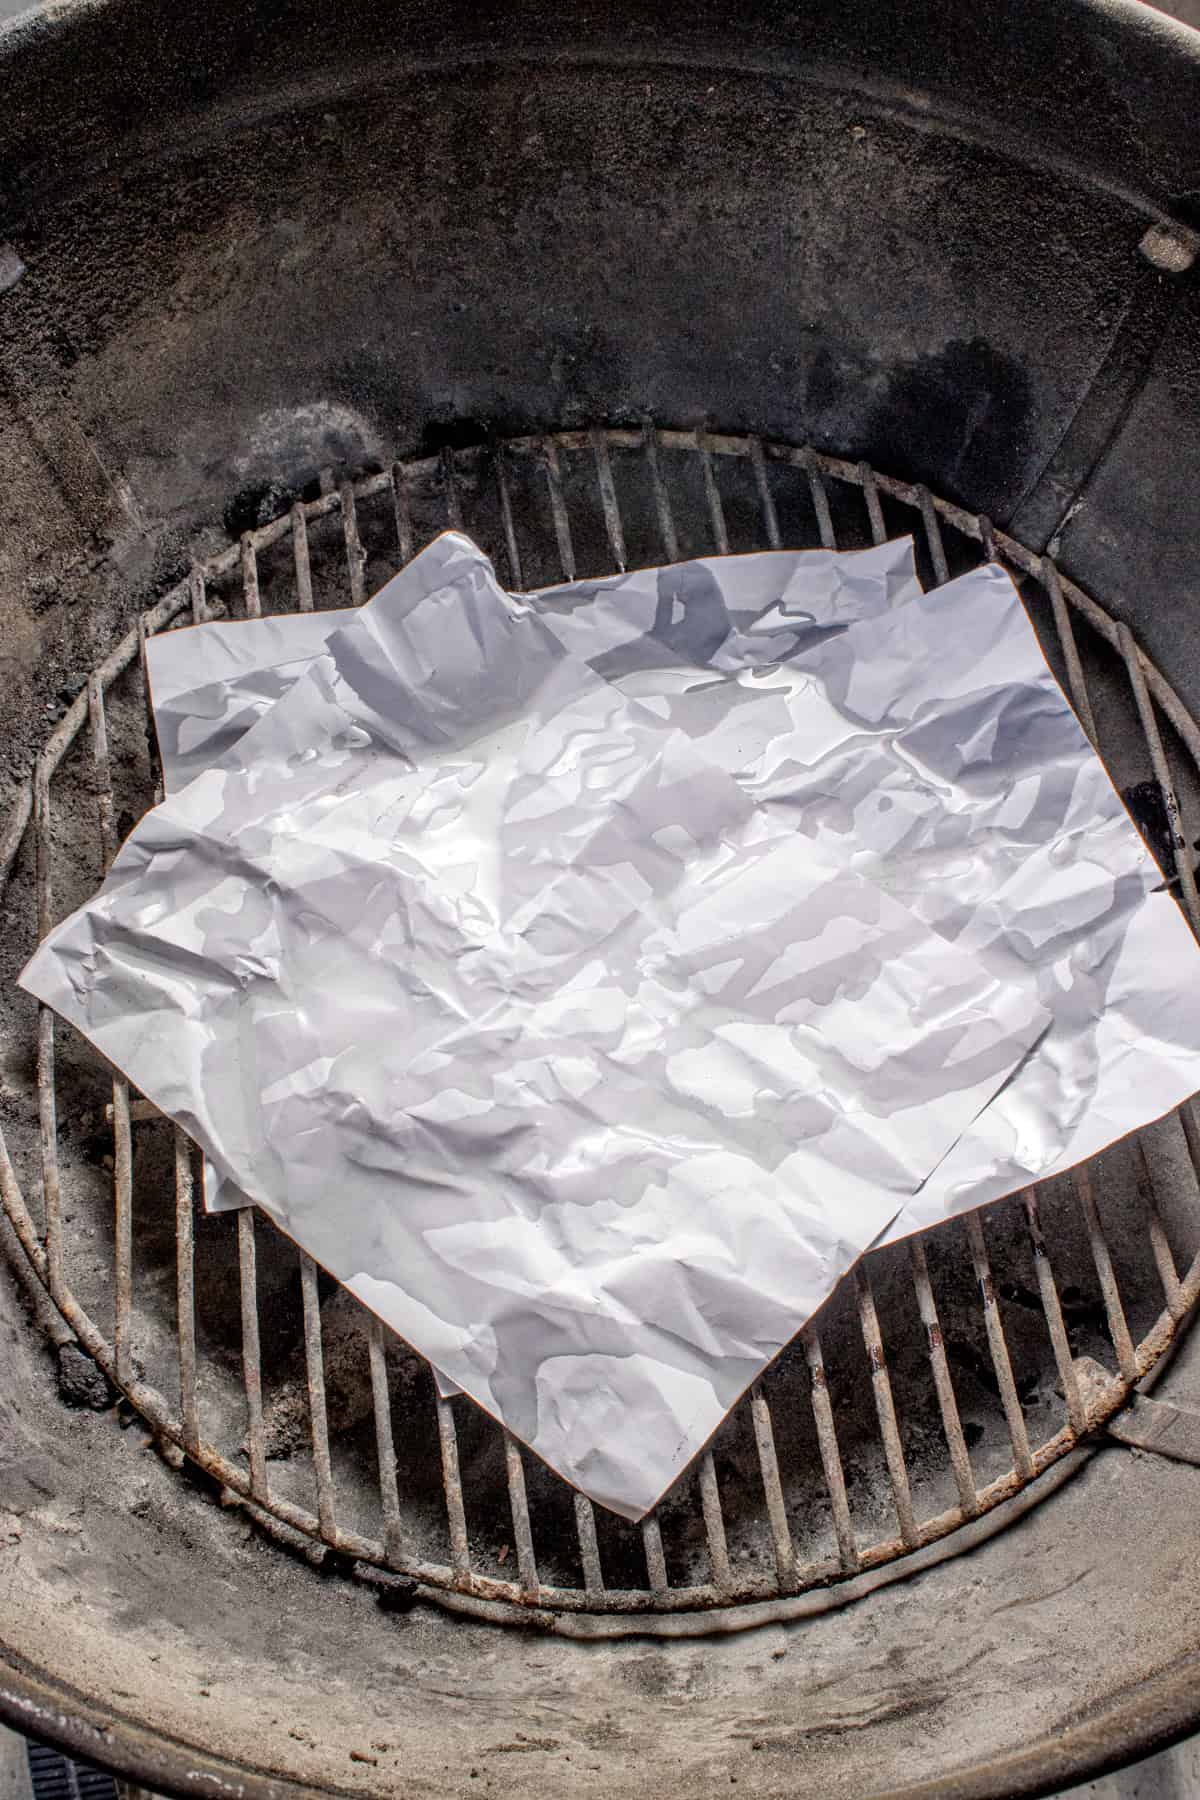
Step 3: Oil Soaked the Paper
Take 2 or 3 pieces of paper, and place them in the center of the bottom charcoal grate and drizzle them with cooking oil or sparingly with lighter fluid. The paper acts like a candle wick that slowly burns underneath the charcoal.
Can I use paper towels?
Sure! Oil-soaked paper towels work well too. I have found that they burn much longer, which gives the charcoal enough time to properly ignite. I like using paper instead because it's always available.
Step 4: Build a Tight Charcoal Pyramid
Pile about 40 to 50 charcoal briquettes directly over the paper in a steep pyramid shape.
Note: Try to keep the briquettes touching each other as much as possible because heat travels best through contact and when the charcoal is packed closely together, the briquettes will help ignite one another.


Step 5: Apply Lighter Fluid or Oil
Carefully drizzle lighter fluid or cooking oil over the charcoal briquettes. If you are using lighter fluid, make sure you use it sparingly and with a lot of caution; it is extremely flammable, and the goal is a controlled fire, not a bonfire. You can be slightly more generous if you are using cooking oil. Using these accelerants directly over the briquettes will ensure that the charcoal properly catches and begins to ignite.
Step 6: Light the Grill
Using a long lighter, carefully light the paper in several spots. Once the paper catches, the flames will slowly begin climbing upward into the charcoal pile.


Note: At first, the fire may seem weak, uneven, or smoky. That's totally normal. Charcoal takes time to ignite properly, and one of the biggest mistakes beginners make is thinking they need to constantly fix or rearrange the coals right away.
Whenever I light my grill I usually try very hard to follow the "No-Touch Rule" for the first 10 minutes:
- Do not move the coals.
- Do not flatten the pile.
- Do not freak out if the fire looks uneven.
The charcoal simply needs time to build heat.
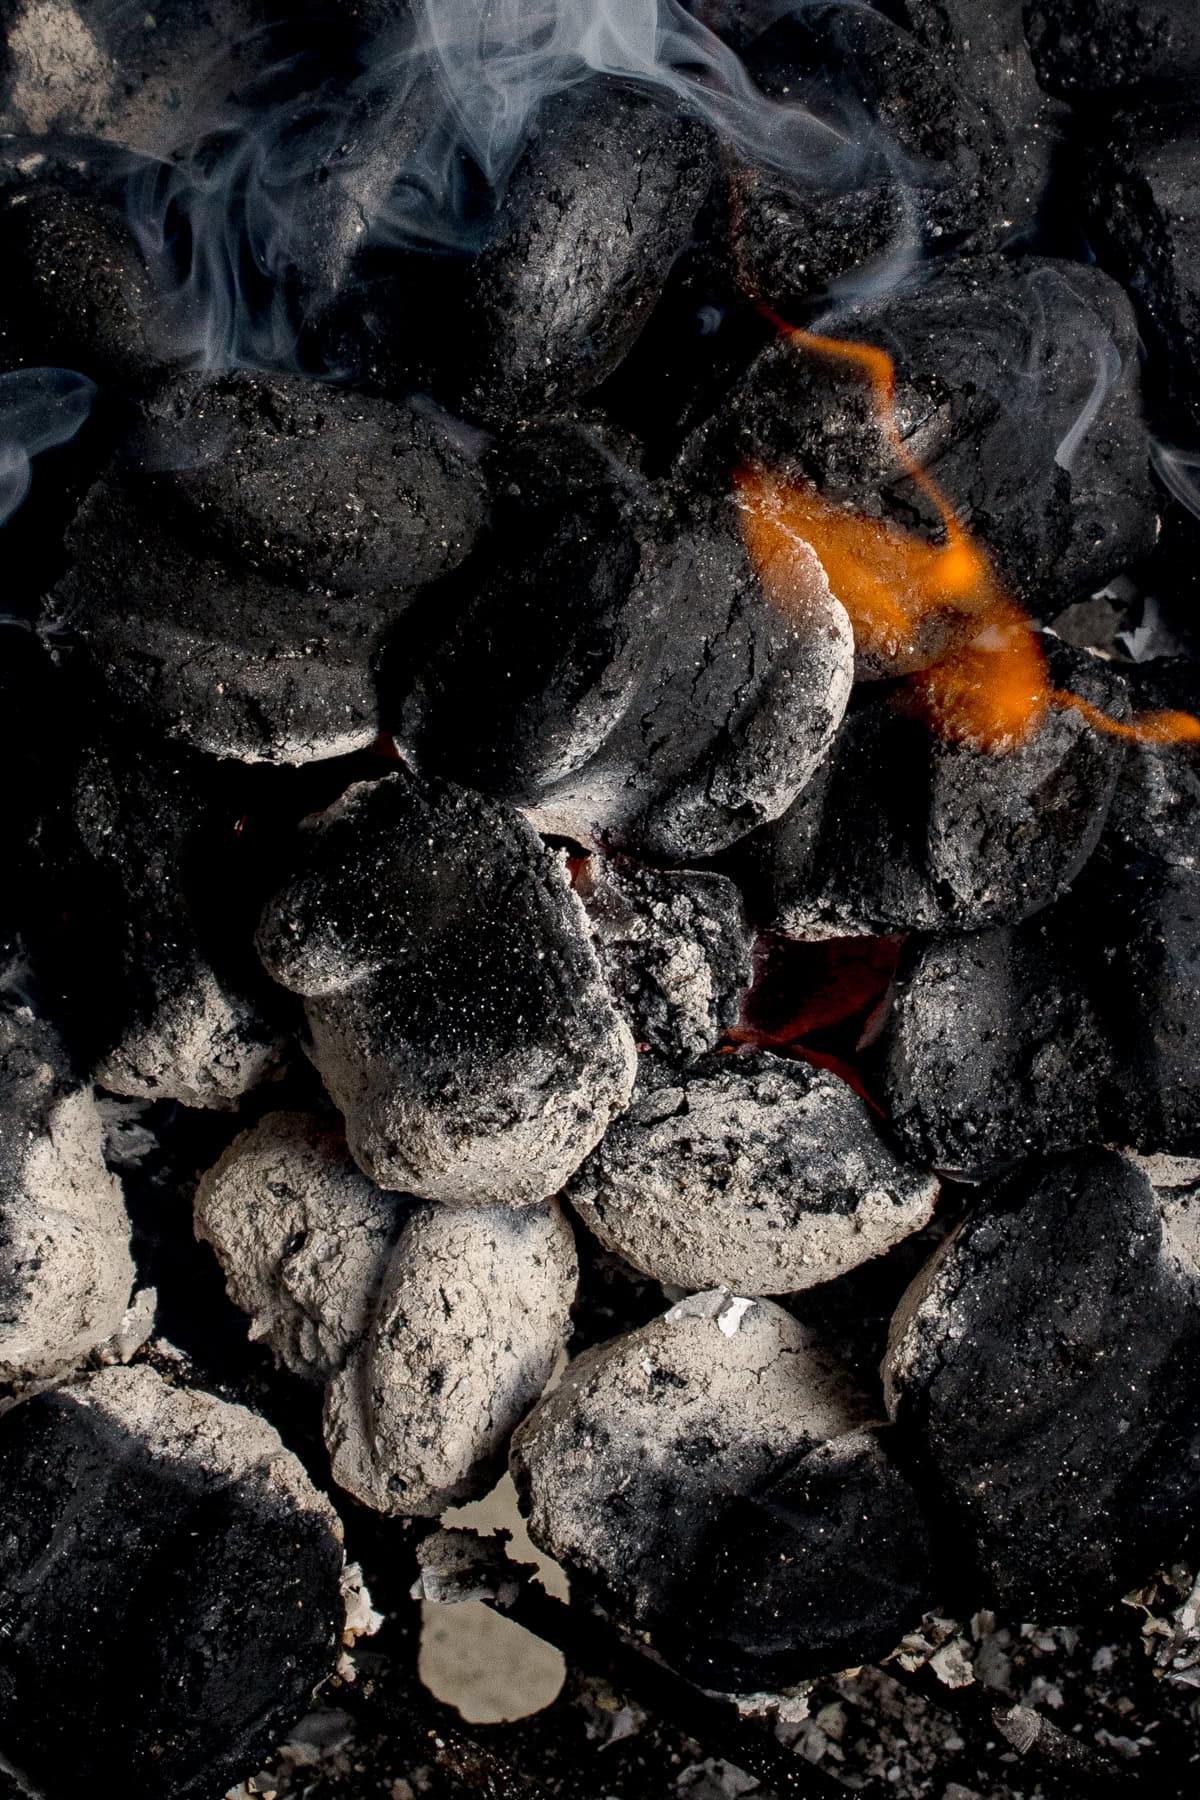
What the Smoke Should Look Like
In the beginning, you'll probably see thick white smoke. This is normal. As the fire improves, the smoke will become lighter and cleaner. Those are signs that the charcoal is burning cleanly and efficiently.
What if the Fire Starts Dying?
If the charcoal struggles to ignite or the flames begin fading, please resist the urge to dump a lot of oil or lighter fluid onto the fire. I know it's tempting but too much oil or lighter fluid can cause dangerous flare-ups and overpowering chemical smells.
If needed, you can add another small oil-soaked paper near the outer edge of the charcoal pile. Usually the main culprit of a dying fire is airflow or impatience, not lack of fuel.
How to Tell When the Charcoal Is Ready
Your charcoal is ready when:
- Most of the briquettes are covered in gray or white ash
- You can see glowing orange heat underneath
- The flames have calmed down
- The smoke looks lighter and cleaner
This usually takes about 15 to 20 minutes depending on the brand of charcoal, weather, and wind.
Set Up a Two-Zone Fire: Once the charcoal is fully lit, use tongs or a grill tool to push the hot coals to one side of your grill. Doing this creates two cooking zones: a hot side and a cooler side.


Direct Heat (The Hot Zone): This is the side that is directly over the charcoal. It is hotter and cooks food quickly. It works best for: burgers, hot dogs, thinner steaks, vegetables, foods that cook fast. Direct heat is perfect for searing, but food can burn quickly or dry out if you leave it there unattended.
Indirect Heat (The Safe Zone): The side without charcoal under it is called indirect heat. Instead of cooking directly over the fire, the food cooks using the circulating heat that's inside the grill, almost like an oven.
Indirect heat is extremely beginner friendly because: it cooks food more gently, it gives you more control, it reduces flare-ups, and it gives you more time to react before your food burns.
Personally, I recommend indirect cooking for almost everything when you're first learning charcoal grilling. If your food starts cooking too fast, you can simply move it to the cooler side of the grill instead of fighting the flames.
Preheat the Grill Grates: Once the coals are arranged, place the lid on the grill for about 5 minutes to preheat the cooking grates. Preheating your cooking grates helps prevent sticking and creates better grill marks.
After the grates heat up, use a grill brush or scraper to clean them and then you'll be good to go!
How Much Charcoal Should You Use?
- For smaller cooks like burgers or patties, around 40 briquettes is usually enough.
- For larger cooks or longer grilling sessions, around 80 briquettes works better.
If you are kind of nervous about the whole grilling process and want my recommendation, I'd say start with about 80 briquettes and be sure to use the two-zone method of grilling.
Beginner Safety Tips
Never pour lighter fluid directly onto active flames
Never use gasoline
Never light charcoal indoors
Never leave your lit grill unattended
Keep children, spouses, and pets away from the grill
Keep a fire extinguisher or spray bottle nearby
Allow the ash and charcoal to fully cool before removing it. I usually remove the ash the next day or right before I start my next cook.
Final Thoughts
The first time lighting charcoal can feel awkward, slow, or even frustrating. That's totally normal. Charcoal actually takes a little while to properly light so try not to rush the process.
Nobody was born a grill master...well except for George Foreman. In all honesty and seriousness, charcoal grilling for you will get easier every single cook because you will slowly start recognizing:
- How the smoke changes
- How the fire behaves
- How airflow affects heat
- When the charcoal is truly ready
Once those things click, charcoal grilling will become far less intimidating and a lot more enjoyable.
Your Questions Answered
How much cooking oil should I use?
2 to 3 tablespoons (about 1 fl oz) of a high-smoke-point neutral oil like vegetable or canola oil.
Absolutely! Unused charcoal briquettes or lump charcoal don't actually have an expiration date.
A chimney starter is a simple metal cylinder that uses airflow to light charcoal quickly and evenly. You don't need lighter fluid or chemicals. At around $15 to $25, it's also one of the most affordable grilling tools you can buy, and one I recommend every griller have.
In a Dinner Rut?
Sign up for our newsletter!
Please Rate this Recipe!
We hope you love this How to Light a Charcoal Grill Without a Chimney Starter guide! If you get to use it, please be sure to leave a rating so we know how you liked it!

More Recipes You'll Love
Looking for other easy and delicious recipes? Try these:


How to Light a Charcoal Grill Without a Chimney Starter
Equipment
- Charcoal kettle grill
- Long-handled grill lighter
- Long grill tongs
- Heat-resistant grill gloves (optional)
- Grill brush or scraper
Materials
- 40–80 Charcoal briquettes (40 for quick cooks, 80 for longer
sessions)
- 2–3 Sheets paper or paper towels
- 2–3 tablespoon Neutral cooking oil (Vegetable or canola; or optional lighter
fluid used sparingly)
Instructions
Phase 1: Airflow & Setup
- Clear Old Ash: Remove leftover ash from the bottom of the grill bowl tomaximize airflow and prevent moisture retention.
- Open All Vents: Fully open both the bottom intake vents and the top lid vents to allow maximum oxygen flow.
Phase 2: Building & Lighting
- Prep Paper Wick: Crumple 2–3 sheets of paper in the center of the charcoal grate. Drizzle with 1–2 tablespoon of cooking oil.
- Build Tight Pyramid: Pile briquettes in a steep, tight pyramid directly over the paper so coals touch (heat transfers through contact).
- Add Top Fuel: Lightly drizzle 1 tablespoon of cooking oil over the top briquettes.
- Ignite: Use a long lighter to ignite the oil-soaked paper in 2 to 3 spots around the base.
Phase 3: The 10-Minute No-Touch Rule
- Let Heat Build: Allow fire to build naturally for 10 minutes. Do not move the coals, flatten the pile, or panic if flames look uneven.
Phase 4: Two-Zone Setup & Preheating
- Check Readiness: Wait 15–20 minutes until briquettes are covered in gray ash with glowing orange heat underneath.
- Bank the Coals: Use tongs to push coals to one side, creating a Direct Zone (searing) and Indirect Zone (gentle cooking).
- Preheat Grates: Cover with lid for 5 minutes to heat grates, brush clean, and begin cooking.
Notes
Understanding Smoke: Thick white smoke at first is normal. When the smoke becomes light and faint, the charcoal is burning clean. If Fire Struggles: Resist the urge to add more lighter fluid liquid to an active fire. Instead, place a small oil-soaked paper wick at the outer edge of the pile. Safety Guidelines: Always keep a spray
bottle or fire extinguisher nearby.
We'd Love to Hear From You