
Making a sourdough starter from scratch can feel really intimidating. I've been there, I actually tried making a starter three times before succeeding. Here's the honest truth about sourdough: you don't need to be a master baker to create a sourdough starter. All you need is water, flour, patience, and a little bit of time.
So what's a sourdough starter?
A sourdough starter is basically a living culture of wild yeast and bacteria that you'll feed regularly until it becomes strong enough to bake with. I know what you are thinking:
Why even bother when you can use store bought yeast?
Well, people bother making and using starters because homemade sourdough tastes really incredible, is easier on your digestive system (thanks to the breakdown of something called phytic acid), and nothing beats the smell of freshly baked bread and the feeling of cutting into warm bread. Essy can tell you all about that!
Looking for more easy Sourdough recipes? Try Sourdough Artisan Bread, and Sourdough Discard Biscuits. Interested in learning about feeding ratios? Read sourdough starter feeding ratios.
Jump To Recipe
- So what's a sourdough starter?
- Why even bother when you can use store bought yeast?
- Why You'll Love Making a Sourdough
- Recipe Ingredients
- Ingredient Notes
- Equipment Notes
- How To make a Sourdough Starter Step-By-Step
- How to Know Your Starter Is Ready to Bake The Smell:
- Tips and Tricks
- Storage and Reheating
- Your Questions Answered
- In a Dinner Rut?
- Please Rate this Recipe!
- More Recipes You'll Love
- Recipe
Why You'll Love Making a Sourdough
Starter It's simple: Seriously, all you need is just water and flour.
It's forgiving and resilient: I know it's hard to believe but once you start baking regularly with it you'll realize that it's pretty low maintenance and really hard to kill.
It makes amazing bread: Sourdough has a rich, complex flavor and is so versatile.
It's budget-friendly: One starter can live for decades, saving you money on store-bought loaves. The world's oldest starter is 4,500 to 5,000 years old!
It's gut-healthy: The long fermentation makes the bread easier to digest.
Recipe Ingredients
You’ll need the following ingredients to make a Sourdough Starter from Scratch.
Ingredient Notes
Whole Wheat Flour : While all-purpose works, rye or whole wheat flour acts like "superfood" for wild yeast, helping your starter activate faster in the first 72 hours.
Water : Filtered is best; if you are using tap, let it sit out for 24 hours to let chlorine evaporate.
Equipment Notes
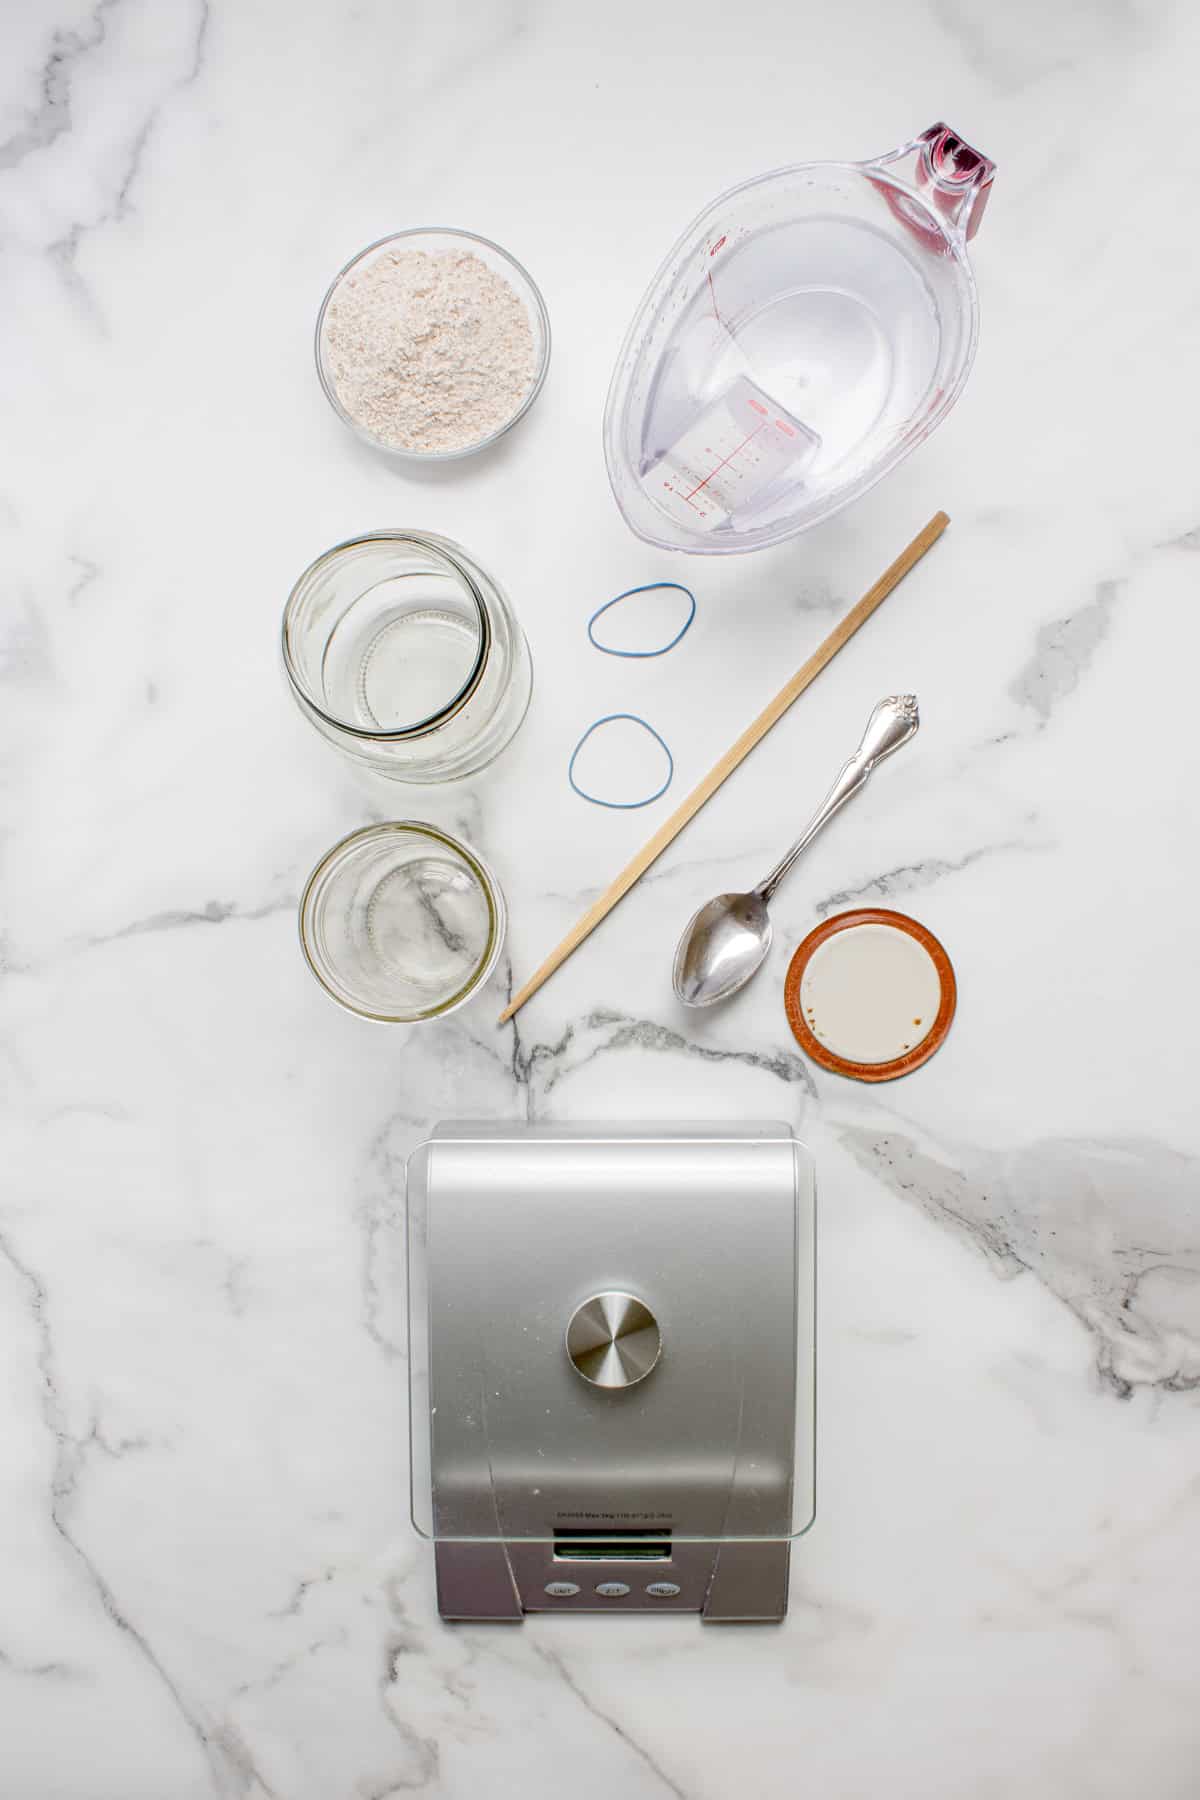
Two glass jars: 16oz wide-mouth jars are best for airflow and cleaning.
Silicone spatula or spoon: For scraping the sides.
Rubber band: Your "growth tracker".
Digital kitchen scale: For measuring in grams. This is the #1 secret to success!
How To make a Sourdough Starter Step-By-Step
Check out these step-by-step instructions with images. Just so you know, you'll find all the details and exact ingredients of this recipe on the printable recipe card below!
Day 1: Create Your Starter What to do: Place your jar on the scale and tare it. Add 30g of flour and 30g of lukewarm water. How it should look: Stir until it's a thick, peanut-butter-like paste. No dry flour should remain. Mark the level: Place your rubber band at the current height of the mixture. Cover the jar loosely with a lid (don't screw it on tight) or a coffee filter.


Let it sit: Leave it in a warm spot for about 24 hours.
Day 2: The "False Rise" & First Feeding What to do: You might see some bubbles or a sudden increase in height. This is usually "leuco-nostoc" bacteria, which is not the yeast we want. The Smell: It might smell like a sweaty and stinky armpit, or old gym socks. If it does, don't throw it away! This is the "bad" bacteria losing the battle to the "good" acidity.
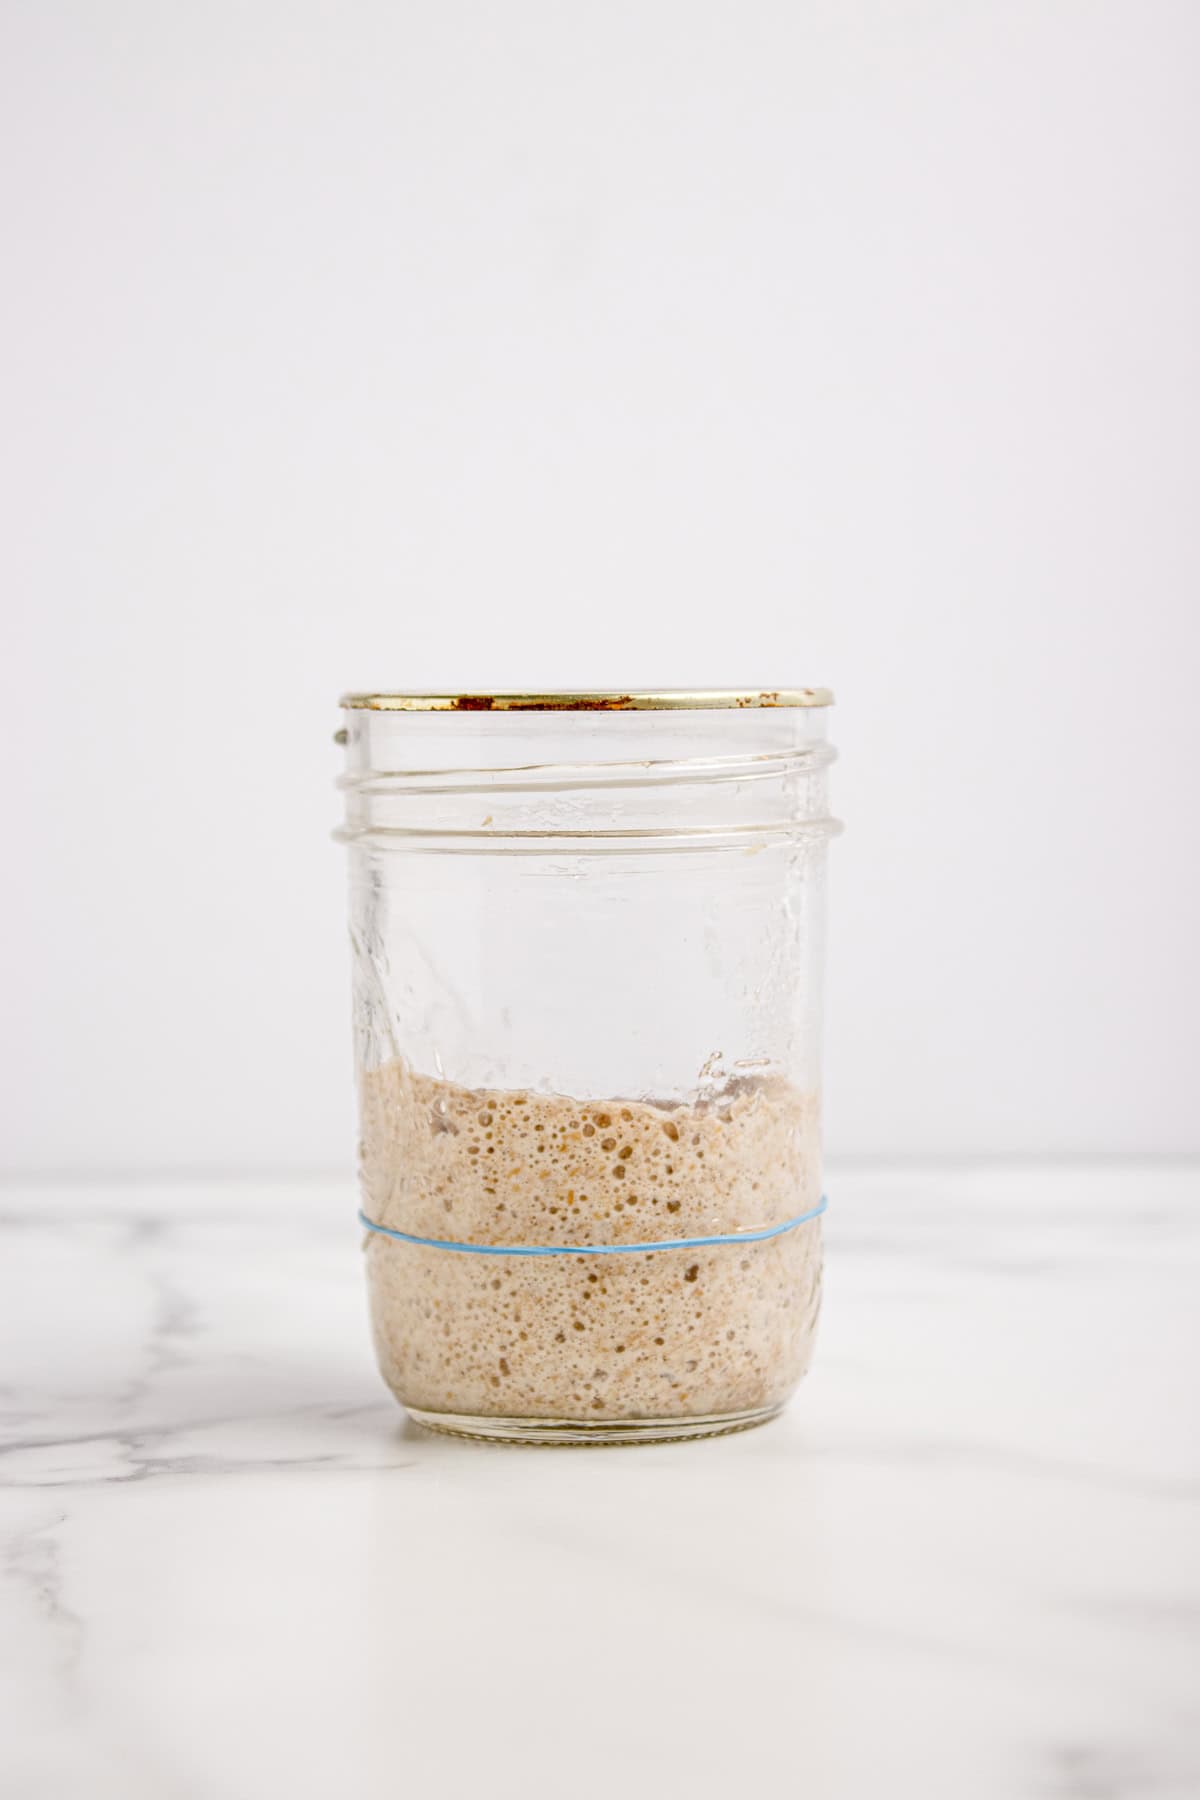

The Feeding: Discard all but 30g of starter. Add 30g flour and 30g water. Stir them all well and reset the rubber band.
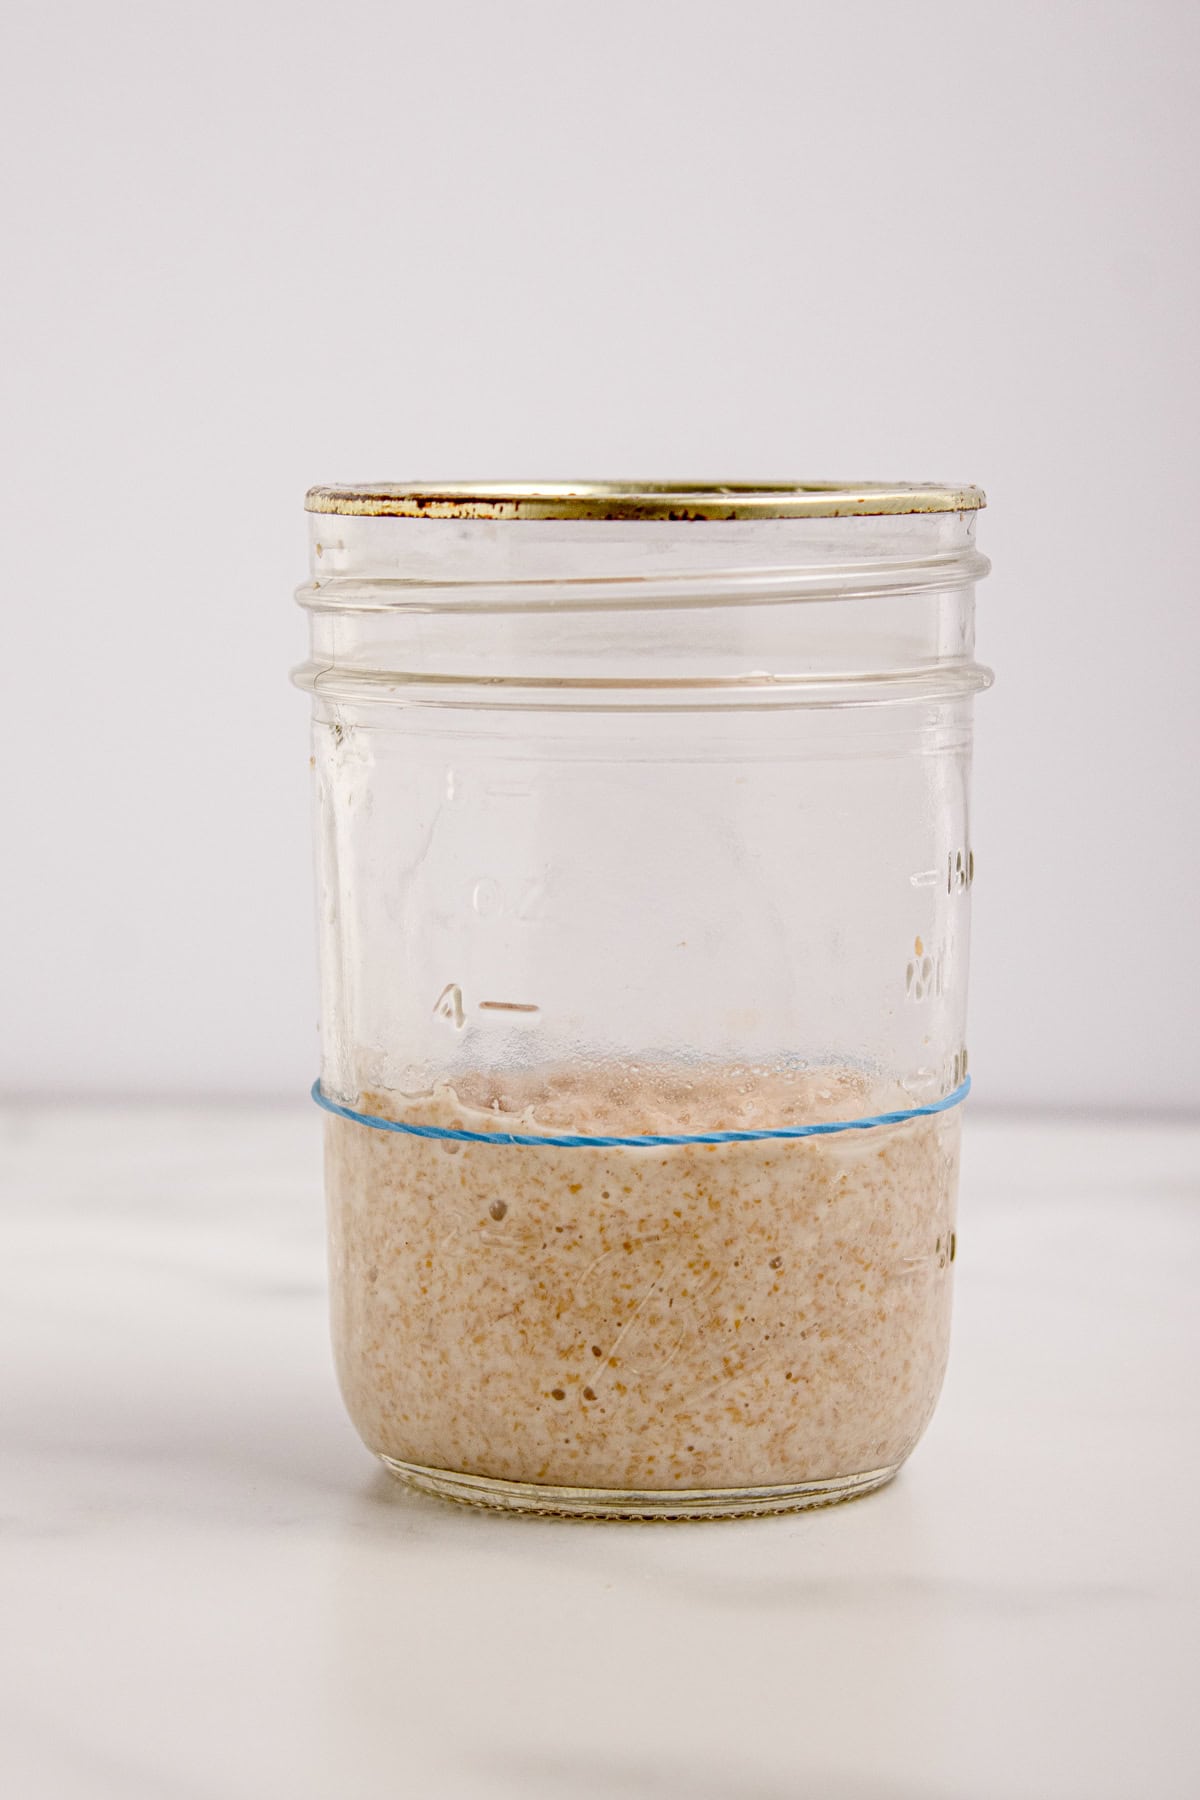
Day 3: Building Strength What to do: Discard it down to 30g again. Add 30g flour and 30g water. What's happening: The "farting" begins! Those tiny bubbles are the yeast releasing carbon dioxide. This gas is what will eventually lift your heavy bread dough.
Maintenance: Repeat this every 24 hours. If your kitchen is very warm, you may need to feed it every 12 hours.
Days 4-6: The Quiet Period What to expect: Your starter might seem to "stall" or stop rising. This is the most common time people quit.
Please don't quit. Keep feeding! The acidity in this stage is currently stabilizing. Look for small bubbles on the surface and a thinning texture.
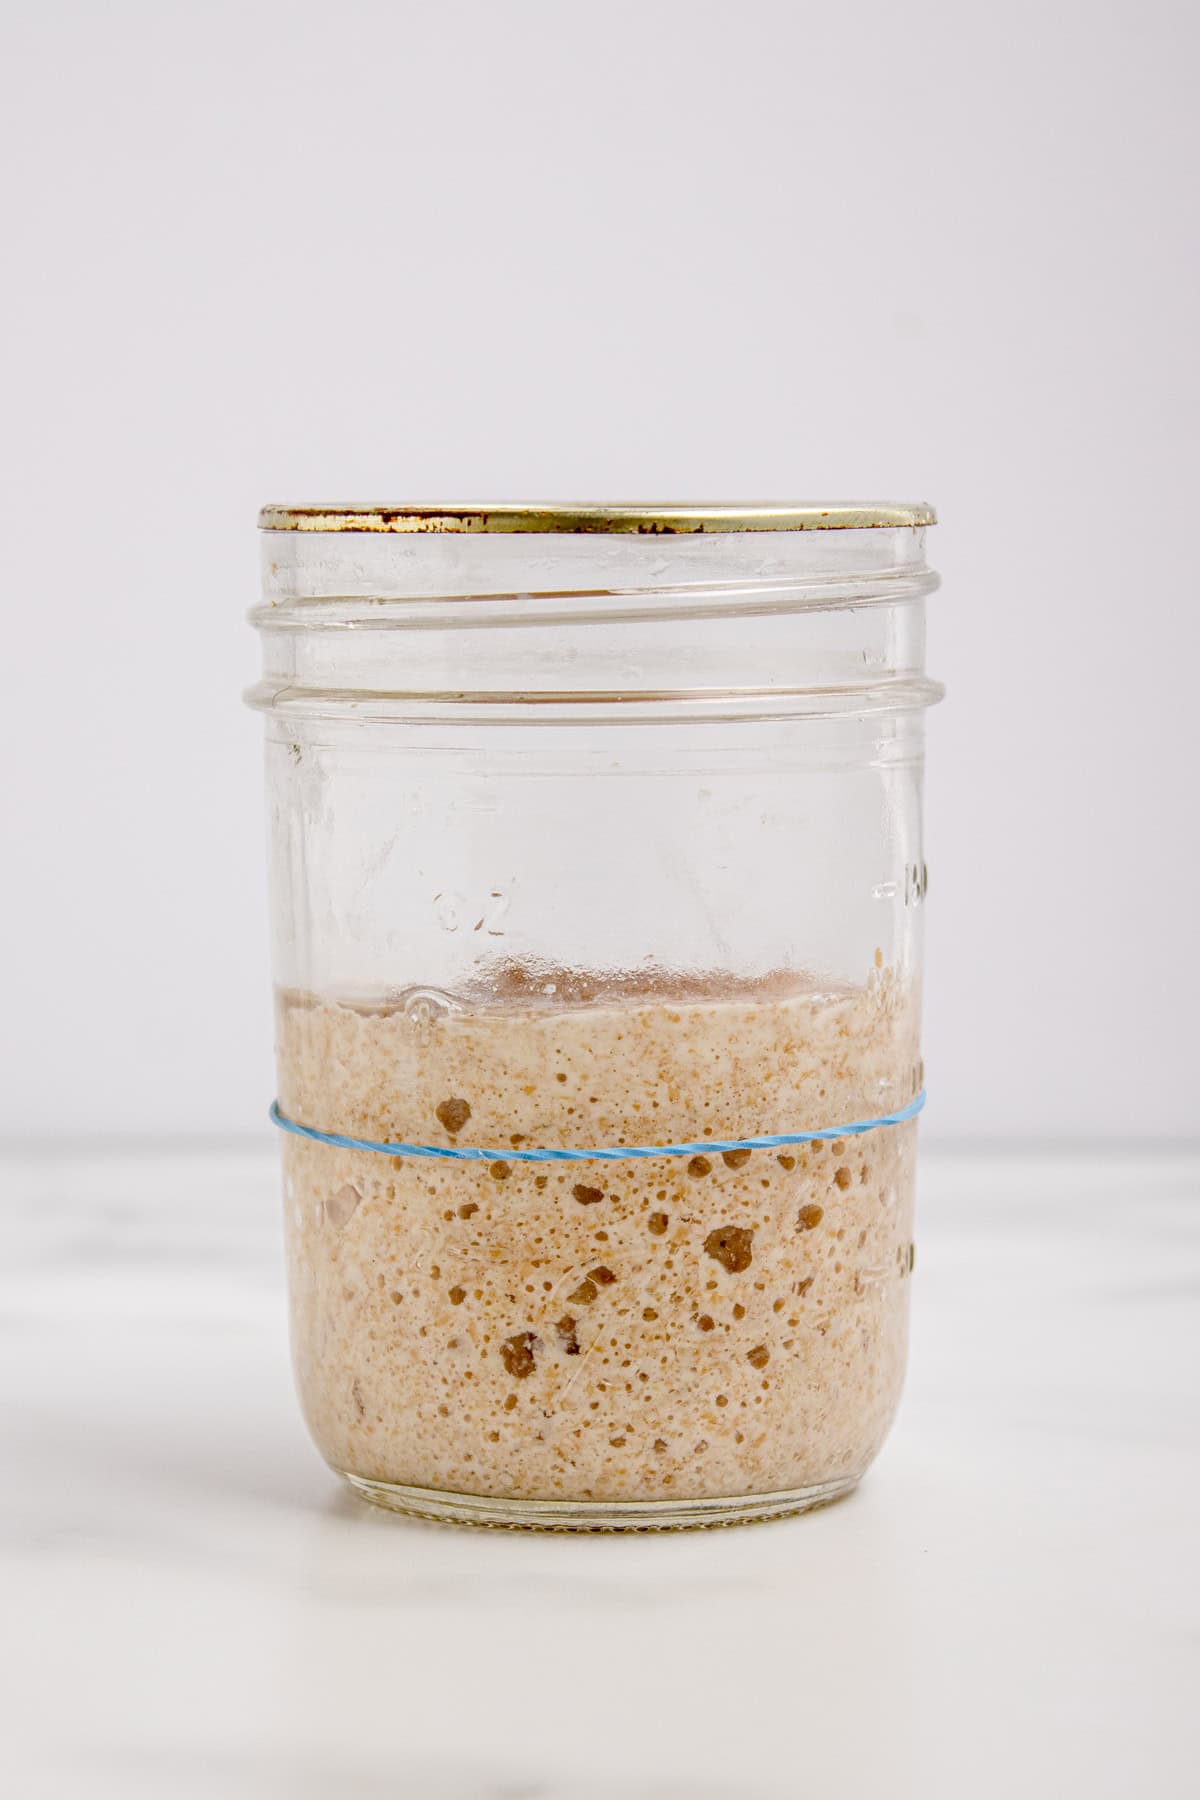
Days 7-10: The Strengthening Phase The Ratio Shift: Your starter is hungrier now. Switch to a 1:2:2 ratio to give it more food. What to do: Keep 20g starter, add 40g flour, and 40g water.
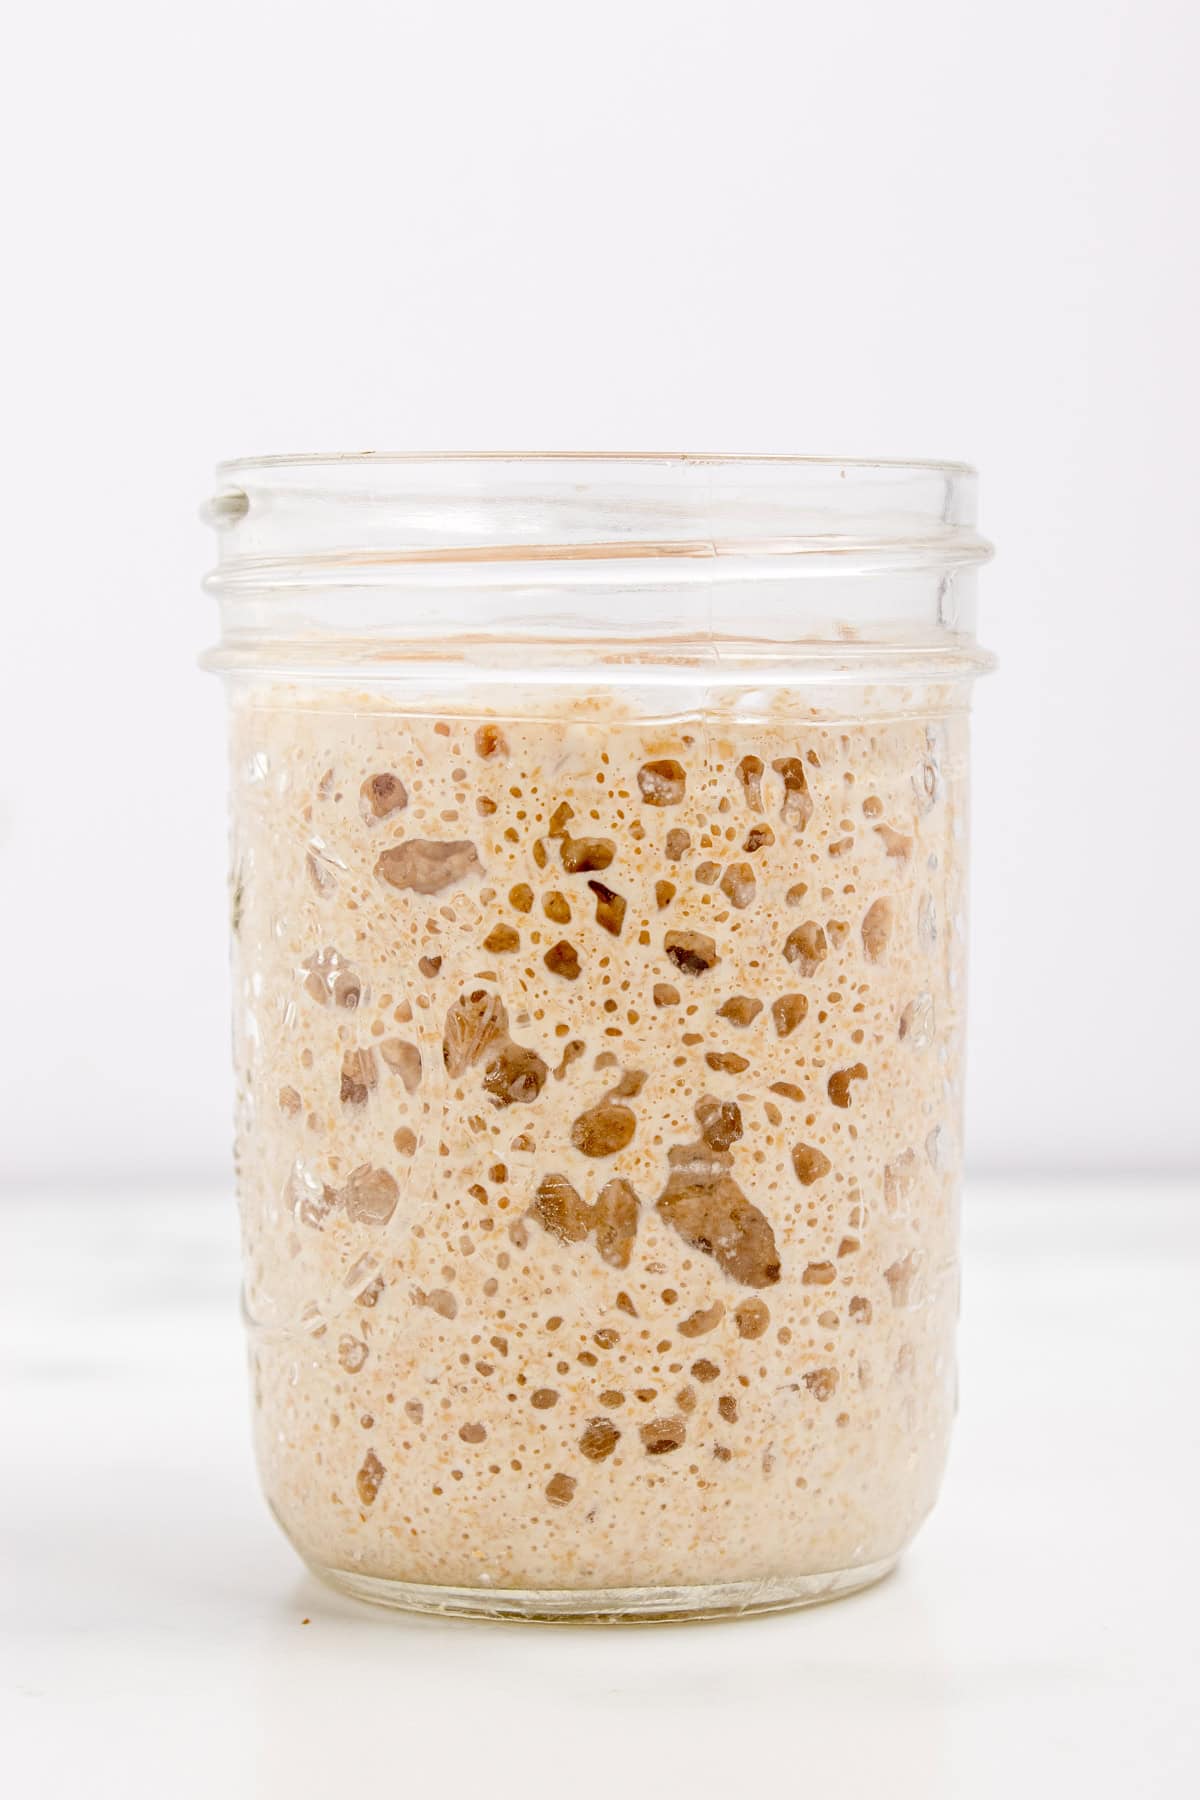
Visual signs: Look for "vertical tunneling" (bubbles trapped in the side of the jar) and a sweet/sour yeasty aroma, cider or beer.
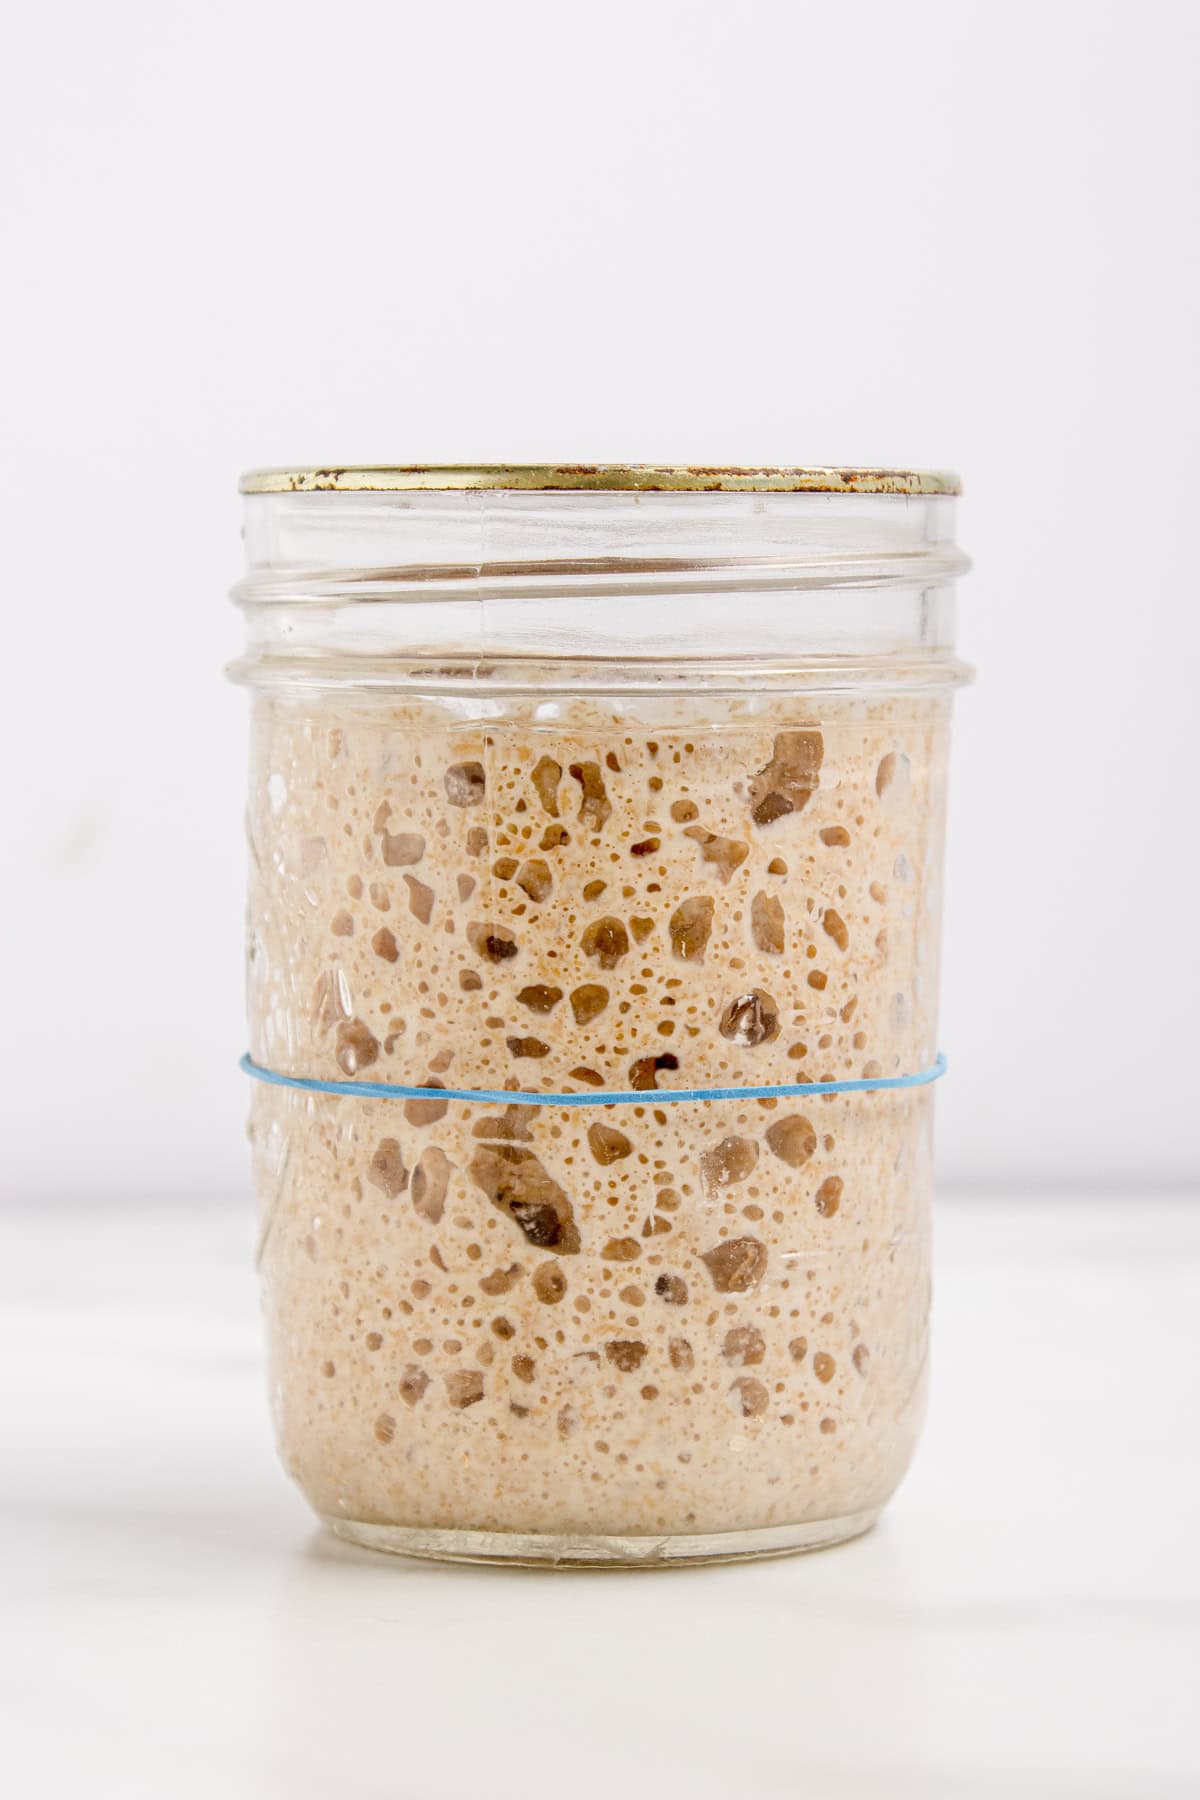
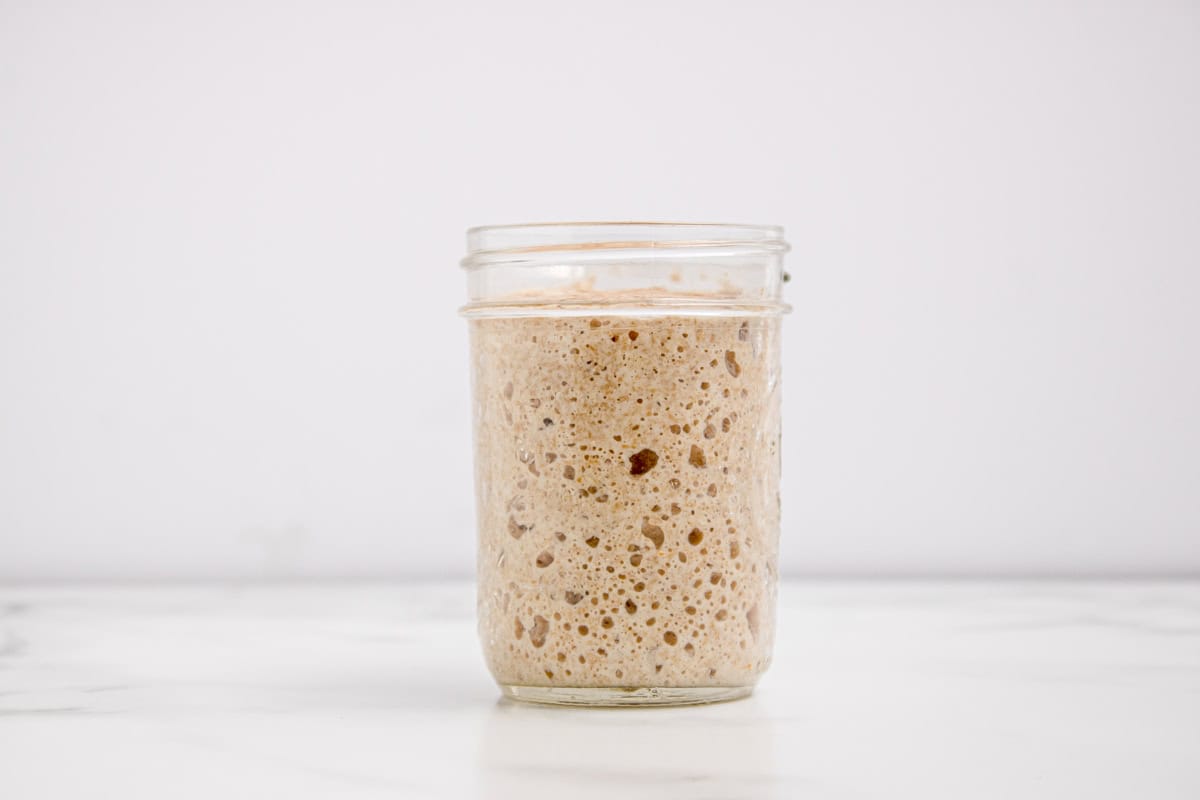
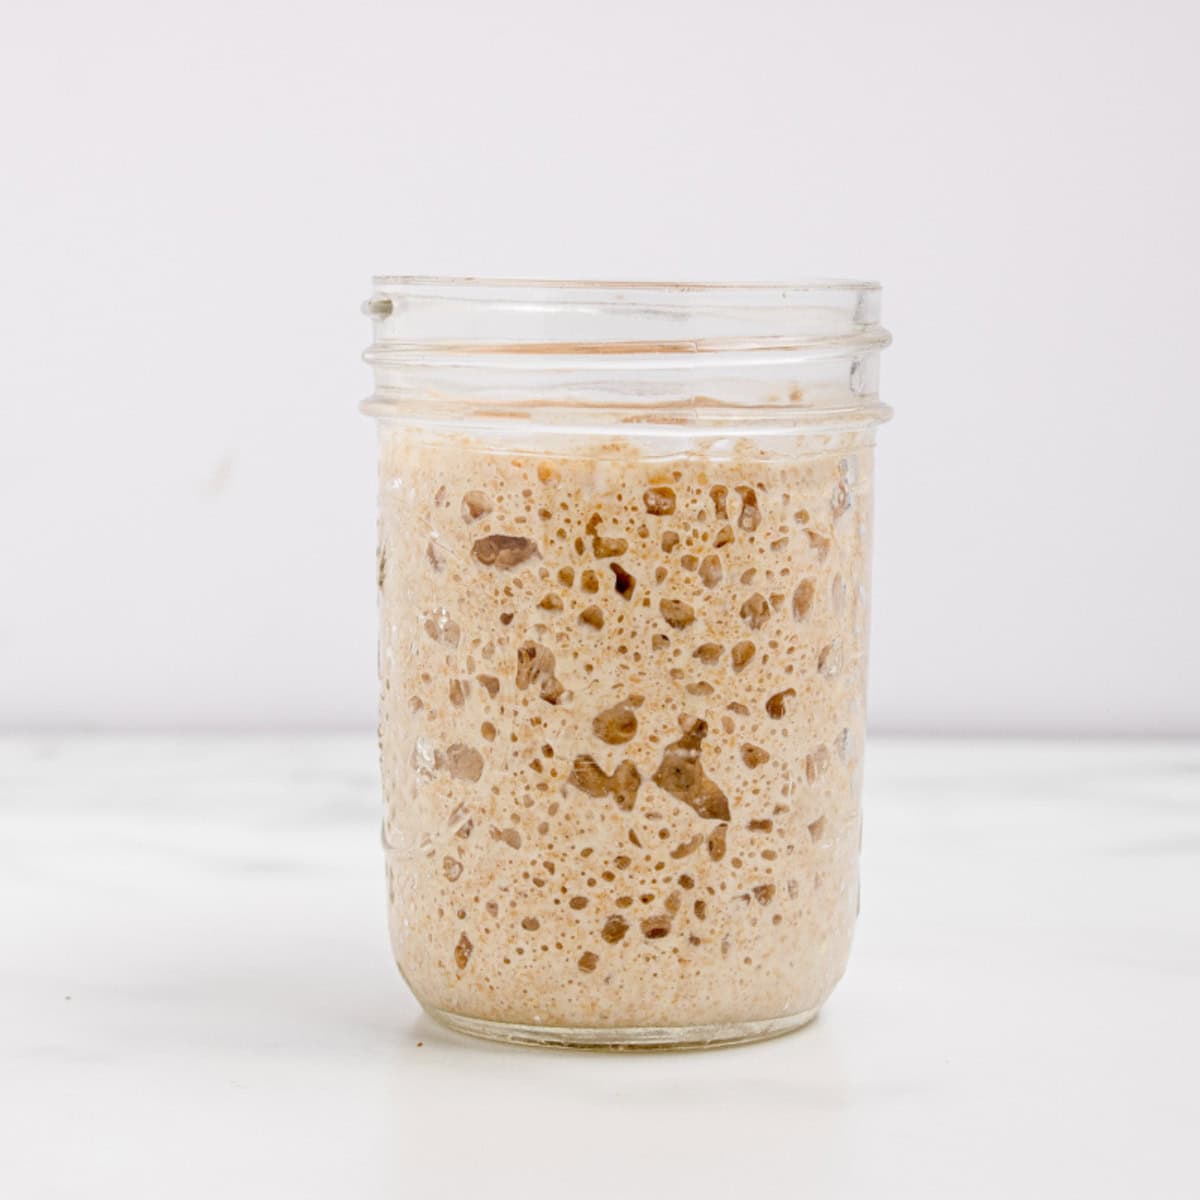
Days 11-14: Signs of a Mature Starter The Goal: Your starter should now double (or triple) in size within 4-6 hours of feeding. Consistency: If it rises predictably for three days in a row, it is officially "active" and ready to bake.
How to Know Your Starter Is Ready to Bake The Smell:
It should smell like tangy sourdough, not vinegar or gym socks. The Webbing: When you stir it, you should see a "web" of gluten strands and bubbles throughout the jar.
Tips and Tricks
Temperature Control: If your house is cold, keep the starter in the oven with only the light turned on (make sure you have a sign on the oven, ask me how I know), the microwave with the door slightly open so the light stays on, in a bread proofing box, on top of your fridge.
The "Hooch": If a dark liquid forms on top, it means that your starter is starving. Mix it in or pour it off, discard most of the starter, and feed it immediately.
Scrape the Sides: Use your spatula to keep the jar walls clean. Dried bits of flour on the glass can grow mold, which will ruin your starter.
Wash the utensils: Wash any utensils that have come in contact with the starter. If you leave the dried starter on the utensils for a long time, it will harden and become extremely difficult to scrape off or wash away.
Storage and Reheating
On the Counter: Feed it every 24 hours if you plan to bake bread 3 or more times a week.
In the Fridge: The night or day before you bake, take it out, feed it, and wait for it to peak before you use it.
Use a 1:1:1 ratio (e.g., 50g starter, 50g water, 50g flour) for a quick rise in 4-8 hours, or a 1:5:5 ratio (20g starter, 100g flour, 100g water) if you want a slower rise, which typically takes around 12 hours.
Your Questions Answered
Yes, but if your water is heavily treated, the chlorine can kill the yeast. If it is heavily chlorinated, let your water sit in an open pitcher overnight before using it. You could also use spring or filtered water.
This smell means that your starter is over-fermented and hungry. When this happens, simply feed it as usual. If you aren't planning to bake immediately, you can store it in the refrigerator after feeding to slow down its fermentation.
It's alive and well! Sourdough starters are really resilient. Discard the top layer, keep a small amount from the bottom, and feed it. It typically revitalizes within 48 hours. If you need to skip feedings in the future, I recommend storing your starter in the refrigerator.
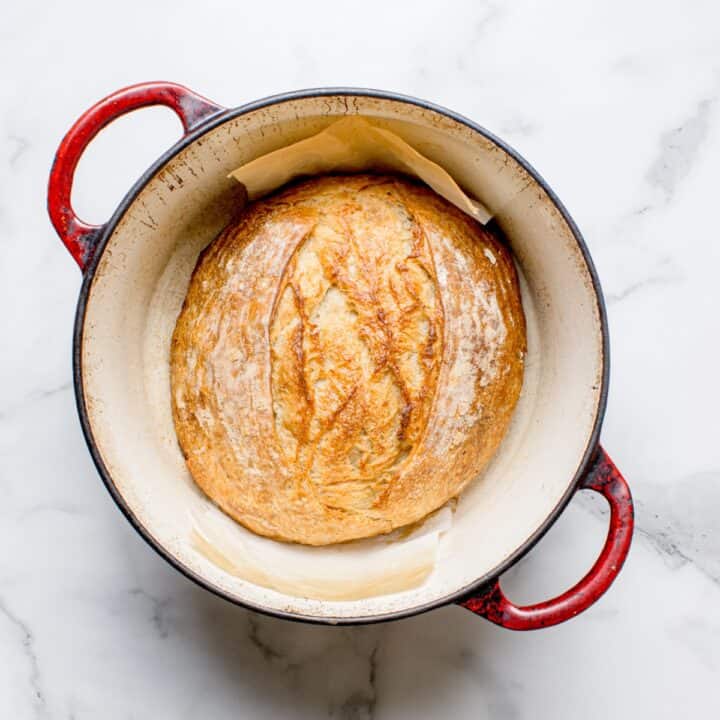
Making a sourdough starter isn't about chemistry, it's about consistency. Follow these steps, keep the starter warm, and by next week, you'll be pulling the most beautiful loaf of bread you've ever seen out of your oven.
If you are ready to bake, check out my Beginner's No-Knead Sourdough Recipe to put your new starter to work!
In a Dinner Rut?
Sign up for our newsletter!
Please Rate this Recipe!
We hope you love this Sourdough Starter for Beginners Guide! If you make it, be sure to leave a rating so we know how you liked it!
More Recipes You'll Love
Looking for other easy and delicious recipes? Try these:


Recipe
Sourdough Starter for Beginners: A Complete Step-by-Step Guide
Ingredients
Method
- Place your jar on the scale and tare it. Add 30g of flour and 30g of lukewarm water. Stir until it's a thick, peanut-butter-like paste. No dry flour should remain. Place your rubber band at the current height of the mixture. Cover the jar loosely with a lid (don't screw it on tight) or a coffee filter. Leave it in a warm spot for about 24 hours.
- You might see some bubbles or a sudden increase in height. This is usually "leuco-nostoc" bacteria, which is not the yeast we want. It might smell like a sweaty and stinky armpit, or old gym socks. If it does, don't throw it away! This is the "bad" bacteria losing the battle to the "good" acidity. Discard all but 30g of starter. Add 30g flour and 30g water. Stir them all well and reset the rubber band.
- Discard it down to 30g again. Add 30g flour and 30g water. The "farting" begins! Those tiny bubbles are the yeast releasing carbon dioxide. This gas is what will eventually lift your heavy bread dough. Repeat this every 24 hours. If your kitchen is very warm, you may need to feed it every 12 hours.
- Your starter might seem to "stall" or stop rising. This is the most common time people quit. Please don't quit. Keep feeding! The acidity in this stage is currently stabilizing. Look for small bubbles on the surface and a thinning texture.
- Your starter is hungrier now. Switch to a 1:2:2 ratio to give it more food. What to do: Keep 20g starter, add 40g flour, and 40g water. Look for "vertical tunneling" (bubbles trapped in the side of the jar) and a sweet/sour yeasty aroma, cider or beer.
- Your starter should now double (or triple) in size within 4-6 hours of feeding. If it rises predictably for three days in a row, it is officially "active" and ready to bake.


We'd Love to Hear From You