
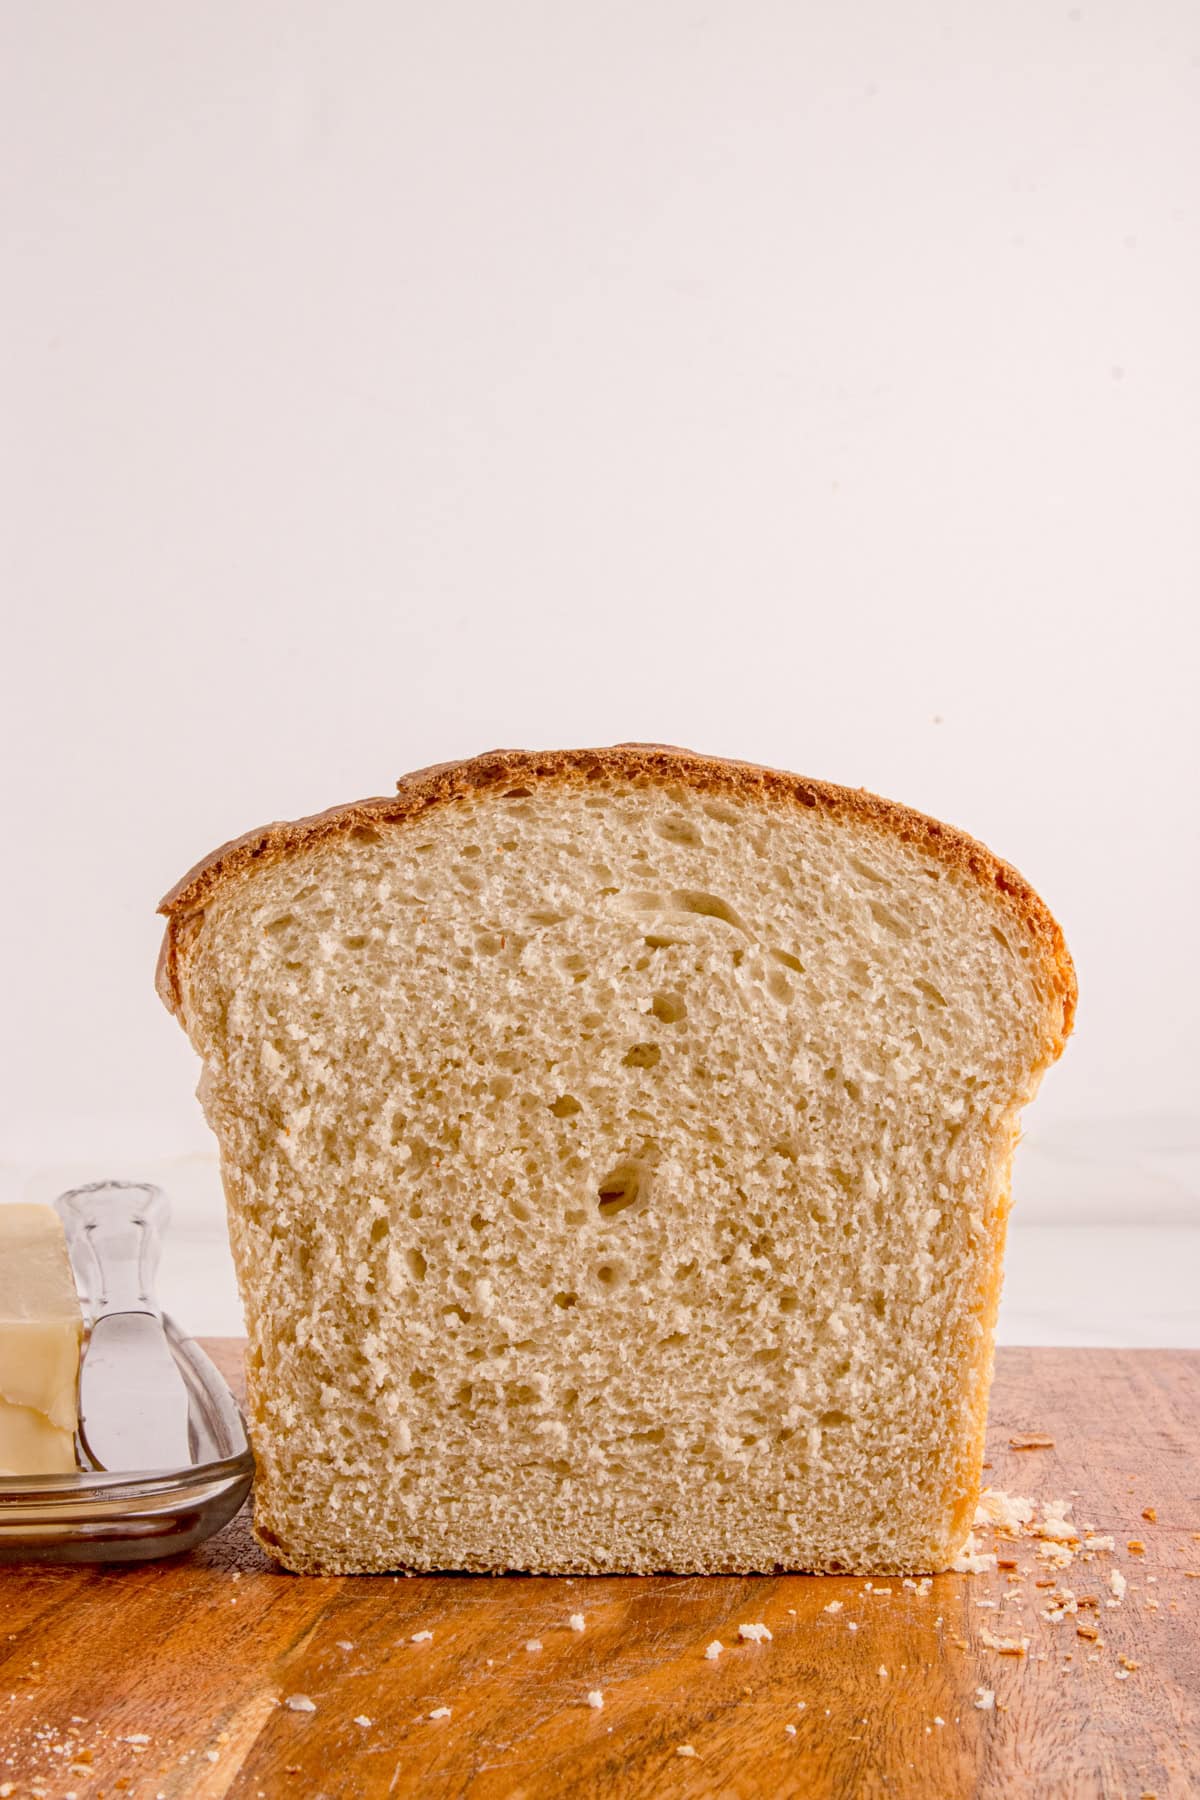
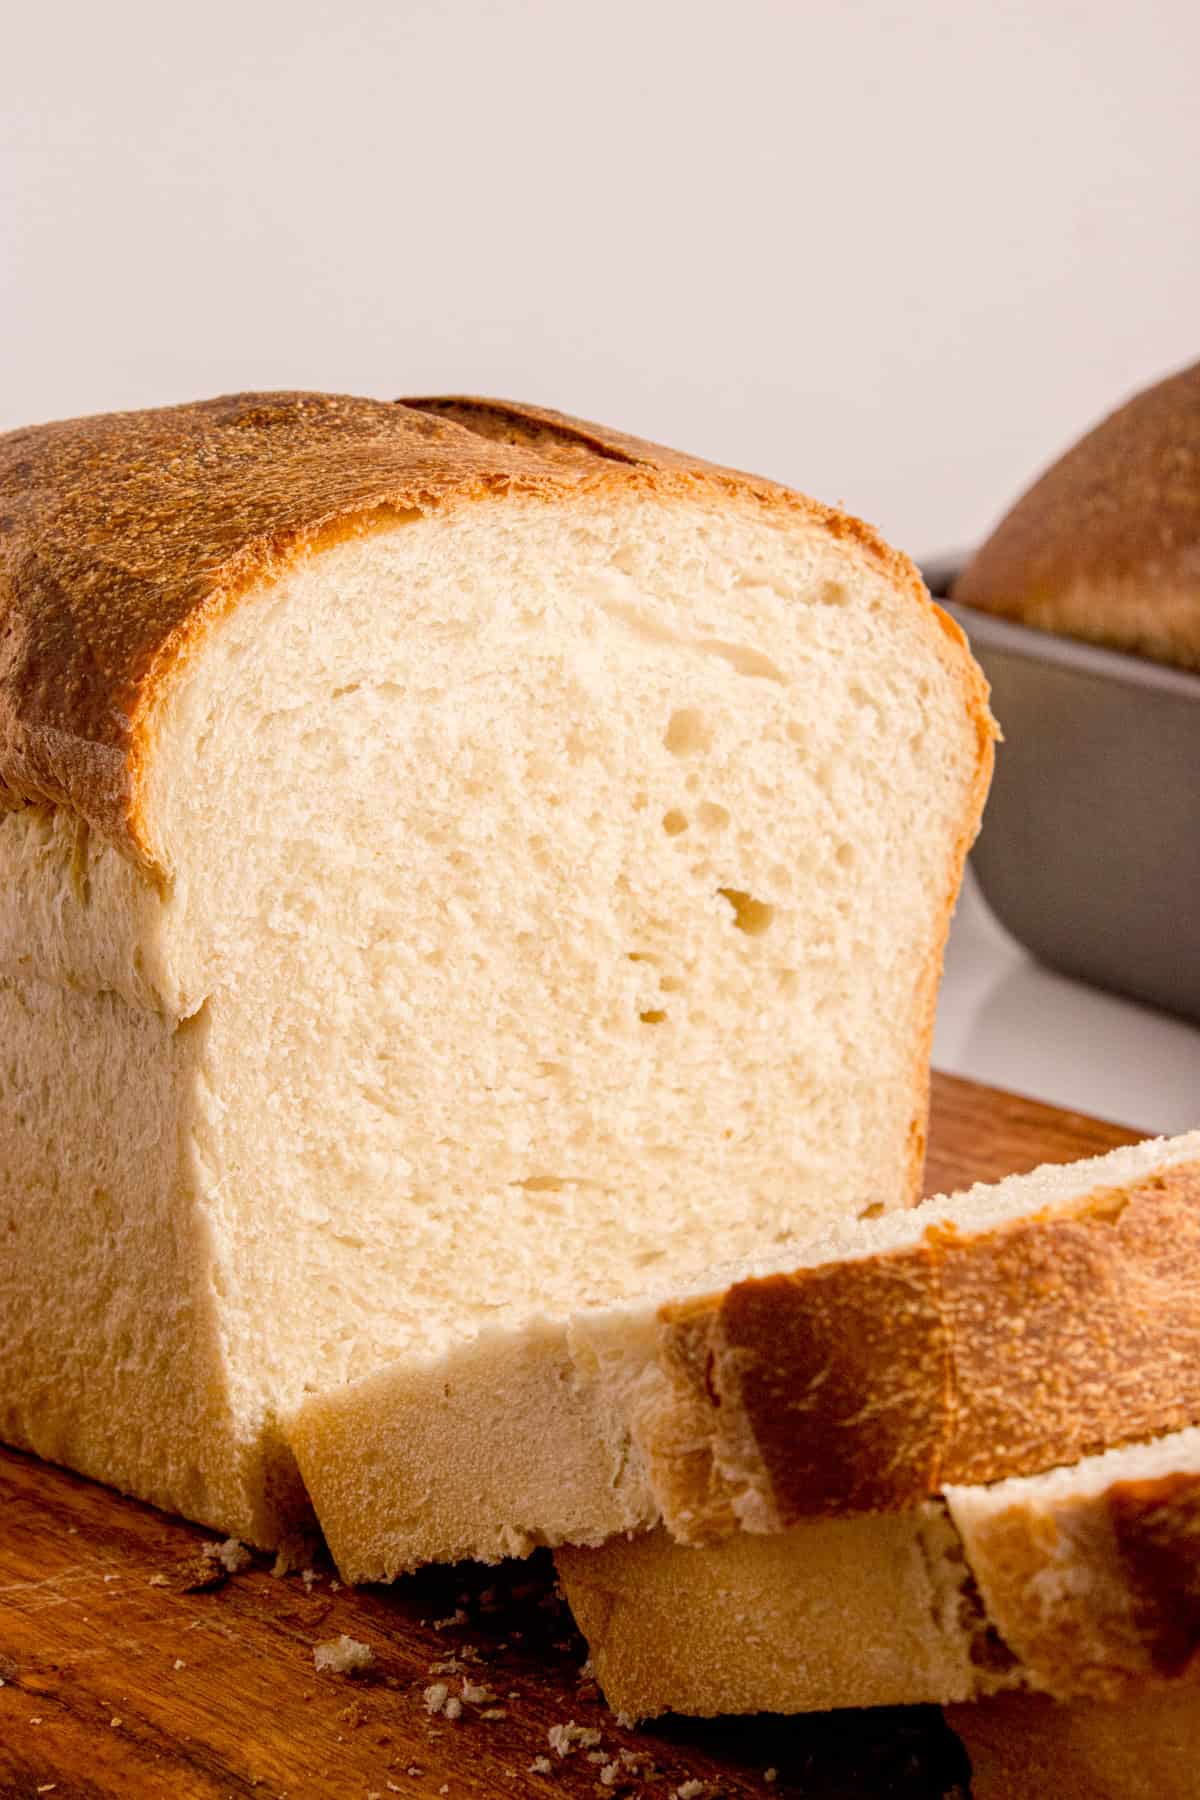
White bread with poolish is a staple in our home. One of our daughters has a sensitive stomach, and after experimenting with all kinds of breads for her, we discovered that this one worked for her. That’s why it’s always on heavy rotation around here.
Soft, simple, and comforting. It’s our favorite loaf, and we hope you and your family will love it too!
Looking for more easy Bread recipes? Try Sourdough Artisan Bread, Homemade Sandwich Bread or Irish Sourdough Soda Bread.
Jump to:
Why You'll Love This Recipe
Incredible flavor: The poolish develops overnight, building a complexity of flavor you can't get from commercial yeast alone.
Soft, fluffy texture: A long dough rest gives you a light crumb with a touch of chew, perfect for sandwiches, toast, or French toast.
You’ll need the following ingredients to make this White sandwich bread with poolish
Ingredient Notes
Poolish: This wet pre-ferment combines equal parts flour and water by weight, plus a little yeast. It ferments overnight in a large bowl, creating incredible depth, complex flavor, structure, and aroma. It's the only thing that truly sets this apart from a standard bread recipe.
Water: Hydrates the flour and develops gluten. You can replace part of the water with milk for a softer crumb or even use a splash of orange juice for a subtle sweetness. Always start with cold water if your kitchen runs warm because dough temperature affects fermentation.
Oil: Keeps the loaf tender and helps with shelf life. Use butter for richness or olive oil for a more savory note.
Flour: Use all-purpose or bread flour. Swap up to 20% with whole wheat flour or rye flour for a nuttier, denser loaf. Dust your proofing basket with rice flour to prevent sticking during the final rise.
Yeast: Instant or active dry yeast both work. If using active dry yeast, dissolve it in warm water before adding. To develop even more complexity, use half the yeast and extend fermentation time overnight.
How To make White Bread with Poolish Step-By-Step
Check out these step-by-step instructions with images. Just so you know, you'll find all the details and exact ingredients of this recipe on the printable recipe card below!
Step 1: In a large bowl, combine the yeast, water, and flour. Mix until no dry spots remain.
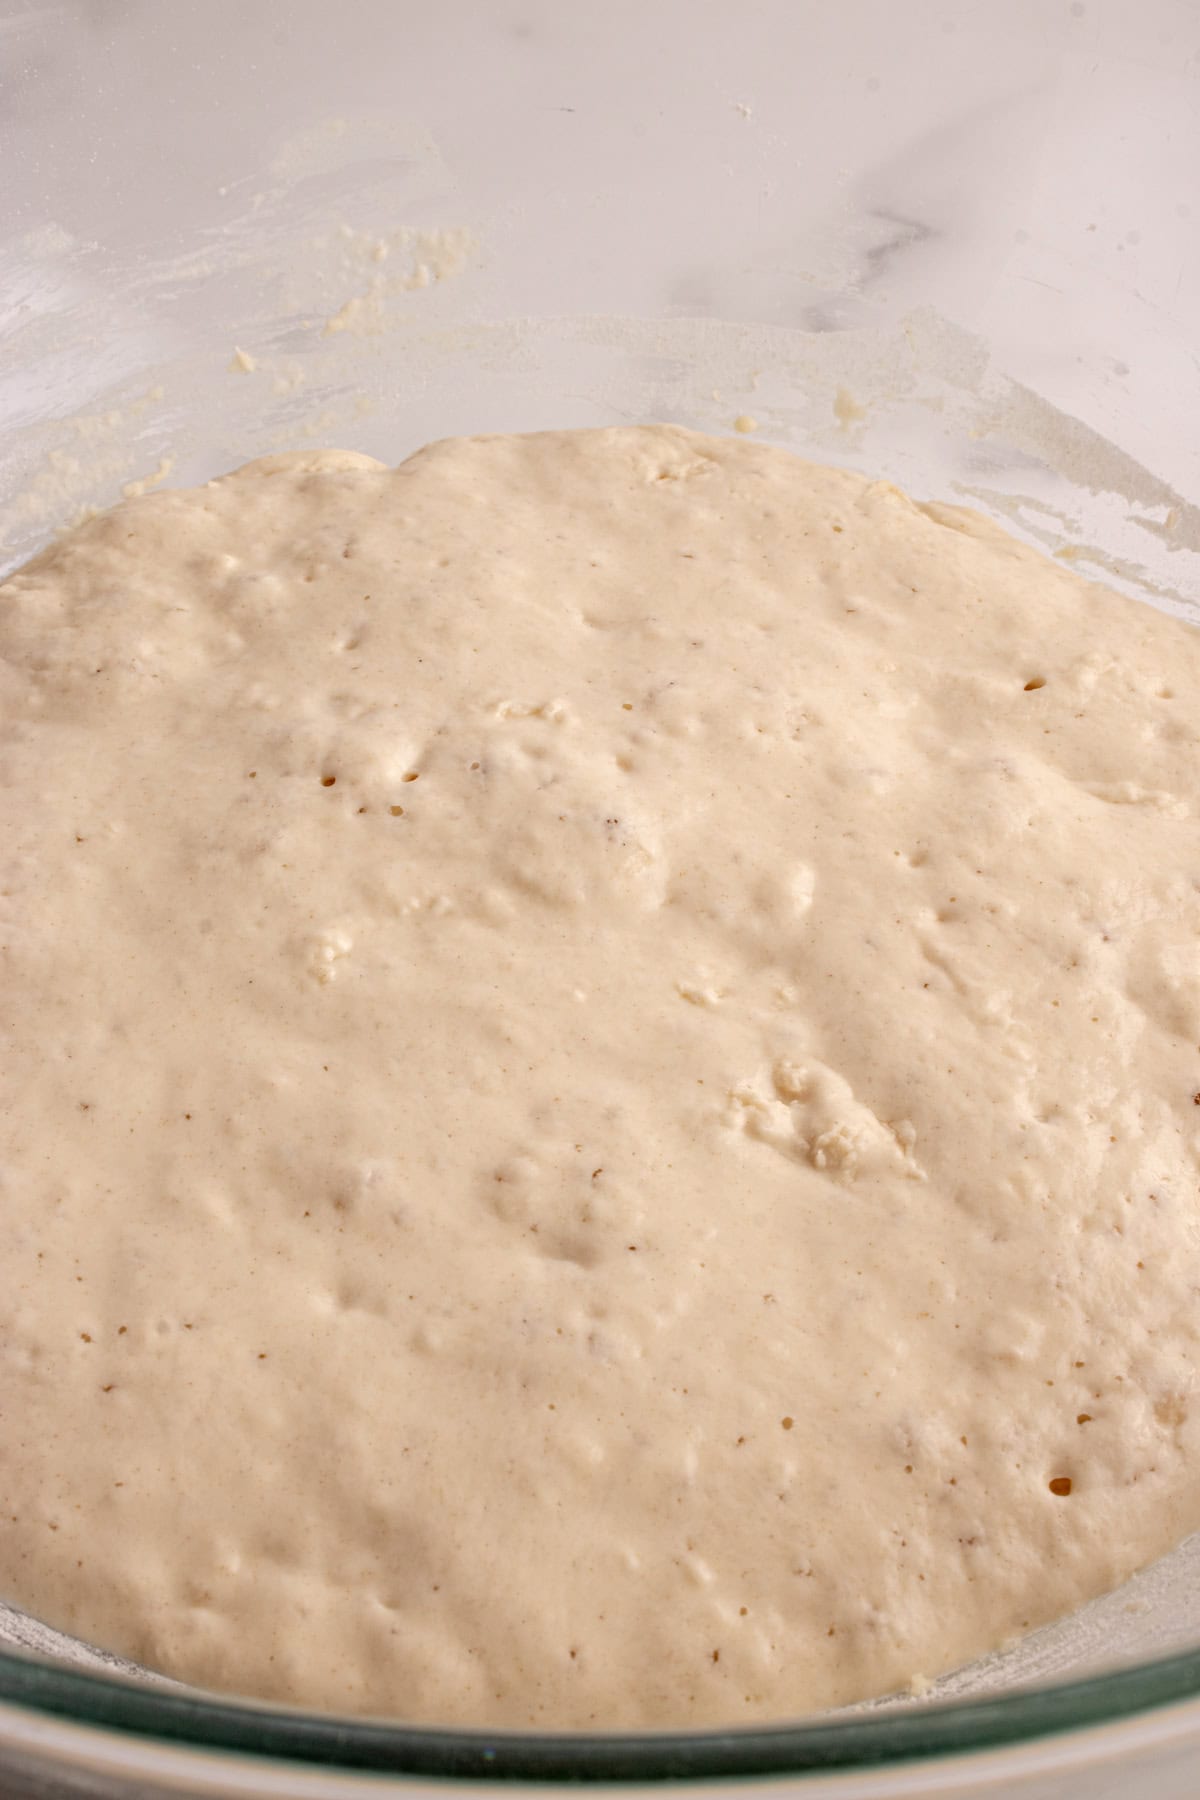
Cover the bowl and leave it in a warm place for 8–12 hours or overnight, until it becomes bubbly and has doubled in size.

Step 2:
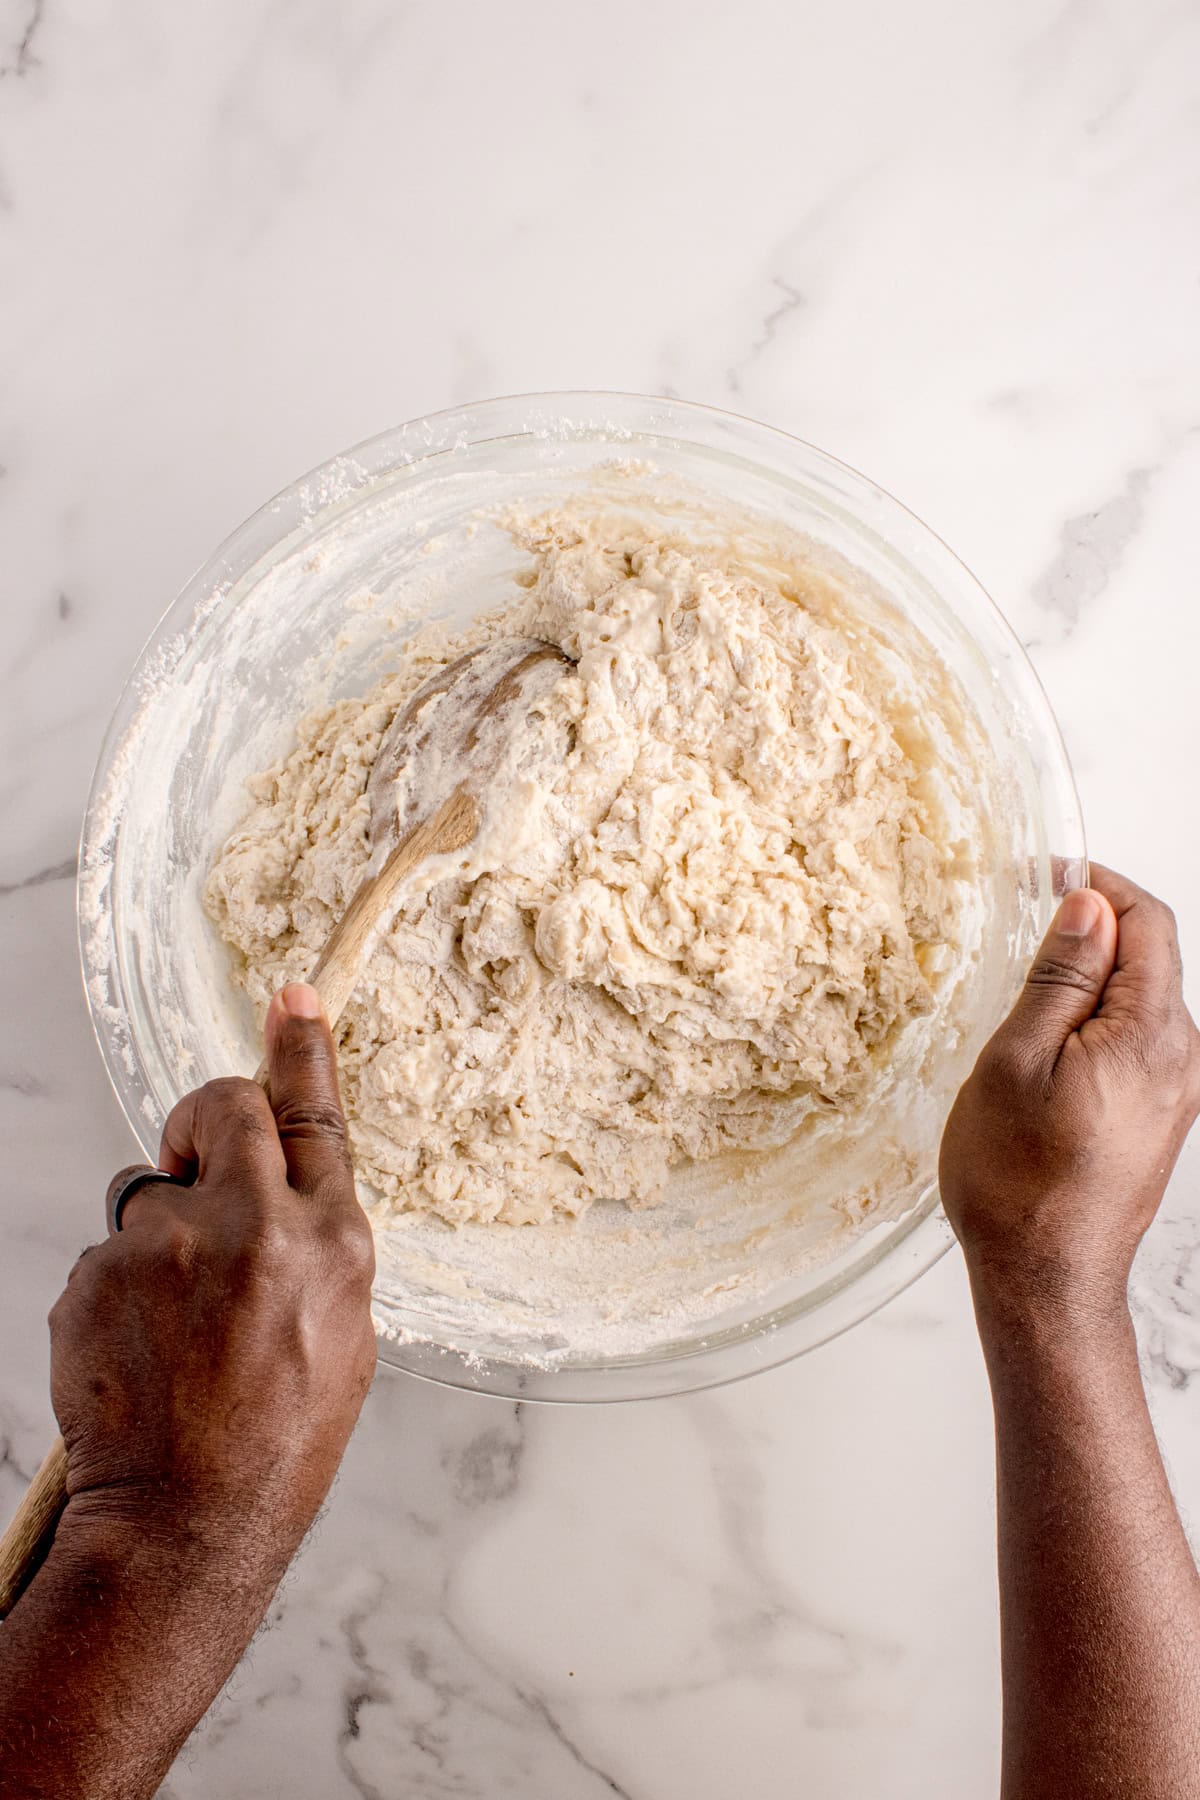
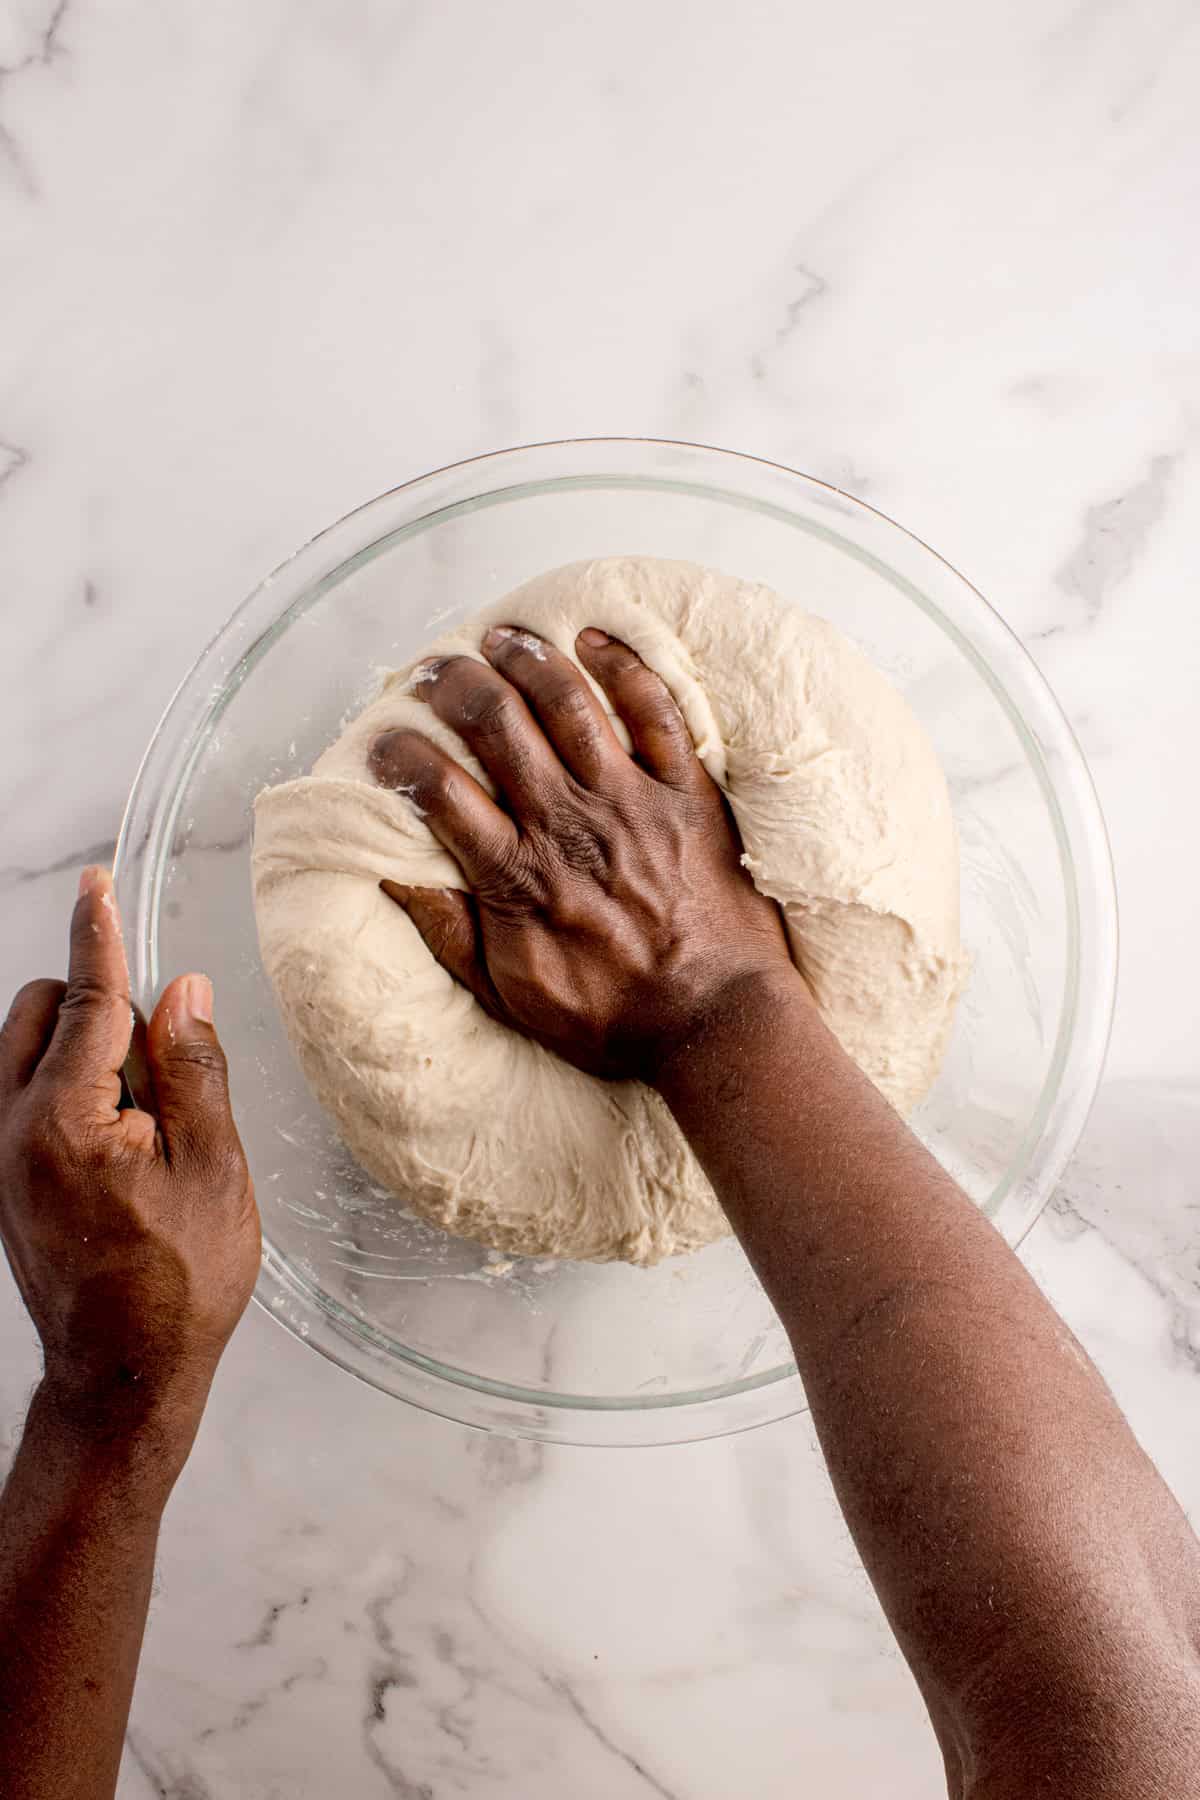
Hand-Kneading: Add all the ingredients to the risen starter. Combine them with a wooden spoon or your hands, then knead the dough for 8–10 minutes until it’s smooth and elastic.
Stand Mixer Instructions: Place all ingredients in the mixer bowl. Knead on low speed for 2–3 minutes, then on medium speed for 5–7 minutes, until the dough is smooth.
First Rise Cover the bowl with a lid or plastic wrap and let it rise in a warm place until it doubles in size (about 1–2 hours).
Step 3: Shaping
Turn the dough out onto a lightly floured work surface and divide it in half (use a scale or, if you are feeling lucky, you can also eyeball it). Flatten each portion into a rectangle by hand (or with a rolling pin). Roll it up like a burrito, and place each roll seam-side down into a greased loaf pan.
Step 4: Second Rise
Cover and let the dough rise in a warm place until it is slightly puffy. When you press the dough lightly with your finger, it should slowly spring back.


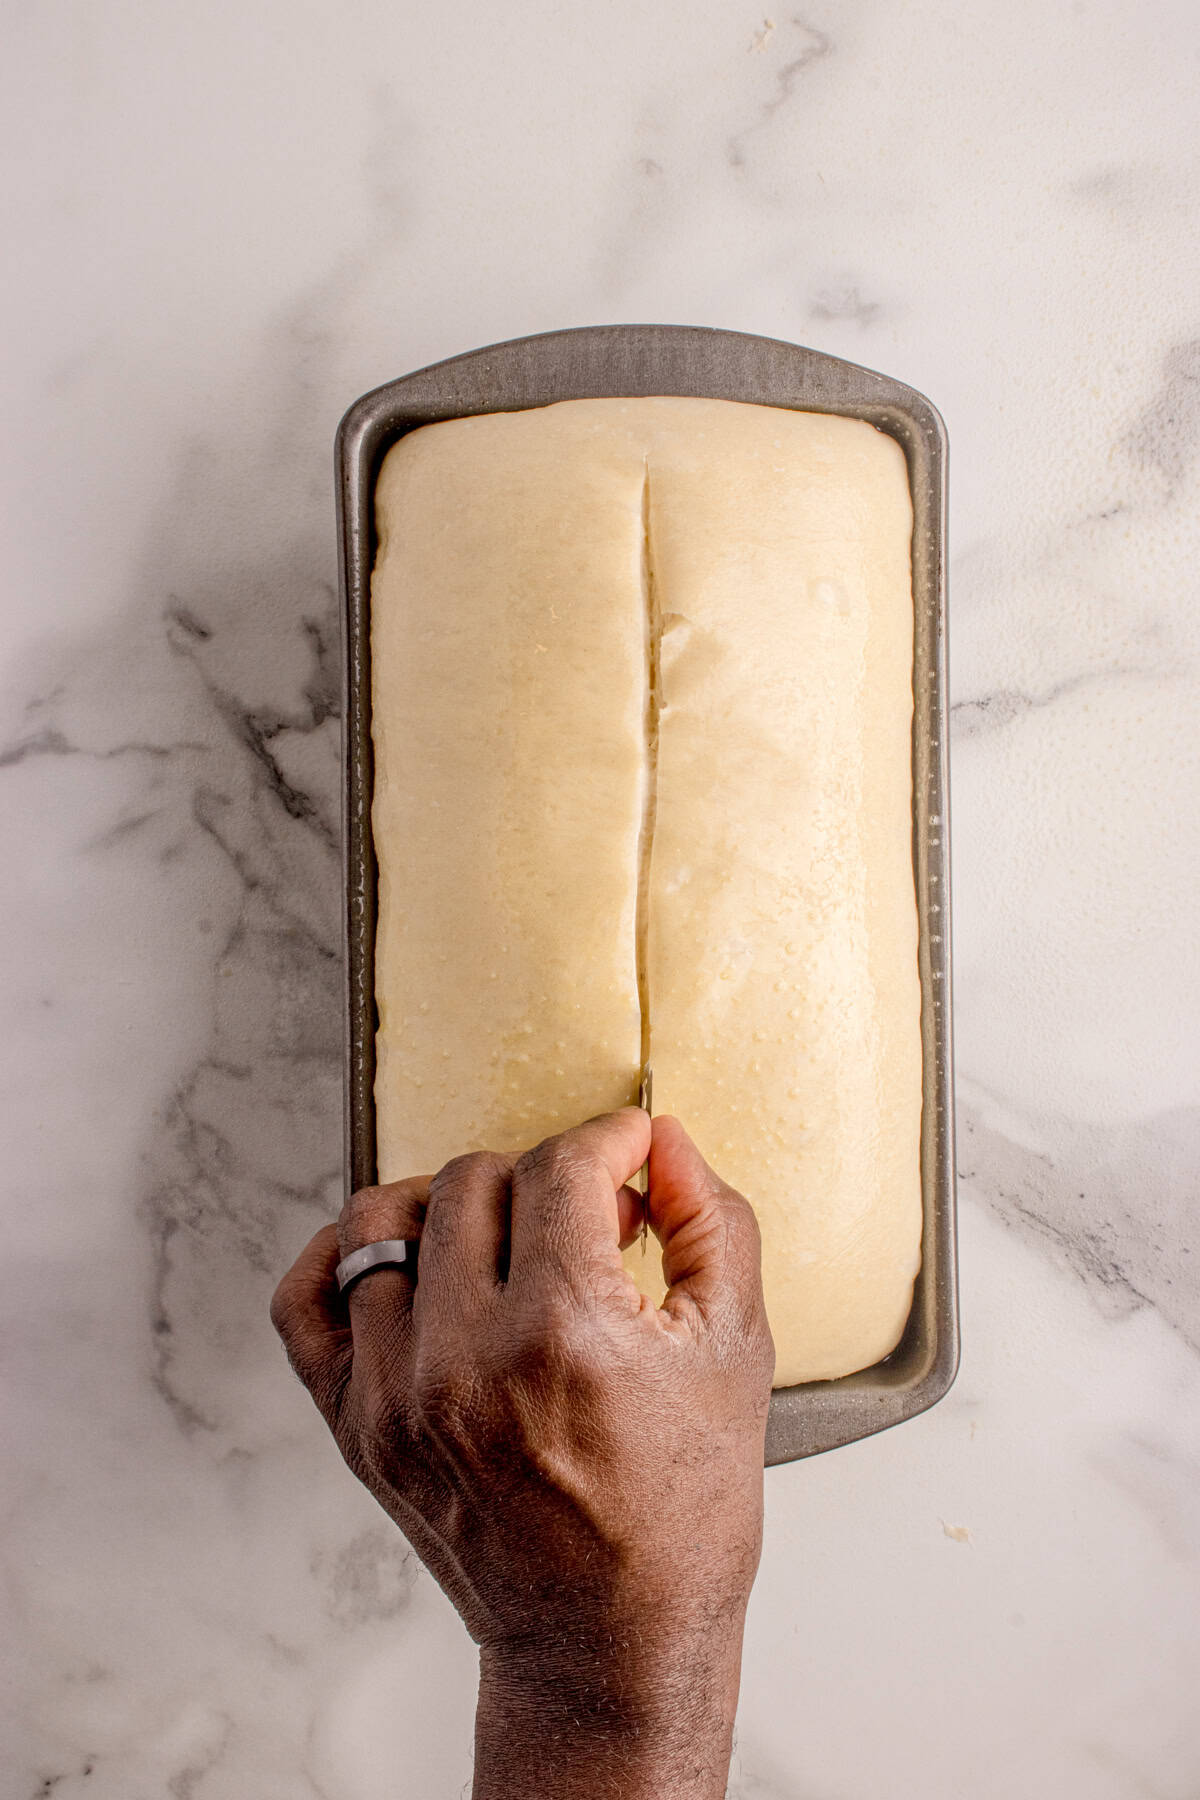
Step 5: Baking
Preheat your oven to 350°F (180°C). Score the top of the loaf with a sharp knife or blade and bake the homemade bread for 30–40 minutes, until it turns golden brown. After it bakes, leave it in the pan for about ten minutes, then transfer it to a wire rack to cool completely.
Recipe Tips and Tricks
Cover the bread dough with a damp towel or plastic wrap during all rises to prevent a dry crust from forming on the surface of the dough.
A lightly greased bowl helps prevent sticking and makes it easier to lift your dough out after bulk fermentation.
Use a kitchen scale. Measure grams of the all purpose flour and grams of water for consistent results every single time.
Bread baking is sensitive to ambient temperature. If your kitchen is chilly, let the dough rest somewhere warm (around 75–78°F).
Line your loaf pans with parchment paper for easy release and quick cleanup.
Storage and Reheating
At room temperature: Store the cooled loaf in a sealed bag or bread box for up to 4 days.
Freezer: Slice, wrap in foil, and freeze for up to 3 months. Reheat from frozen at 350°F for 5–10 minutes. Avoid the fridge because it dries bread out faster.
Your Questions Answered
Your poolish may have been inactive or your yeast too old. Always check for bubbles before mixing the final dough.
It likely needed more kneading or longer fermentation. Patience is key when it comes to baking and every bread benefits from a proper dough rest.
Yes, but you'll miss some of the flavor you get from the poolish. I recommend that you follow the manufacturer instructions and use the "French" or "Basic White" setting.
Absolutely. Substitute part of the poolish with your sourdough starter for added tang and complexity.
My personal preference is using a loaf pan. Another common method is baking the dough in a Dutch oven. A pizza stone is another great option. It usually gives you a crisp, golden crust.
In a Dinner Rut?
Sign up for our newsletter!
Please Rate this Recipe!
We hope you love this White Bread with Poolish recipe! If you make it, be sure to leave a rating so we know how you liked it!
More Recipes You'll Love
Looking for other easy and delicious recipes? Try these:


Recipe
White Bread with Poolish
Ingredients
Method
- In a large bowl, combine yeast, water, and flour.
- Mix them all until no dry spots remain.
- Cover and leave the mixture in a warm place until it becomes bubbly and risen.
- Add all the ingredients to the risen starter.
- Knead the dough for 8–10 minutes, until it becomes smooth and elastic.
- Add all ingredients to the mixer bowl.
- Knead them all on low speed for 2–3 minutes, then on medium speed for 5–7 minutes, until the dough is smooth.
- Cover the bowl with plastic wrap or a lid and let it rise in a warm place until it has doubled in size (about 1–2 hours).
- Turn the dough out onto a lightly floured surface, divide it in half (no need to be exact), flatten each piece into a square.
- Shape each half into a rectangle, roll it up tightly like a burrito, and place it seam-side down into a greased loaf pan.
- Cover and let the dough rise in a warm place until it’s slightly puffy. If you gently press a finger into the dough and it slowly springs back, it’s ready.
- Preheat your oven to 350°F (180°C), score the top of each loaf with a sharp knife or blade and bake bake the loaves for 40-60 minutes, or until they are golden brown.


Charlotte says
I'm so excited to try this homemade bread recipe using poolish!!! I know my family is going to love this! Thanks for the detailed tutorial and options for both hand kneading and the mixer!