
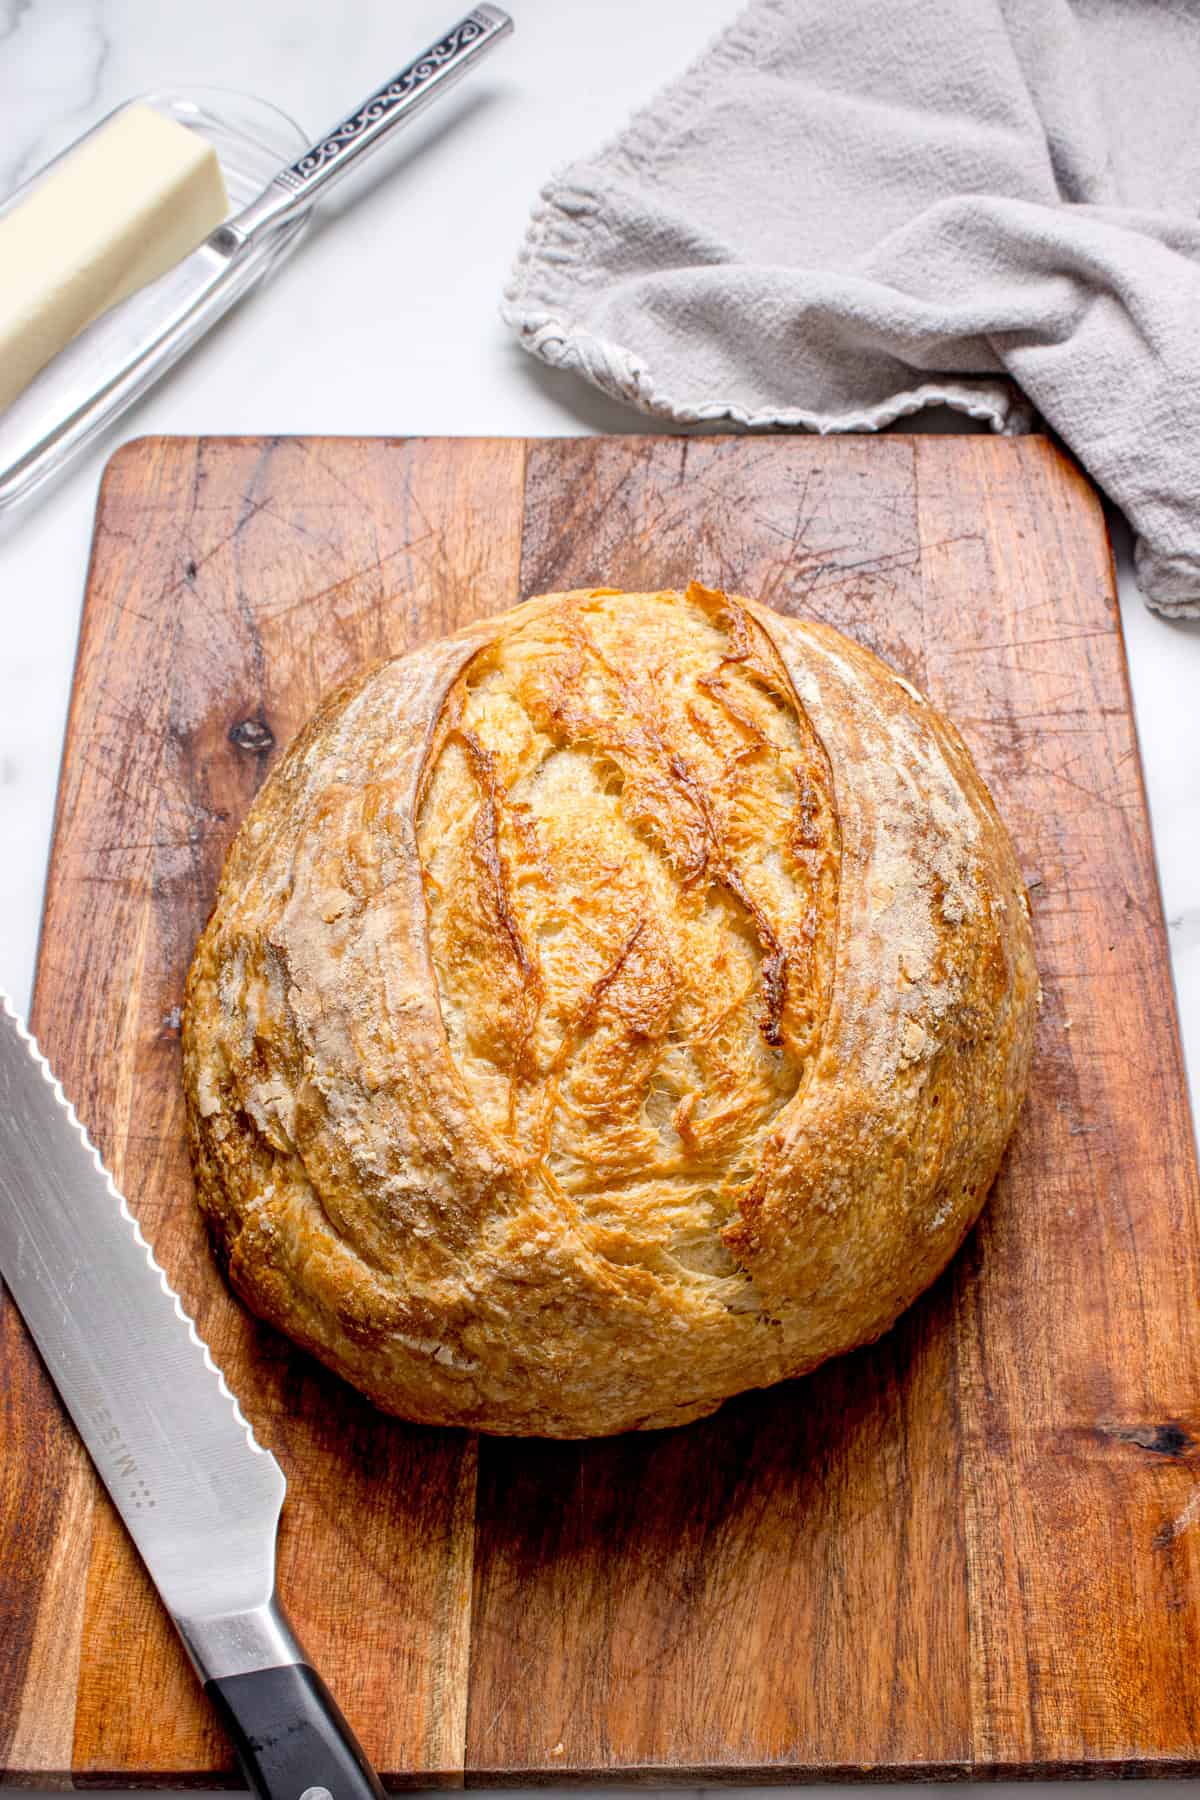
This viral Sourdough Croissant Loaf recipe, popularized by Amy Coyne of Amy Bakes Bread, is pretty delicious. The name is a bit deceptive though, while it is very tasty, the inside doesn’t have that airy, web-like structure you’d expect from traditional croissants. That said, it’s still totally worth making.
Basically, this is a sourdough loaf that uses cold butter as an inclusion, much like other sourdough breads use cheese, herbs, nuts, or chocolate chips.
It’s not the kind of bread you’d bake every day, but it’s definitely a fun loaf to make and a real treat when you do. There’s something so satisfying about pulling a buttery loaf like this out of the oven.
One thing I'll mention: don’t be disappointed if your loaf doesn’t rise super high. Mine didn’t have a dramatic rise either, and I’m not sure if that has something to do with the butter or if the sourdough gods just weren’t smiling on me that day. Either way, it turned out delicious, so don’t let that worry you. I really hope you enjoy making it as much as I did!
Looking for more easy sourdough recipes? Try Sourdough Artisan Bread, Sourdough Discard Biscuits, and Sourdough Discard Crackers.
Jump To Recipe
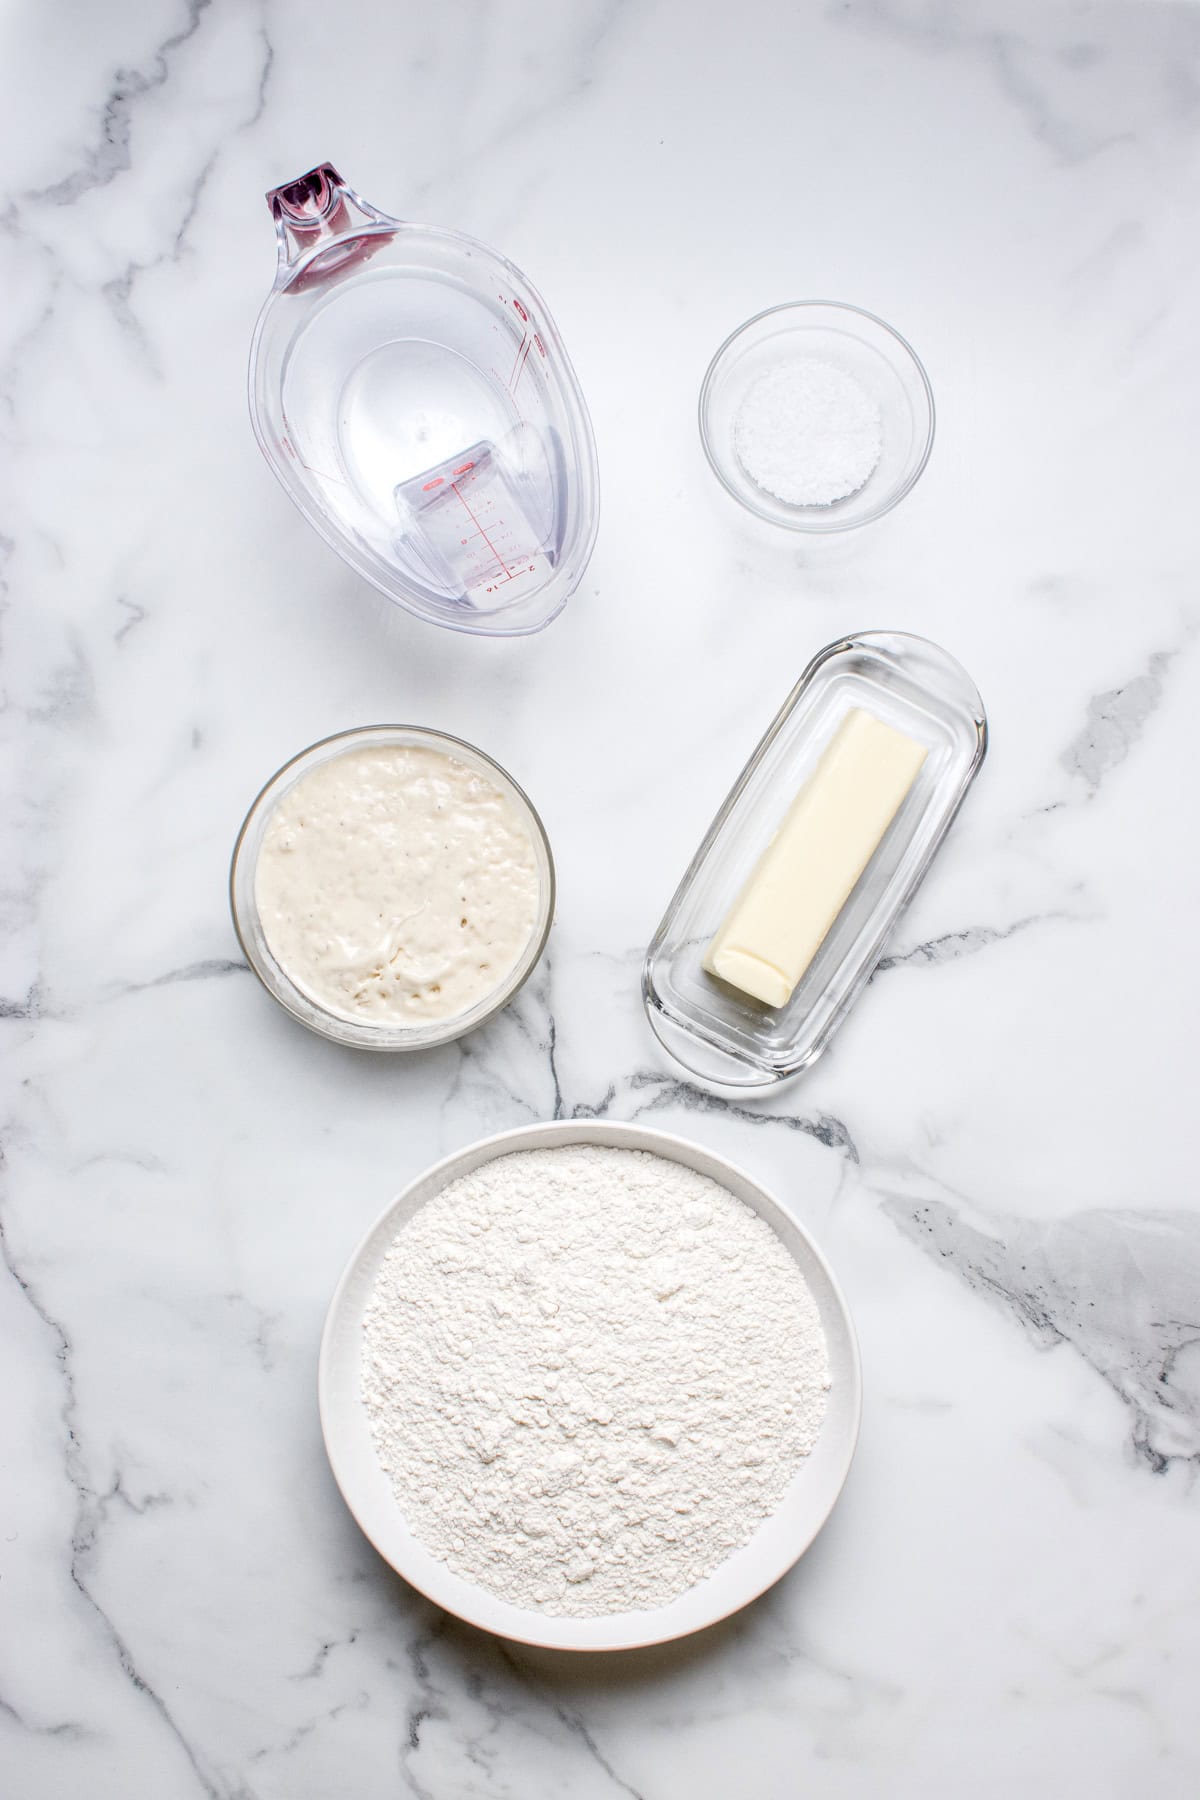
Recipe Ingredients
You’ll need the following ingredients to make this Sourdough Croissant Bread.
Ingredient Notes
Ingredients and Substitutions
Water: Water hydrates the flour and activates gluten development. In this recipe, it creates a soft dough that allows the butter to fold in smoothly.
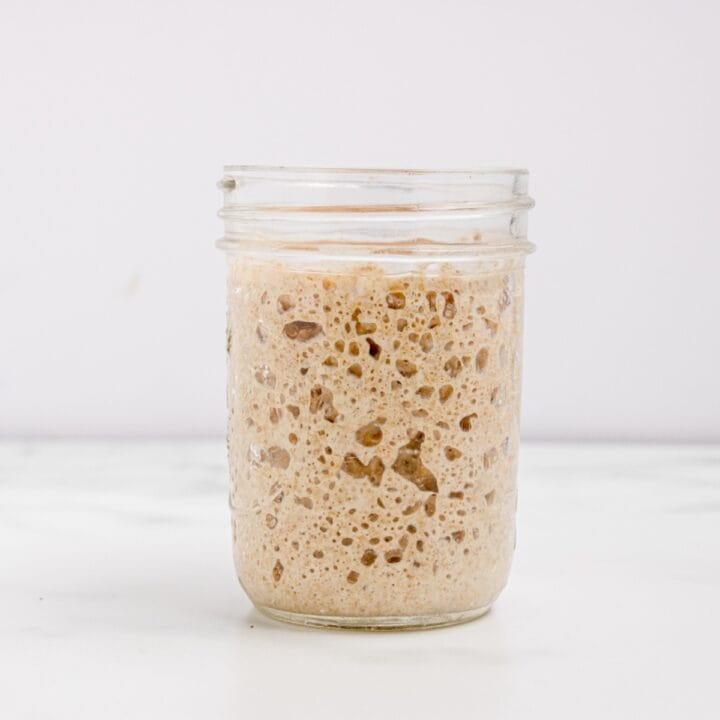
Sourdough Starter: Your starter brings fermentation, flavor, and rise. It also adds sourness to the bread.
Flour: Flour forms the structure of the loaf. It also gives the dough a gluten network that traps air and supports the butter.
Substitutions: Bread flour: gives the best structure and chew. You can replace a small portion with whole wheat for flavor, but too much will make your loaf dense.
Salt: Salt strengthens gluten, controls fermentation, and enhances your bread's flavor. Substitutions: You can adjust within the 7-10 g range depending on preference, but don't skip it. Without salt, the dough becomes weak and bland. Nobody wants bland bread.
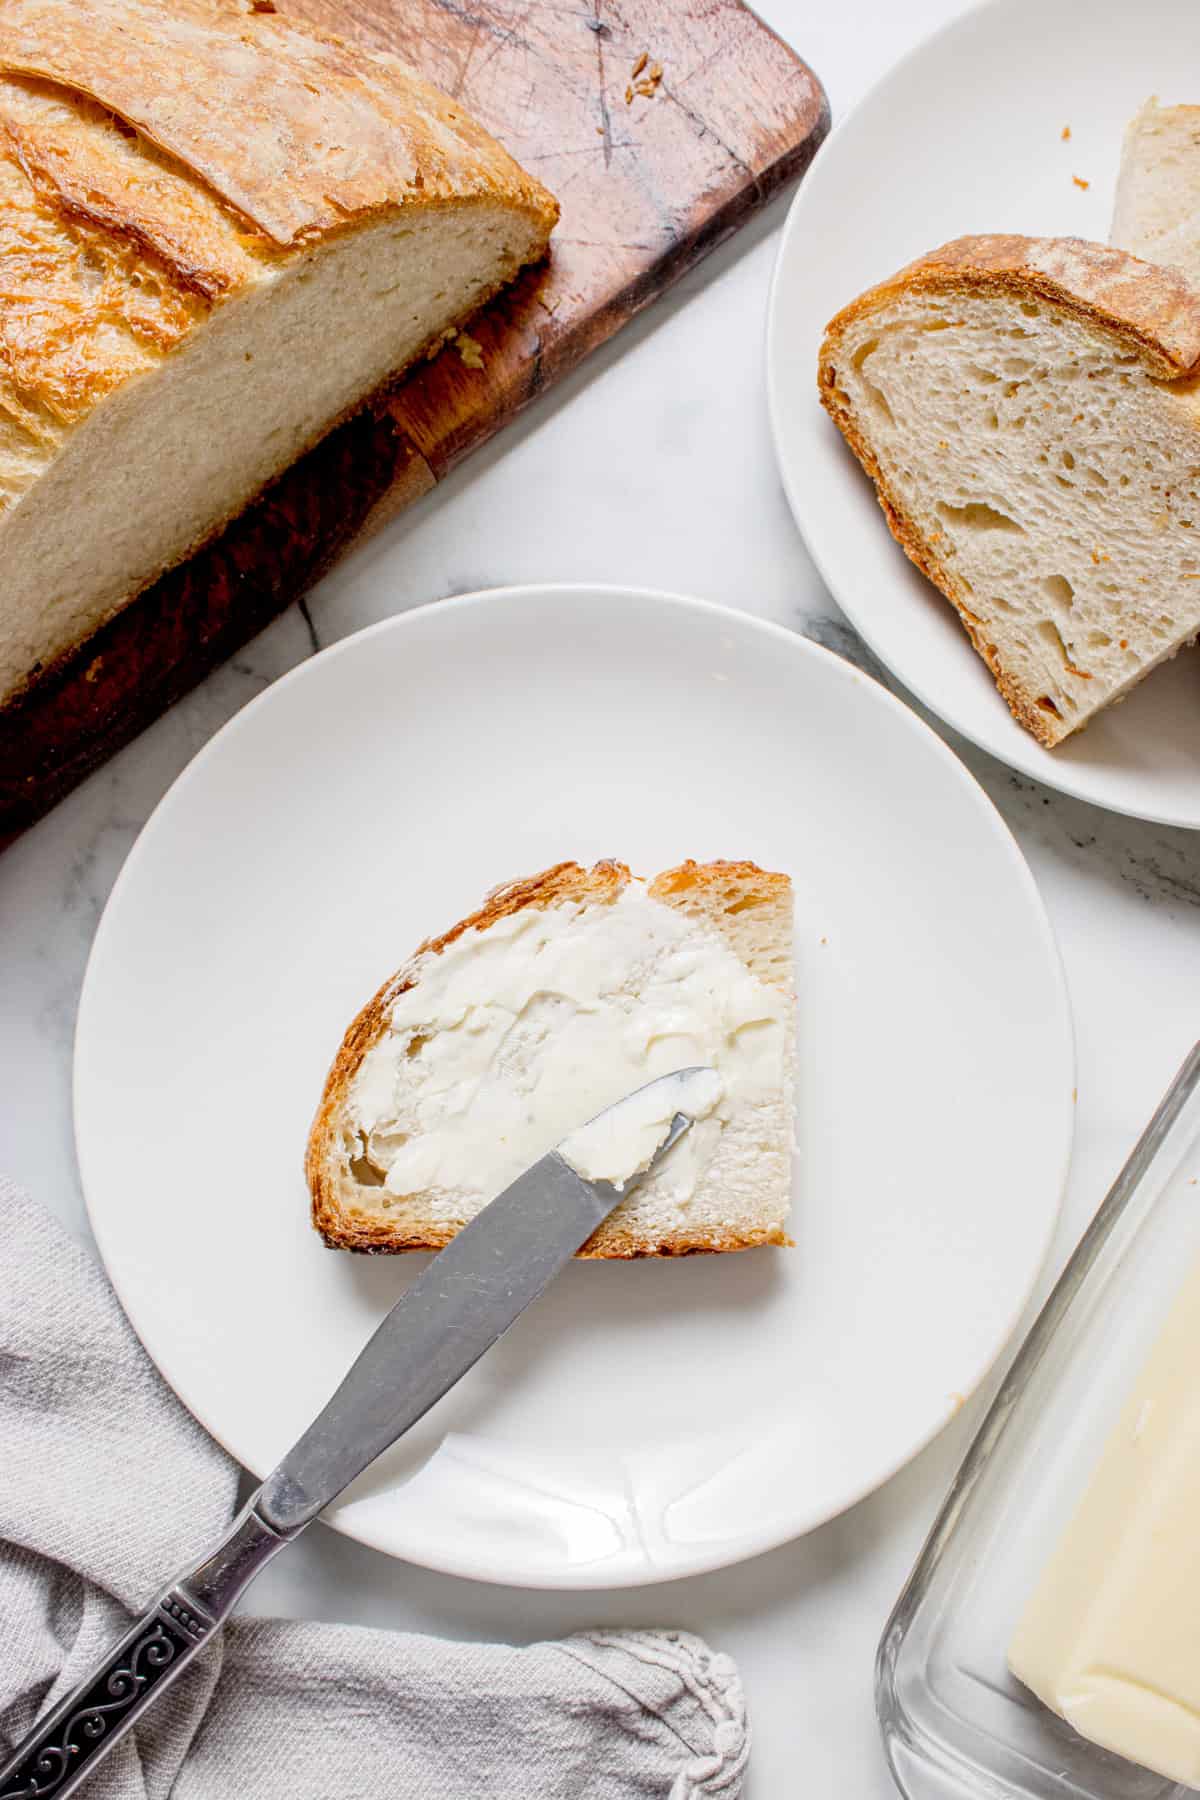
Butter: It adds richness and tenderness to the bread. Substitutions: Vegan butter works, but choose a firm, high-fat version..
How To make a Sourdough Croissant Loaf Step-By-Step
Check out these step-by-step instructions with images. Just so you know, you'll find all the details and exact ingredients of this recipe on the printable recipe card below!
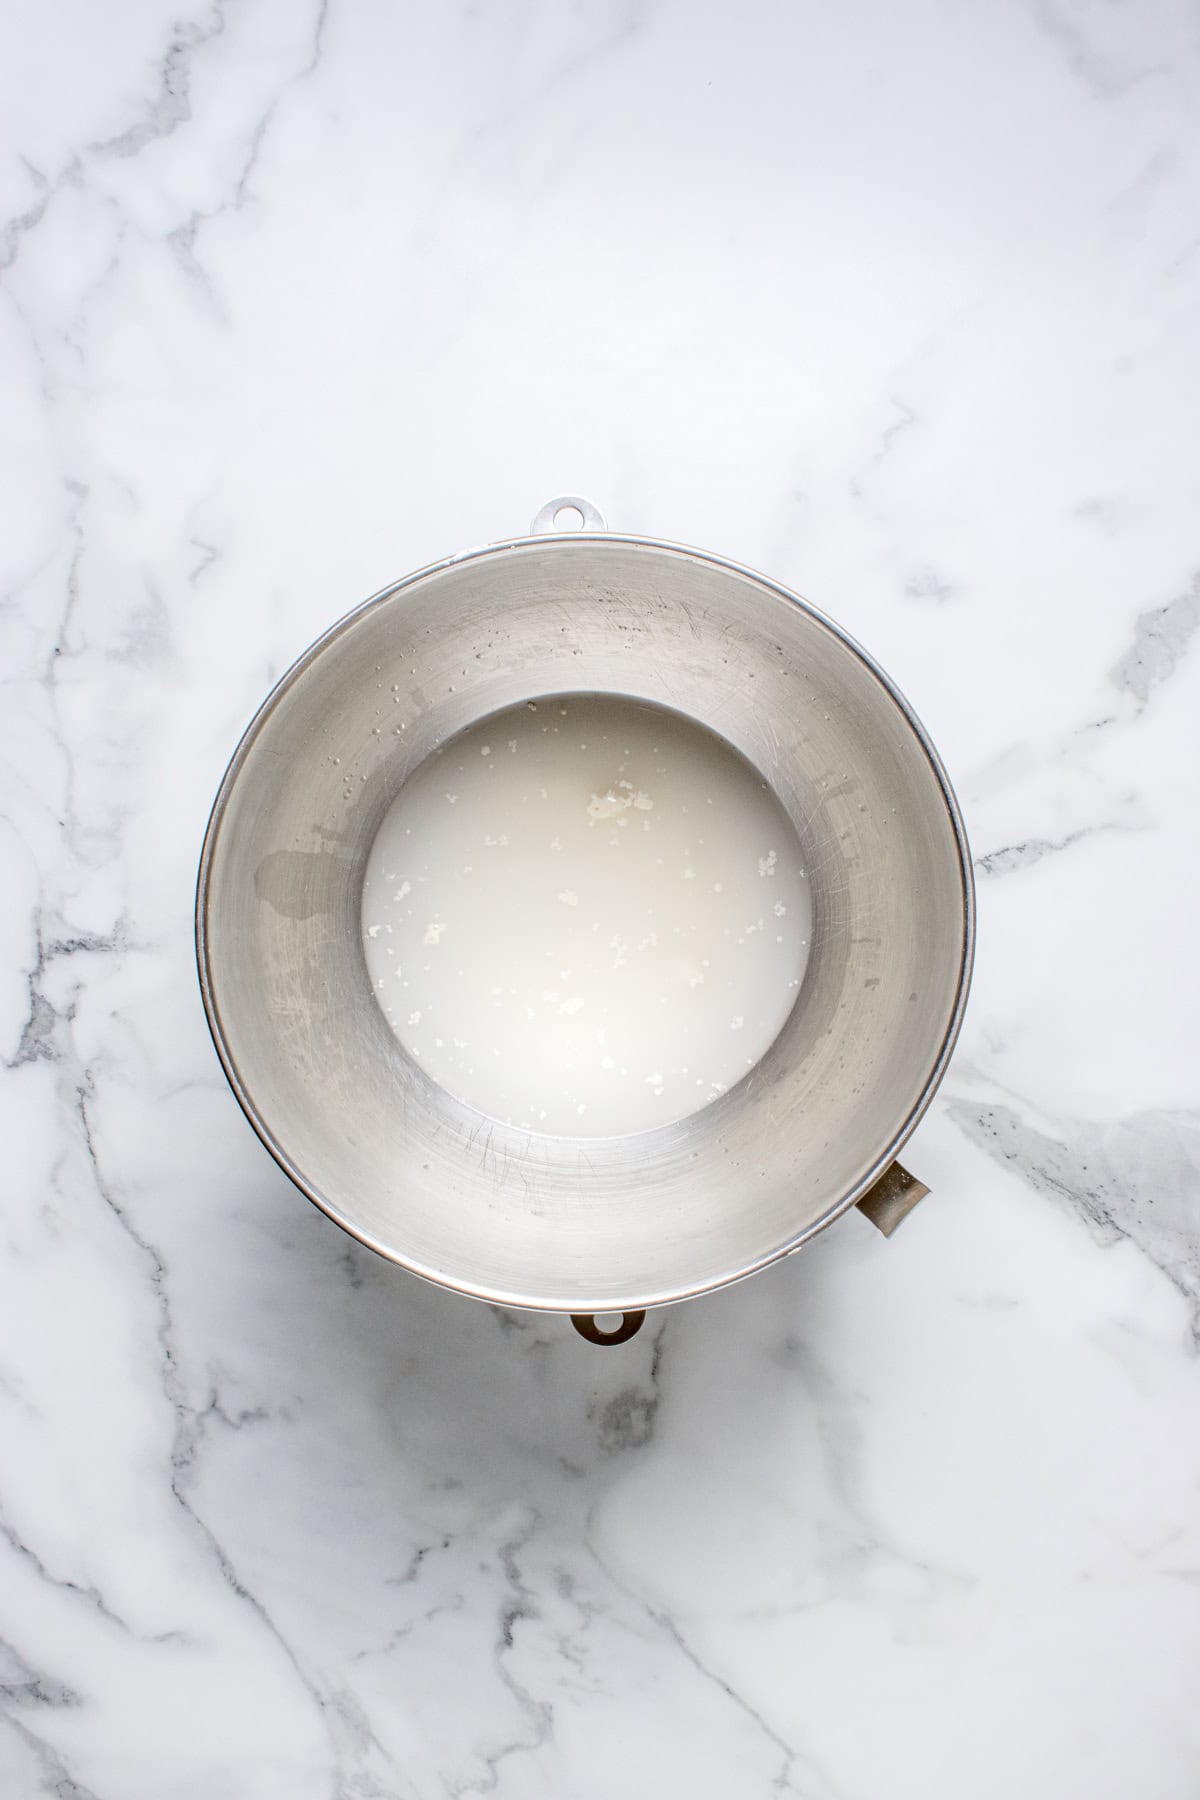
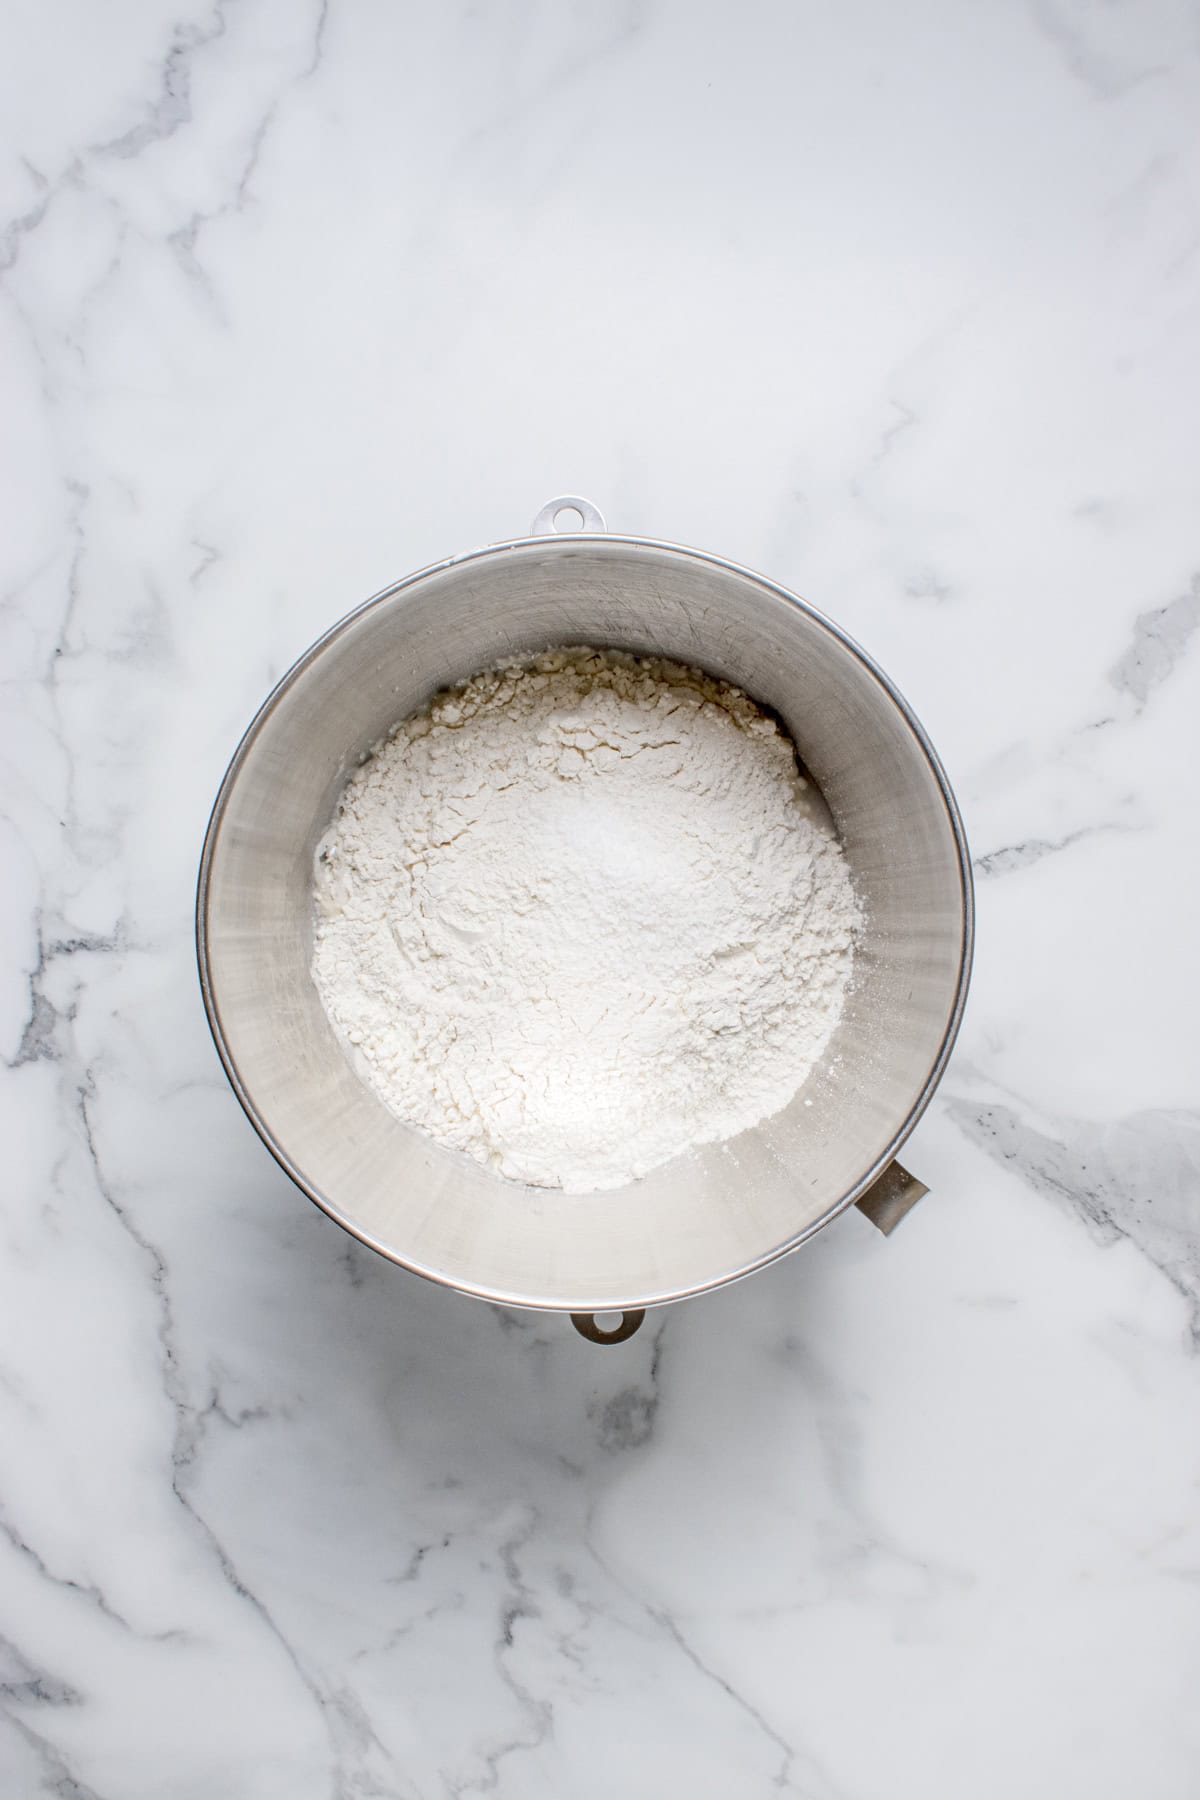
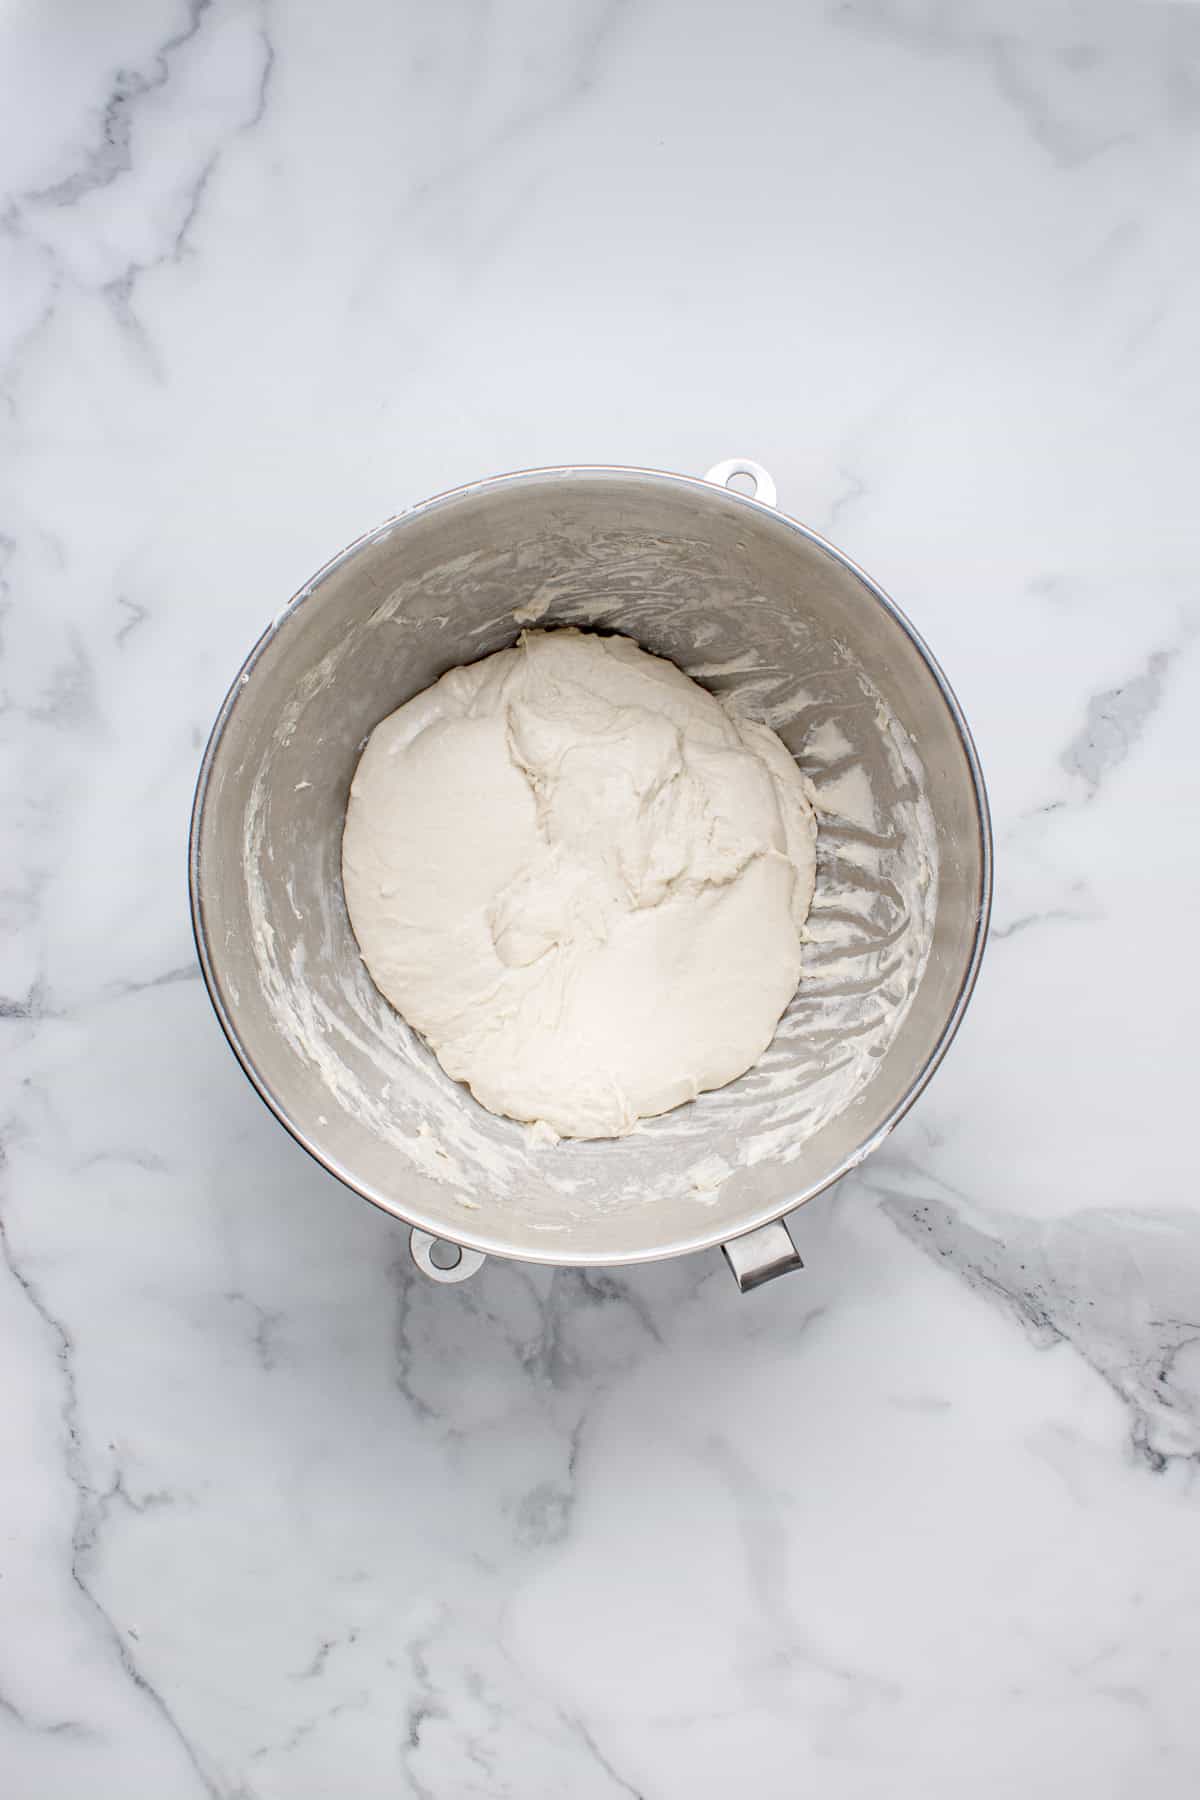
Step 1. Mix the Dough: In a large bowl, add the water and sourdough starter. Whisk them both until they are fully combined. Add the flour and salt. Mix them all until a shaggy dough forms and all the flour is fully incorporated. No dry spots should remain. Cover the bowl and let your dough rest for 20-30 minutes.
Step 2. Build Strength First: Perform your first set of stretch and folds: Stretch one side up and fold it over the center. Rotate the bowl 90 degrees and repeat this for a total of 4 times. Cover the bowl and let the dough rest for 20-30 minutes.
Perform a second set of stretch and folds using the same method. Cover and let it rest for 20-30 minutes. Your dough should feel smoother and slightly elastic at this stage. This step is important before adding butter.
Step 3. Prepare the Butter: Place the butter in the freezer for 30 minutes and after that grate it using a box grater, working on the large holes. Keep it cold until you are ready to use it.
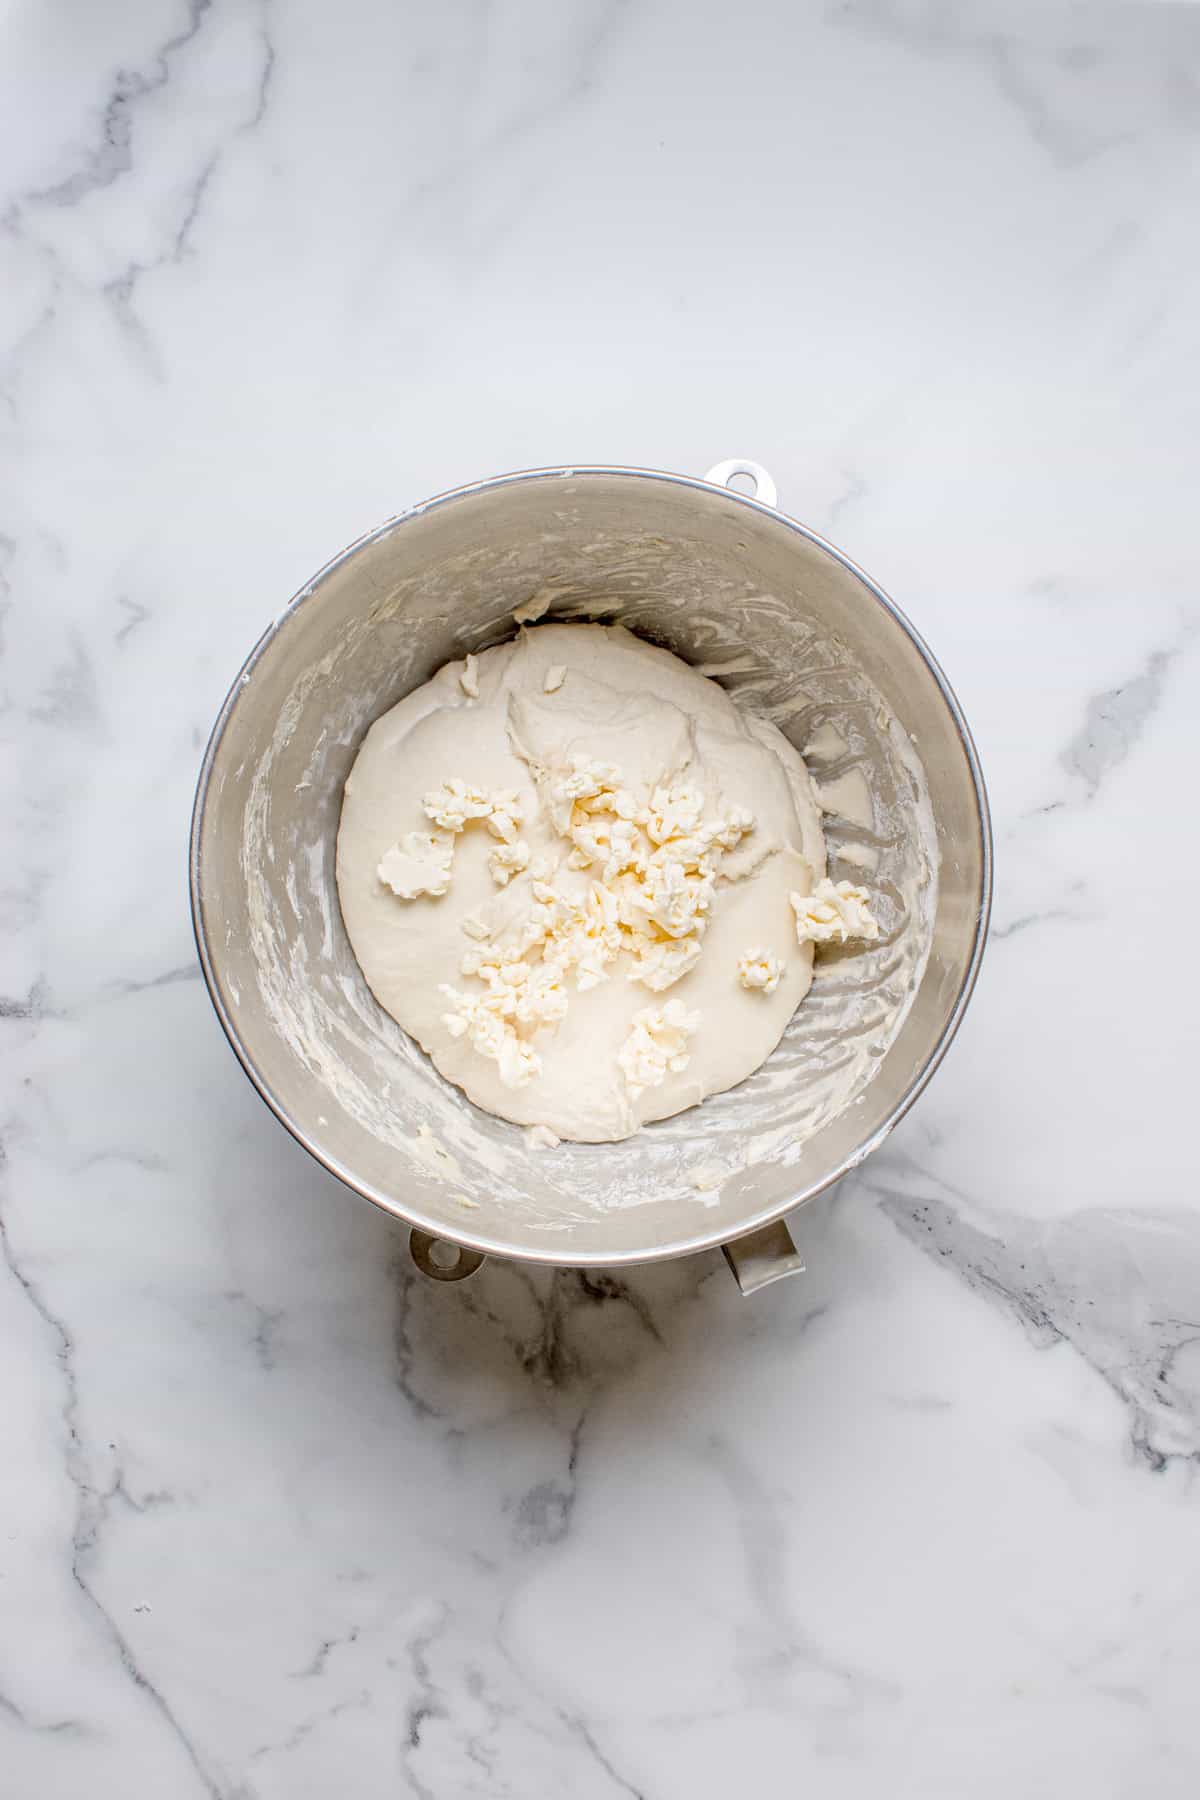
Step 4. Add Butter Gradually (Third Set): Sprinkle half of the grated butter over the dough then perform a gentle stretch and fold set to incorporate it. Don't worry if it looks messy at first. It will come together. Cover and rest for 20-30 minutes.
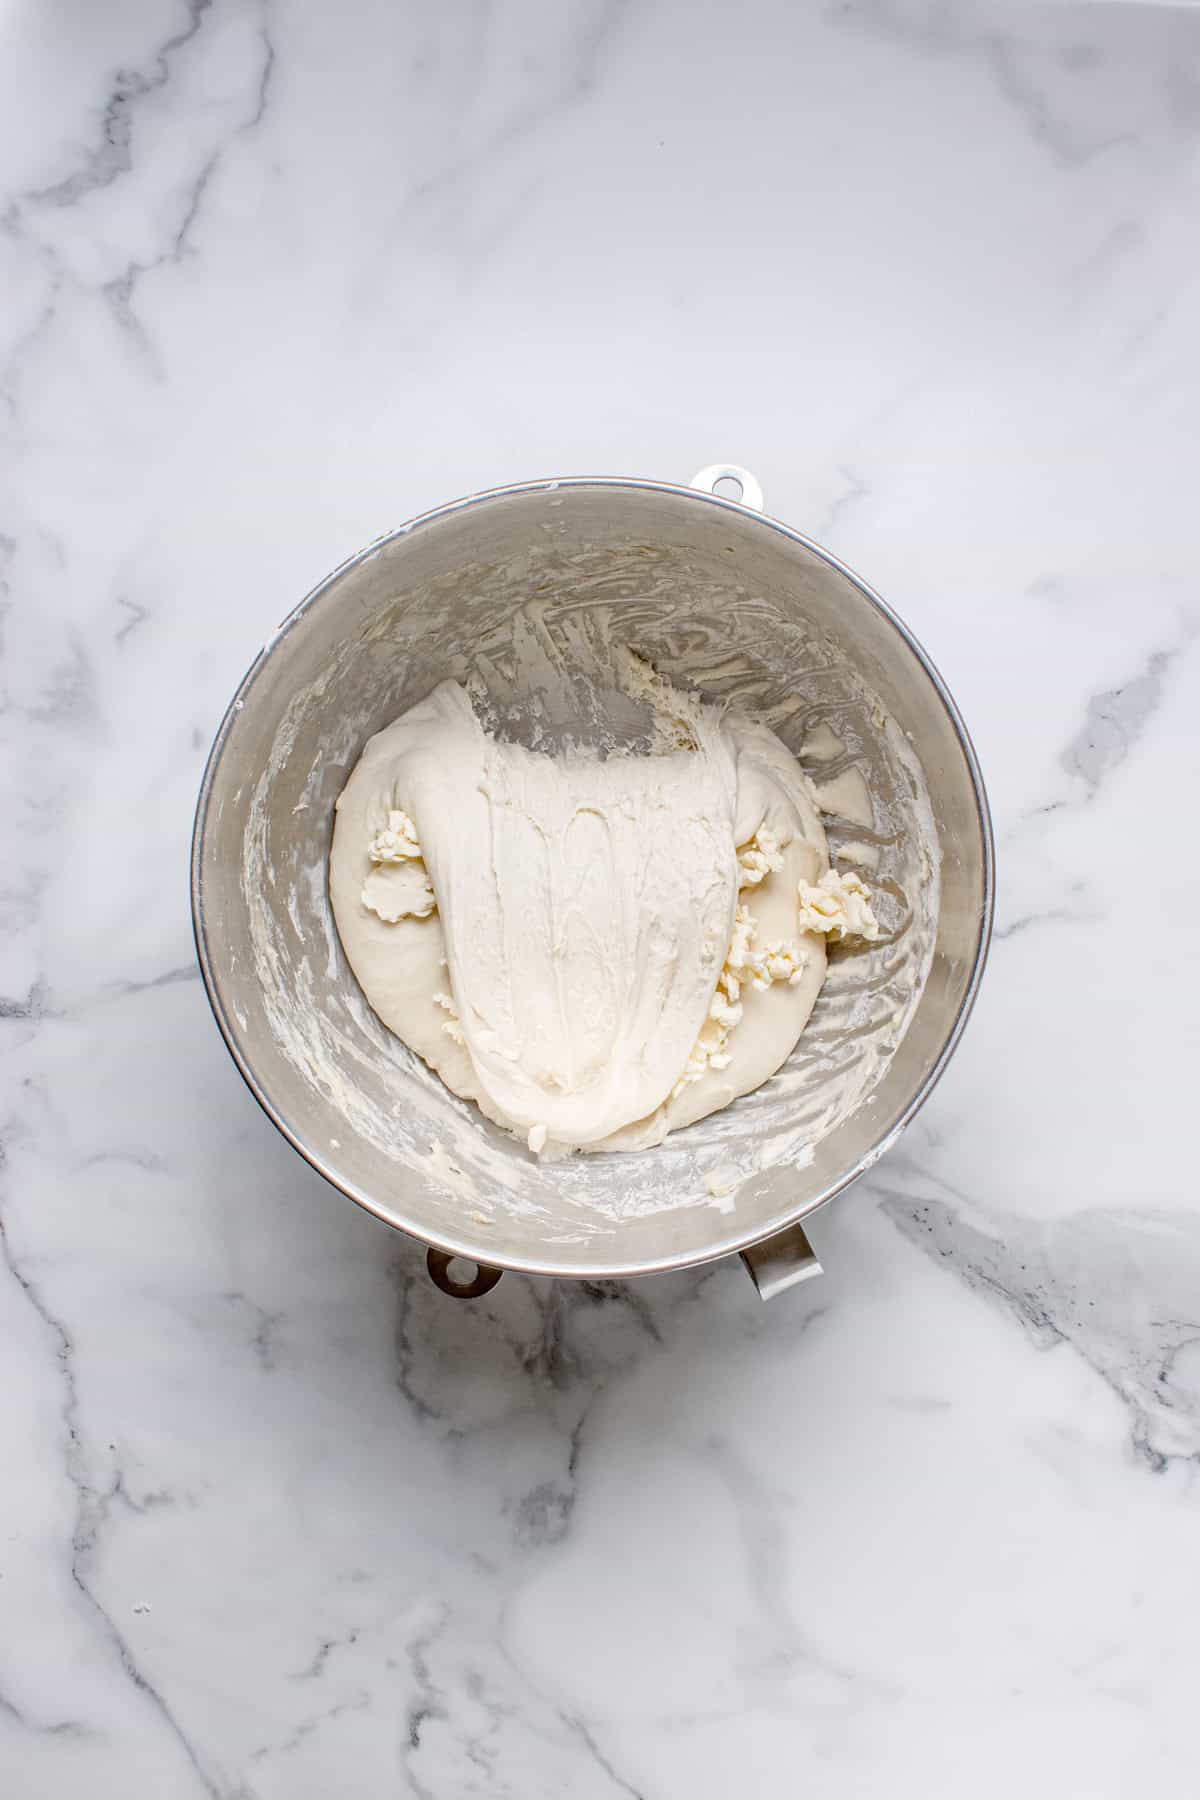
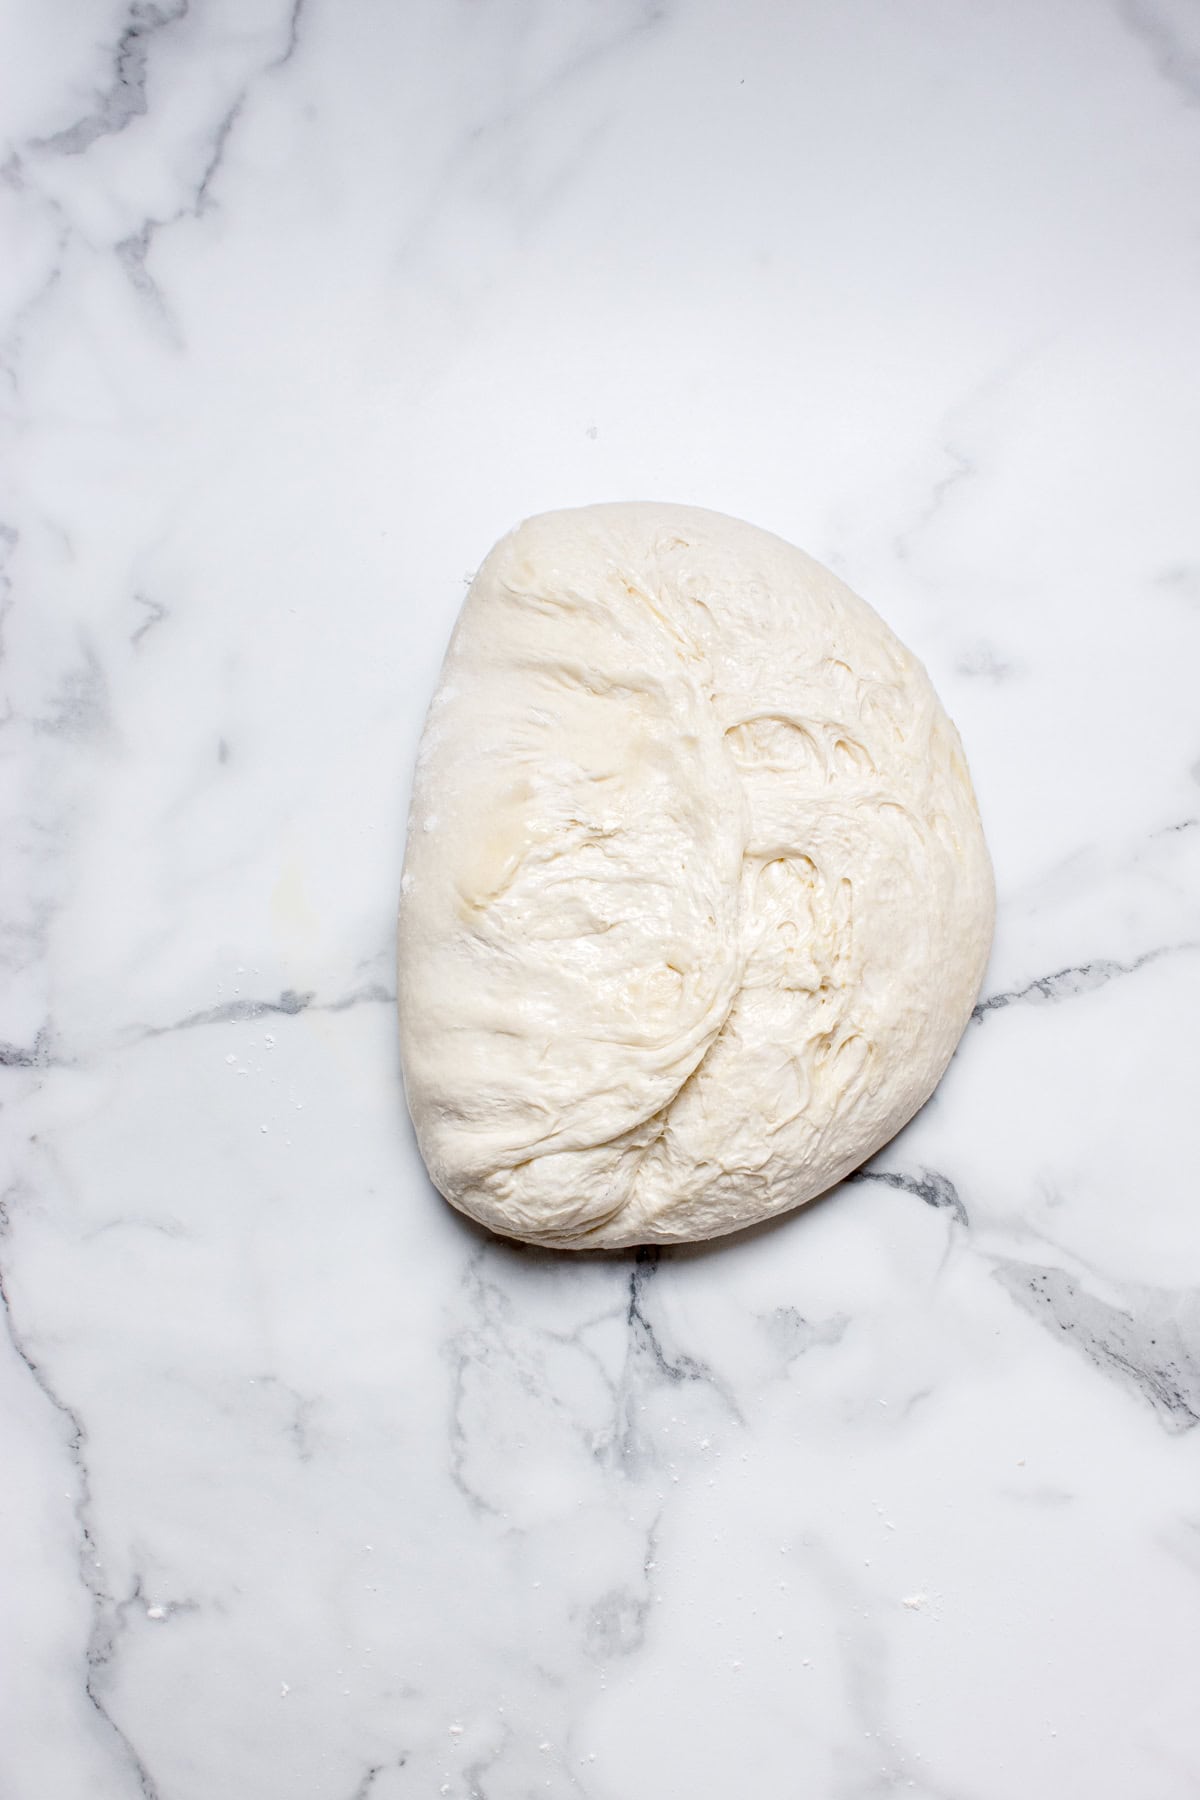
Step 5. Final Butter Incorporation (Fourth Set): Add the remaining butter and perform another set of stretch and folds. If the dough becomes too soft or the butter starts melting, place the dough in the fridge for 5-10 minutes, then continue. The dough should become smoother but still be soft and slightly sticky.
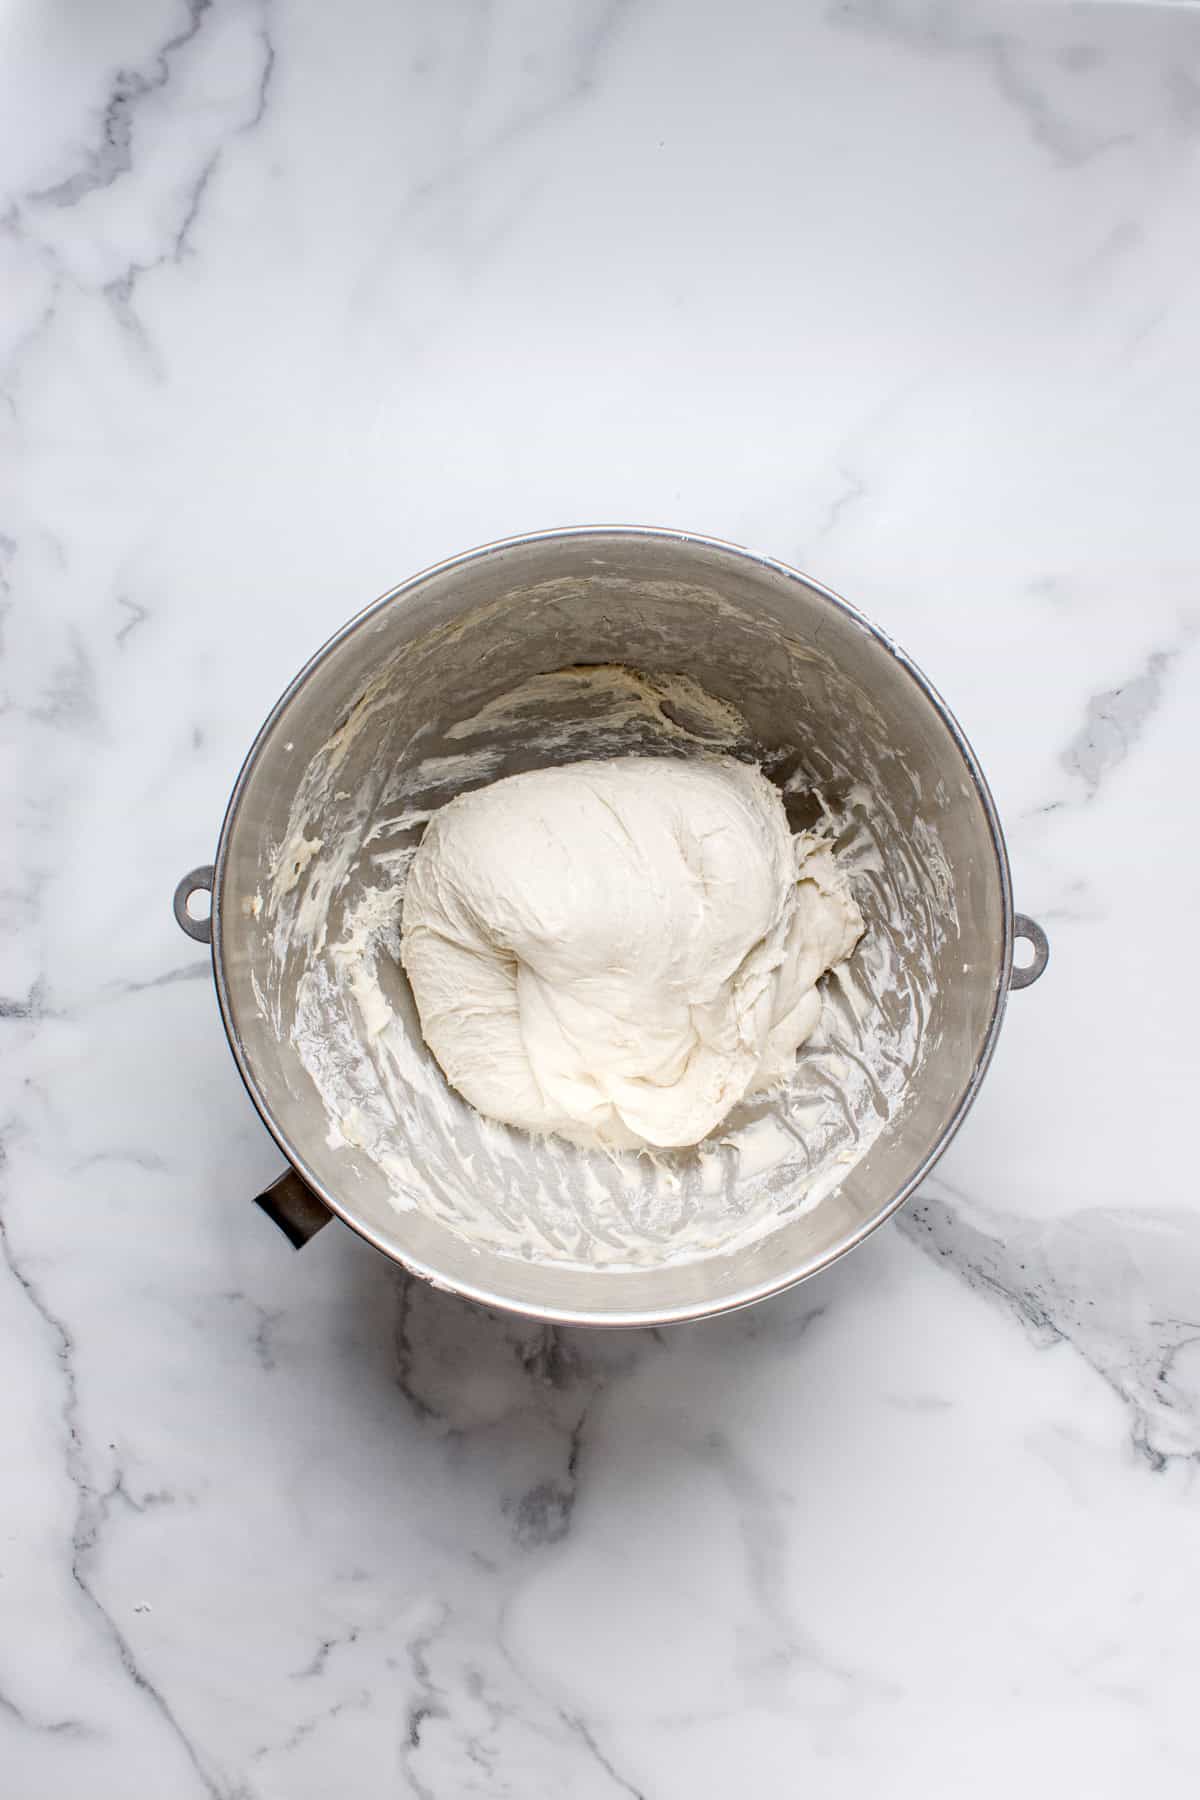
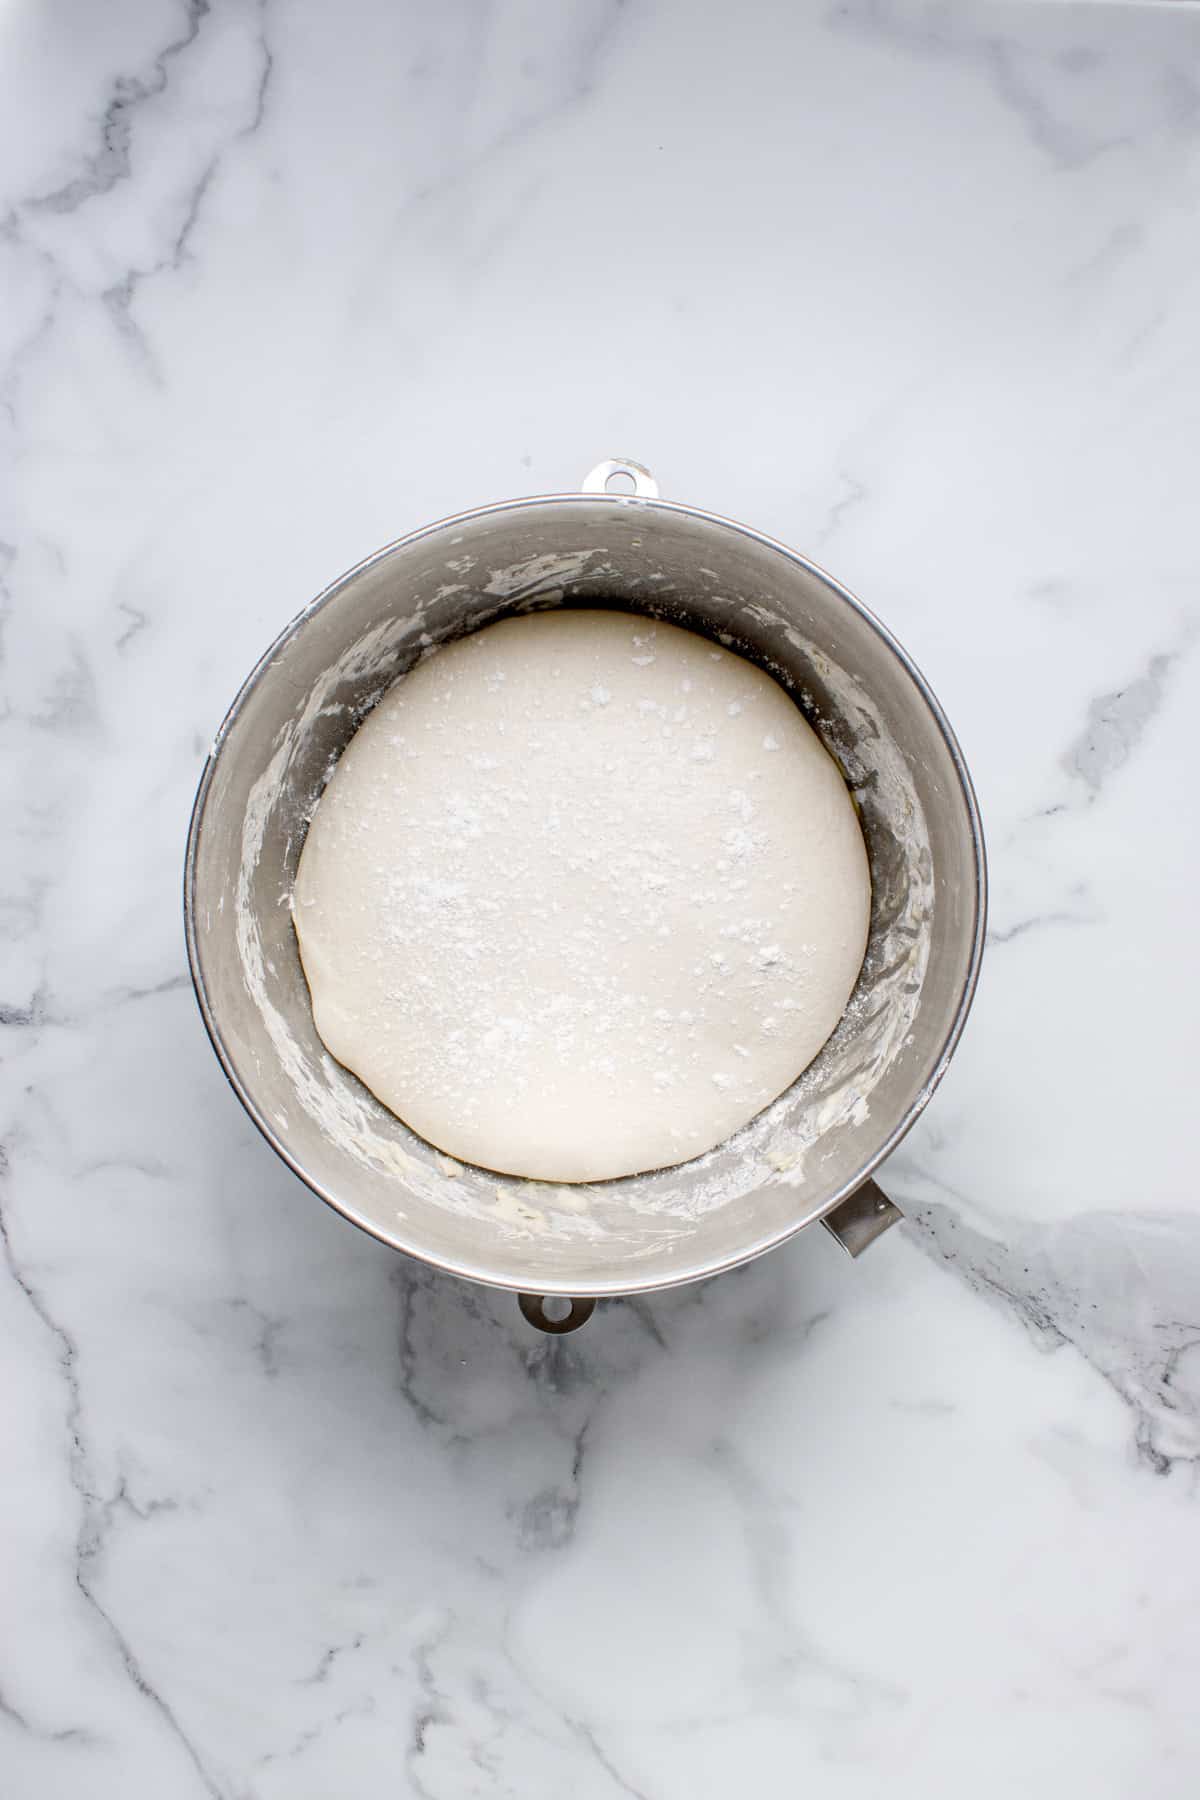
Step 6. Bulk Fermentation: Cover and let the dough rest at room temperature for about 3-5 hours, depending on your room temperature.
Watch for these visual signs the dough is ready:
Dough has risen by about 50-75%
Surface looks smooth and slightly domed
Small bubbles are visible under the surface
Dough jiggles when you gently shake the bowl
It feels airy and lighter
Please do not rely on time alone. Watch the dough. That's what I do.

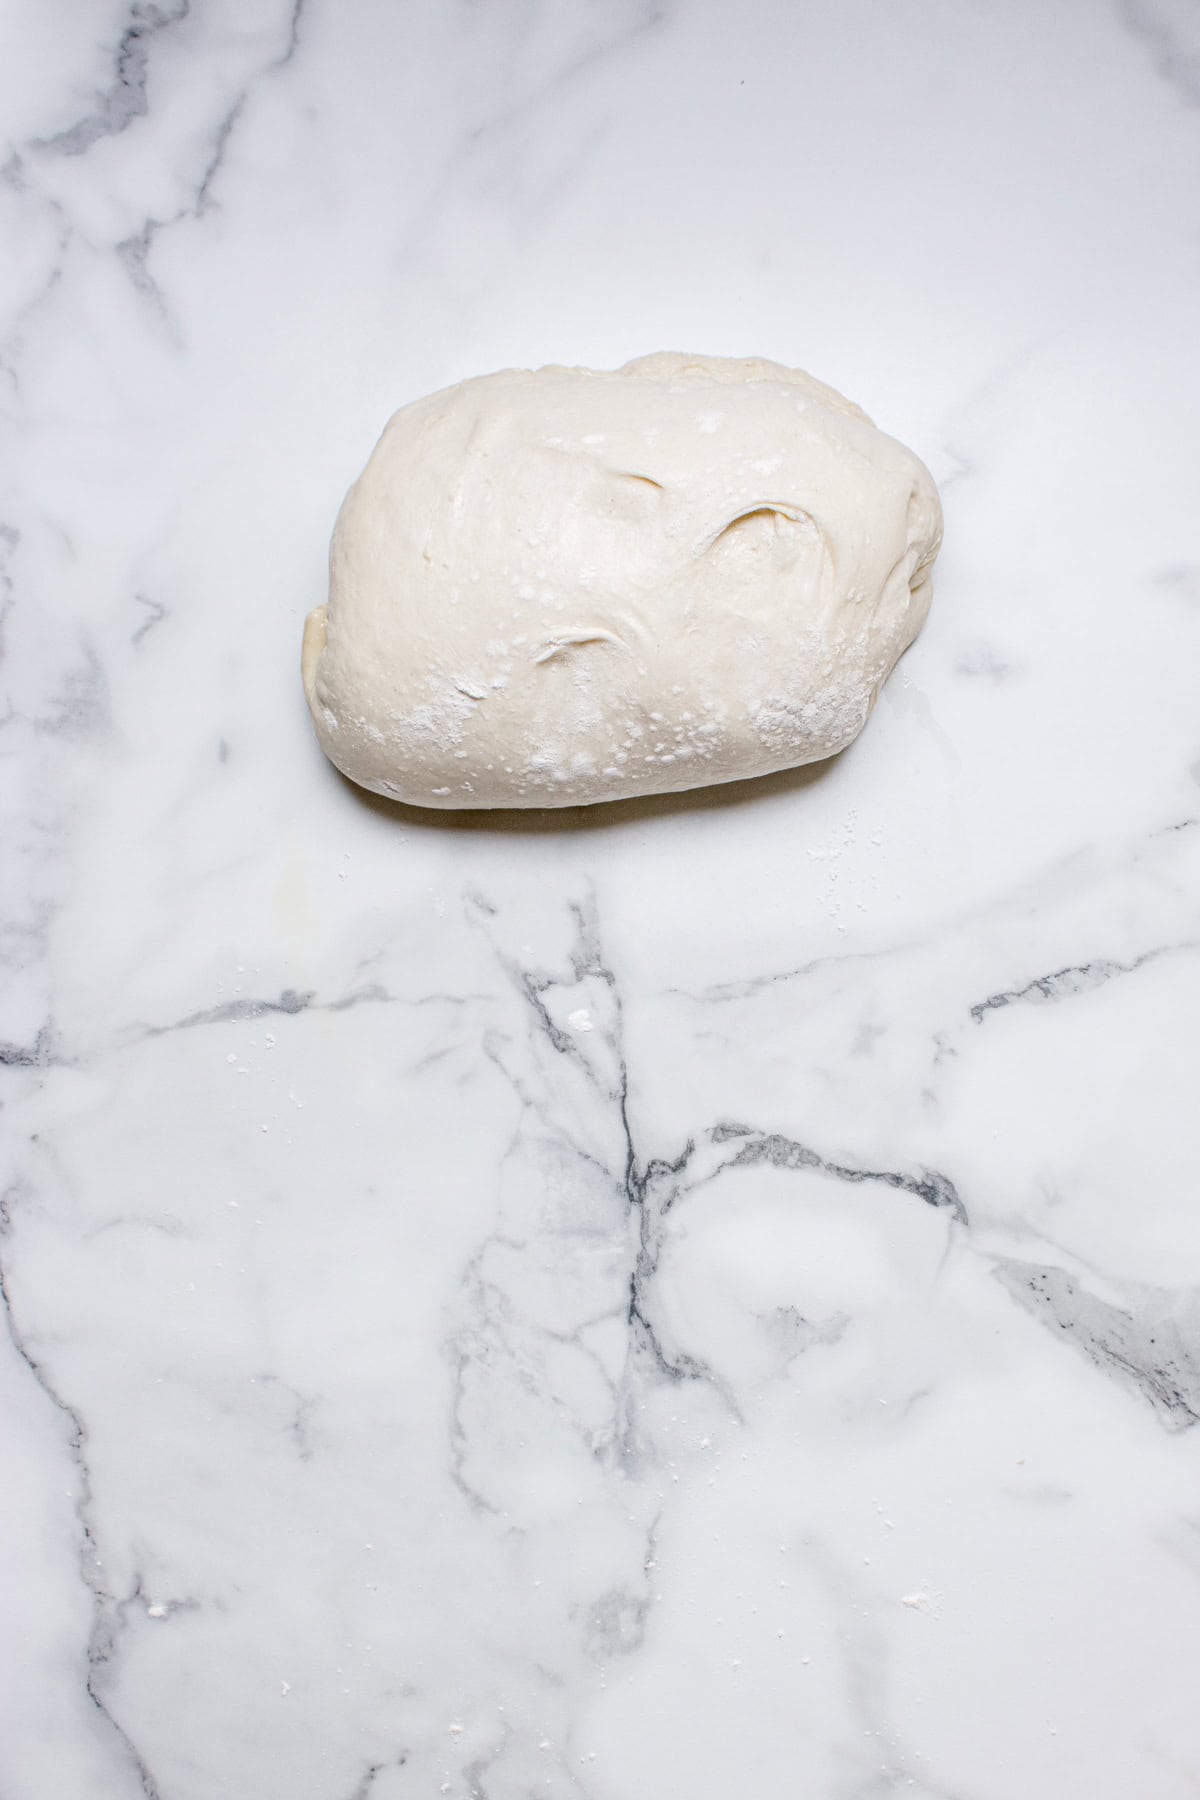
Step 7. Final Shape: Lightly flour your surface and gently turn out the dough. Gently flatten the dough into a rectangle. Fold the top down to the center
Fold the bottom up to the center (like a letter)
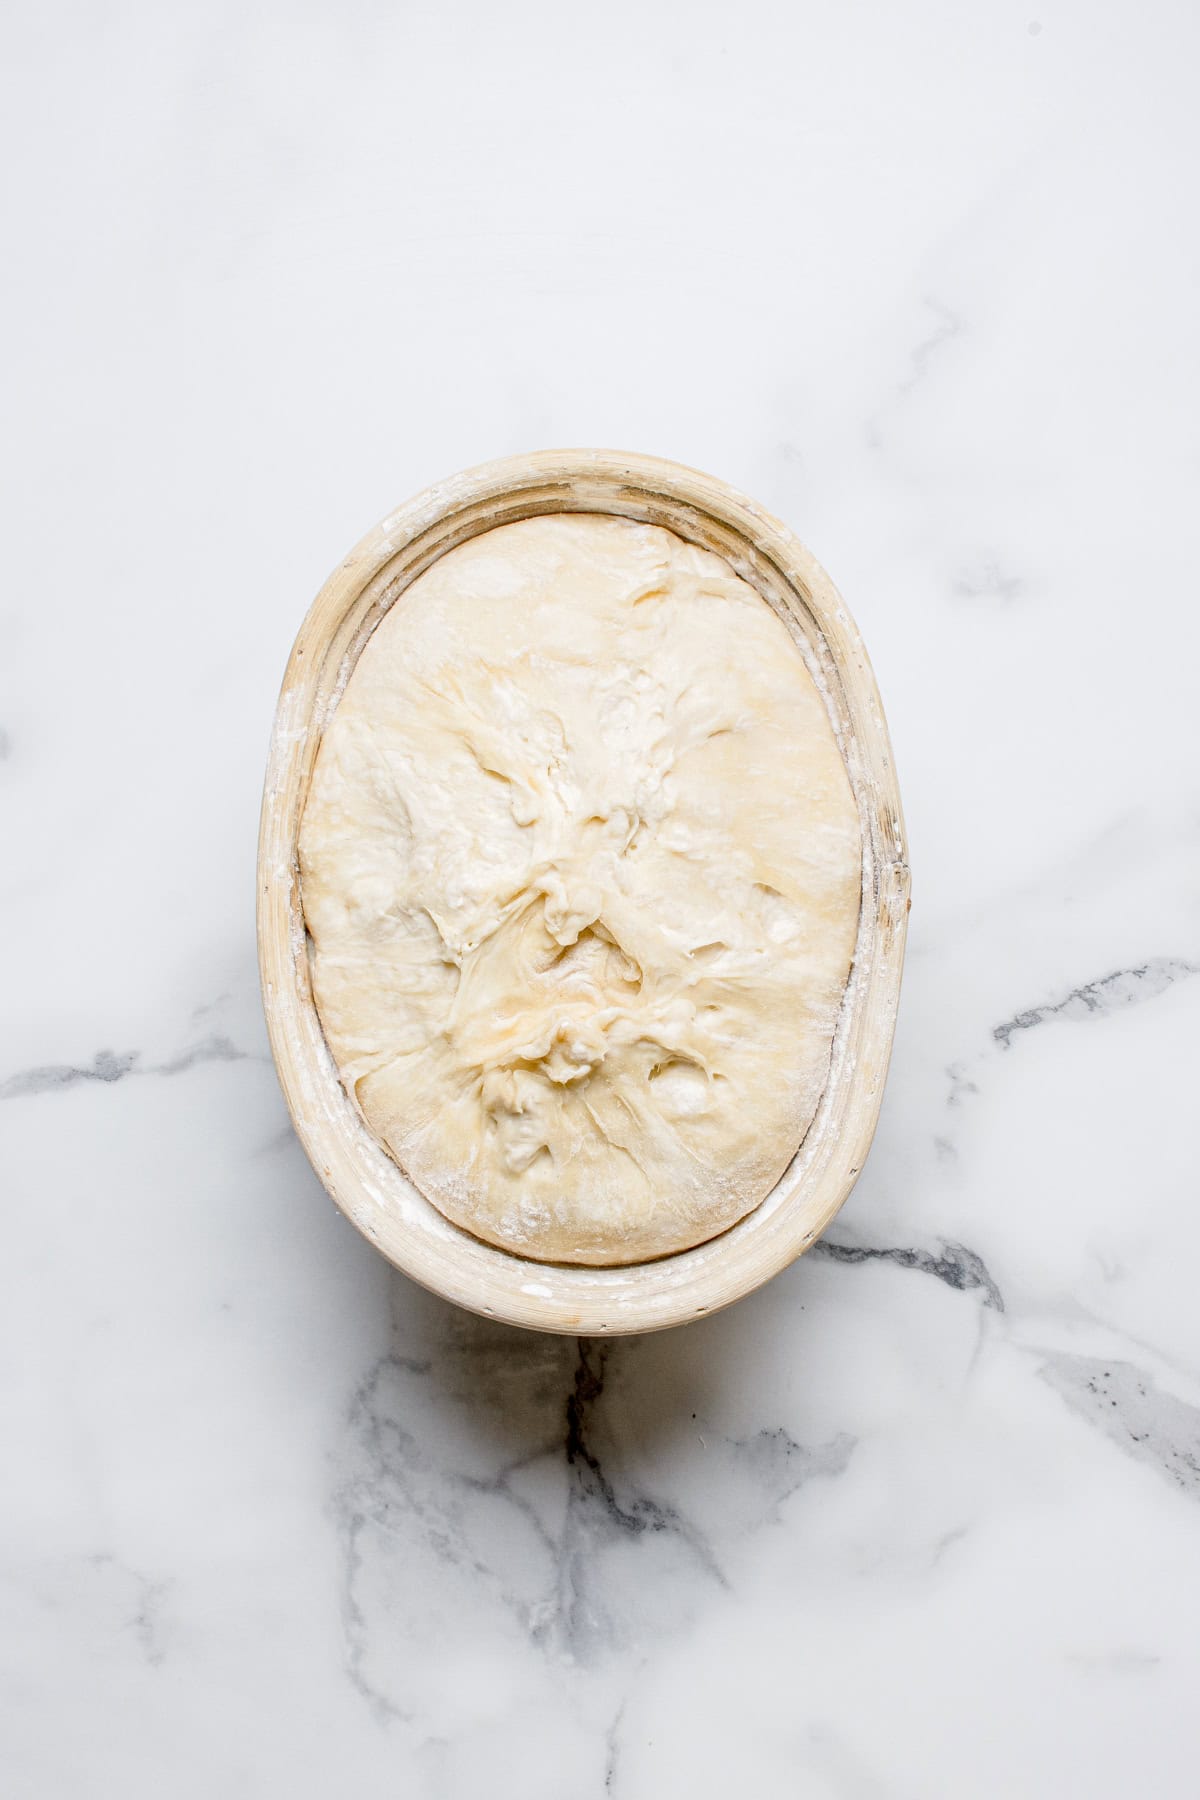
Roll it up tightly like a burrito and place it seam-side up into a lightly floured banneton.
Step 8. Brief Chill (Highly Recommended): Place the shaped dough into the freezer for 15-20 minutes. This helps firm up the butter, make scoring easier, and hold the shape better during baking.
Step 9. Final Proof: You have two options:
Option A: Room Temperature Proof
Proof it for 1-2 hours
Option B: Cold Proof (Recommended)
Place it in the fridge for 8-12 hours
The dough is ready to bake when:
It has puffed up noticeably
It springs back slowly when gently pressed (not instantly, and not too slowly either)
Step 10. Preheat the Oven: Place your Dutch oven inside and preheat it to 475°F (245°C).
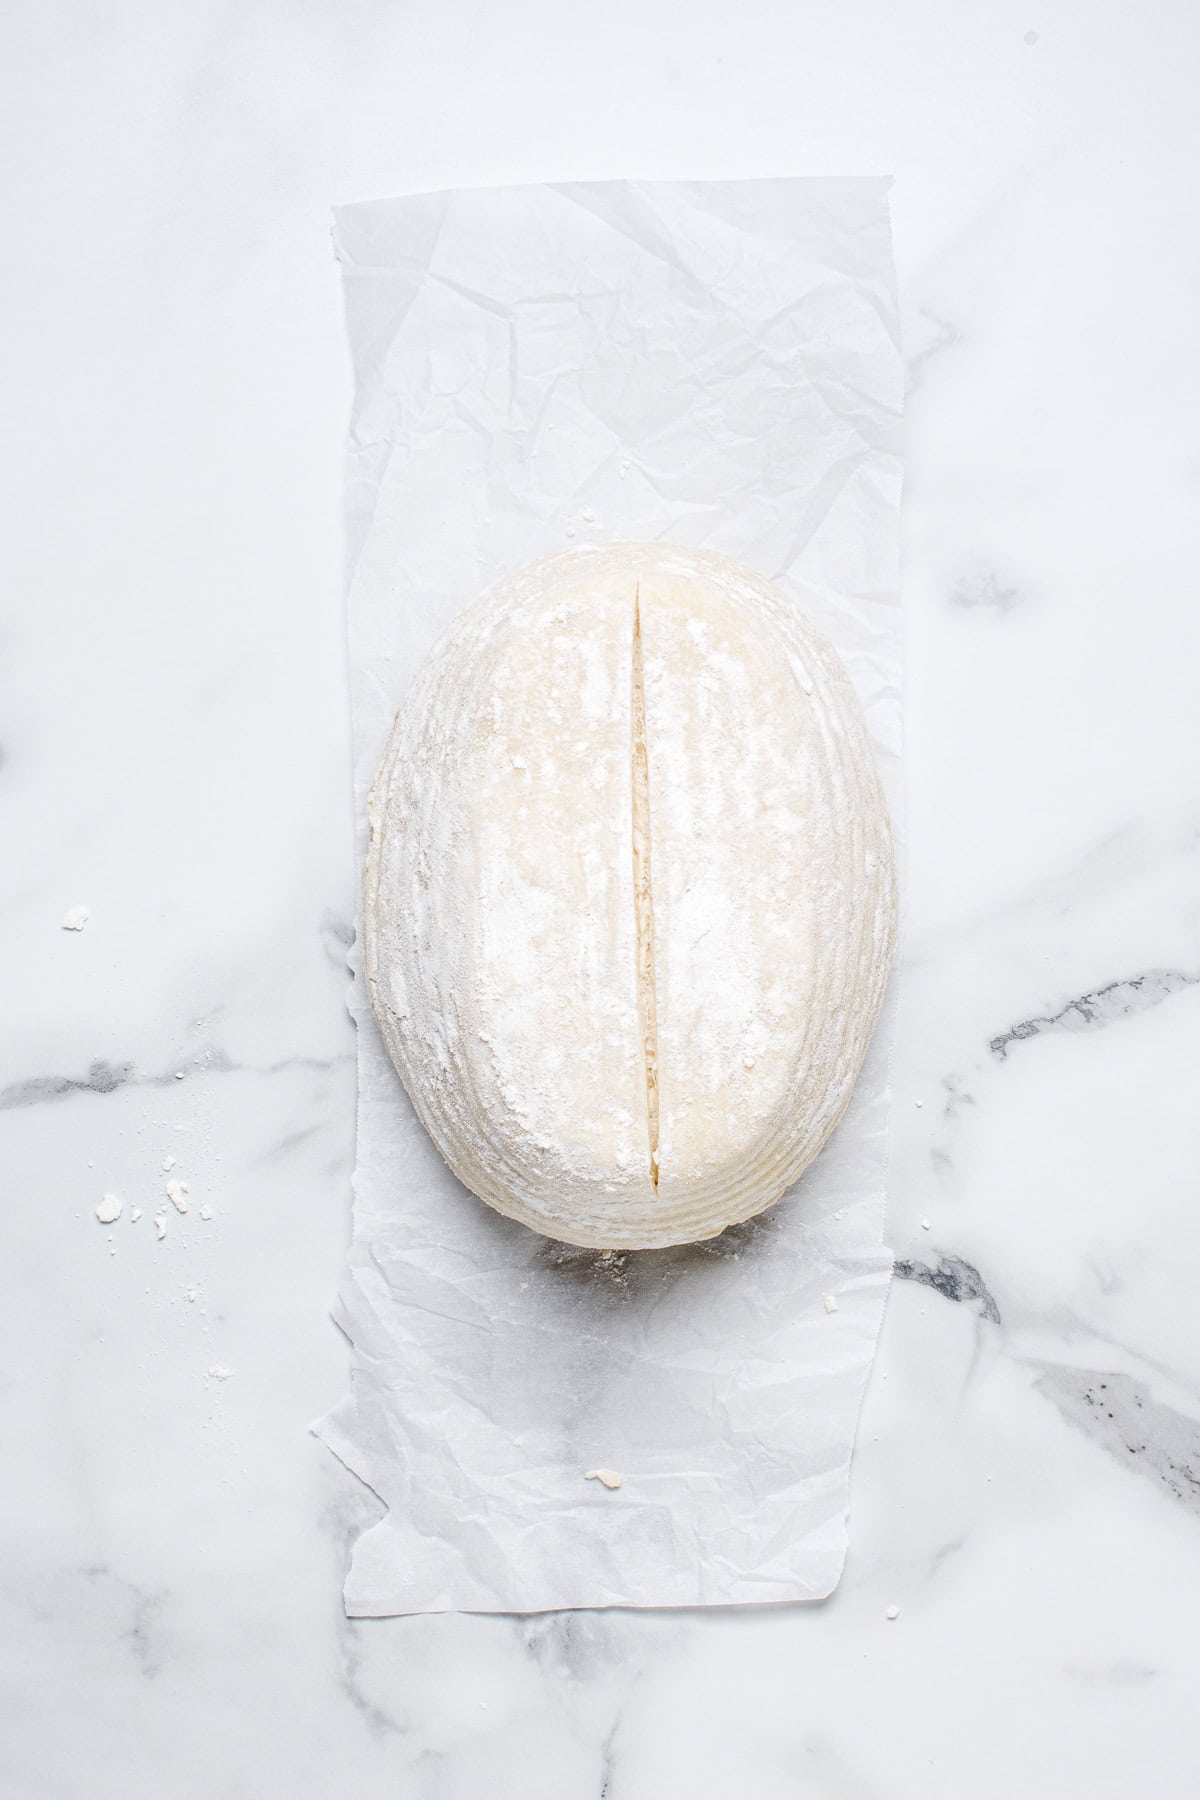
Step 11. Score and Prepare for Baking: Remove the dough from the fridge and turn the dough onto parchment paper. Score the top with a sharp blade in your favorite pattern.
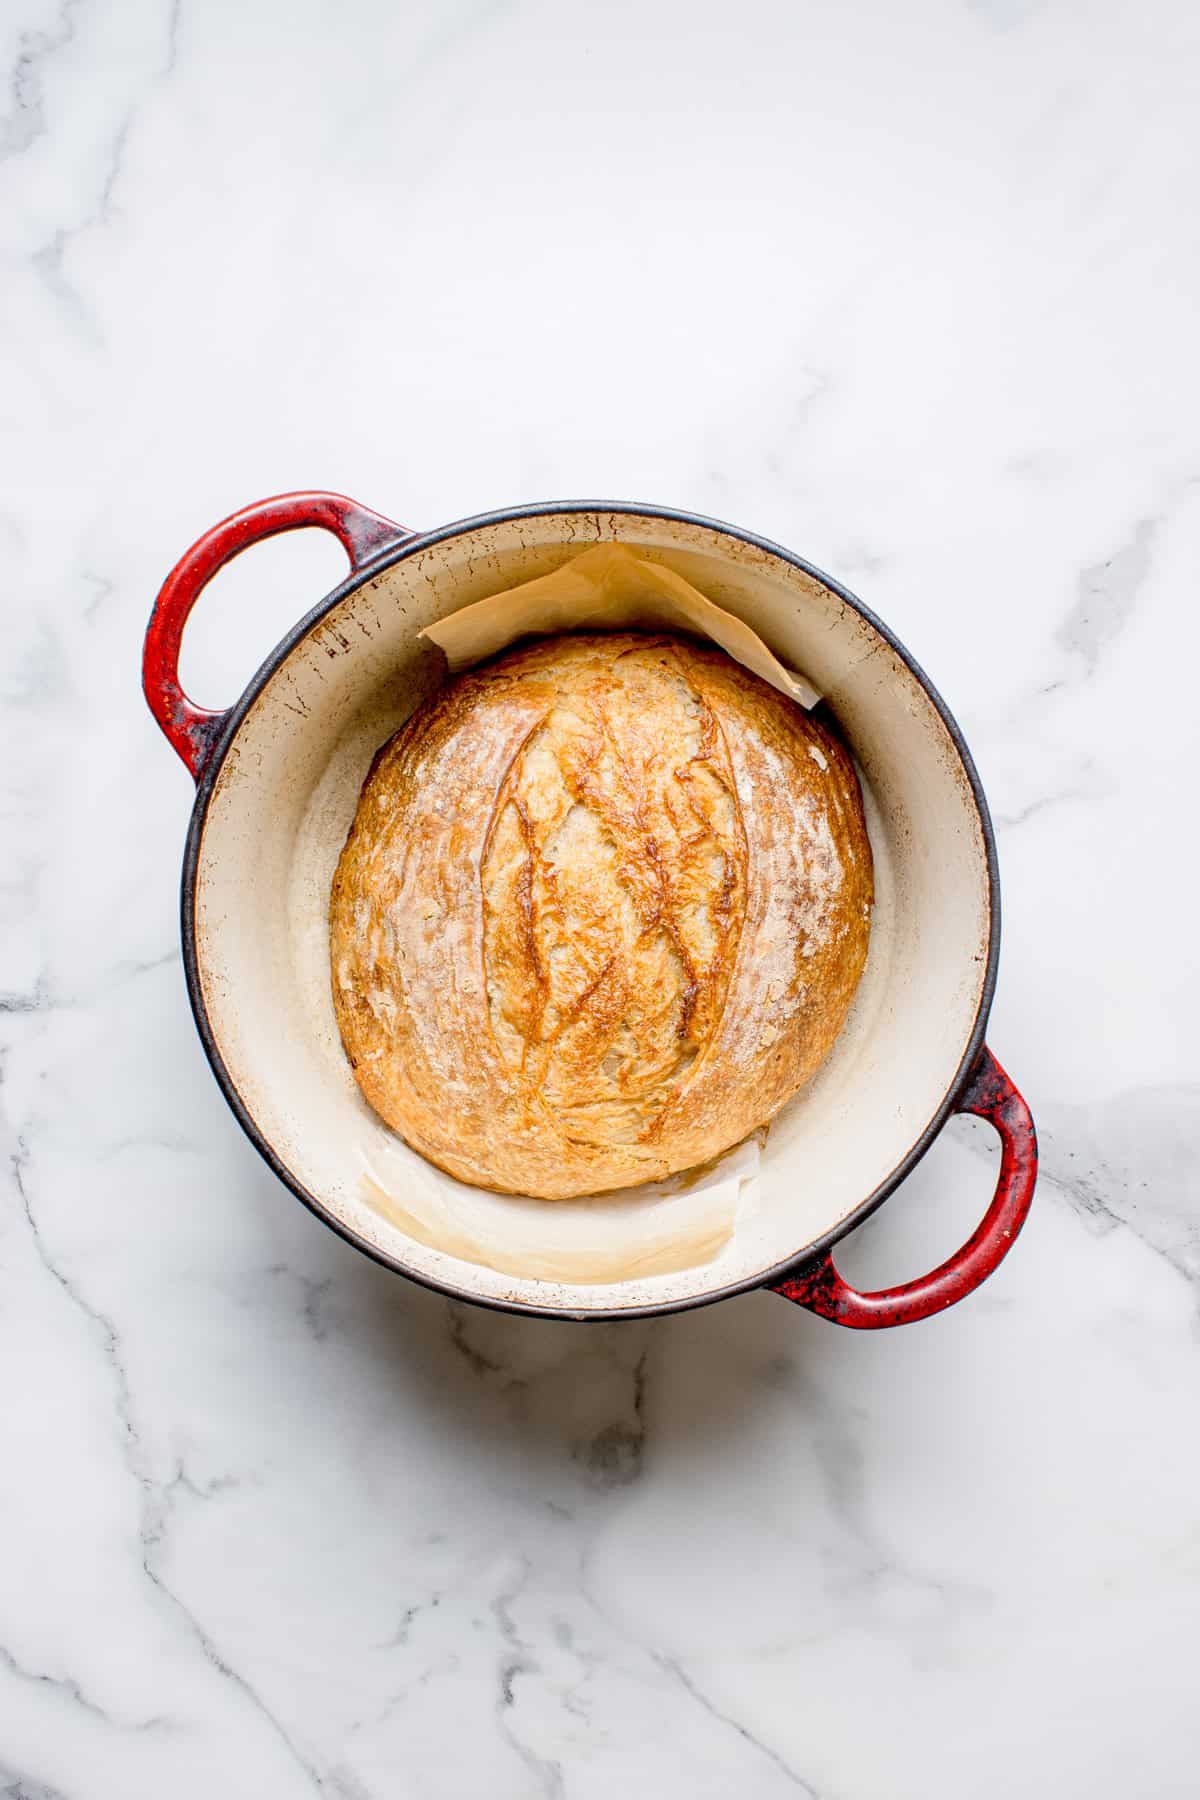
Step 12. Bake with Steam: Carefully place the dough into the hot Dutch oven and add 4-5 ice cubes between the parchment paper and the Dutch oven wall. The ice creates steam, which helps the bread expand, delays crust formation, and gives you a crisp, golden crust.
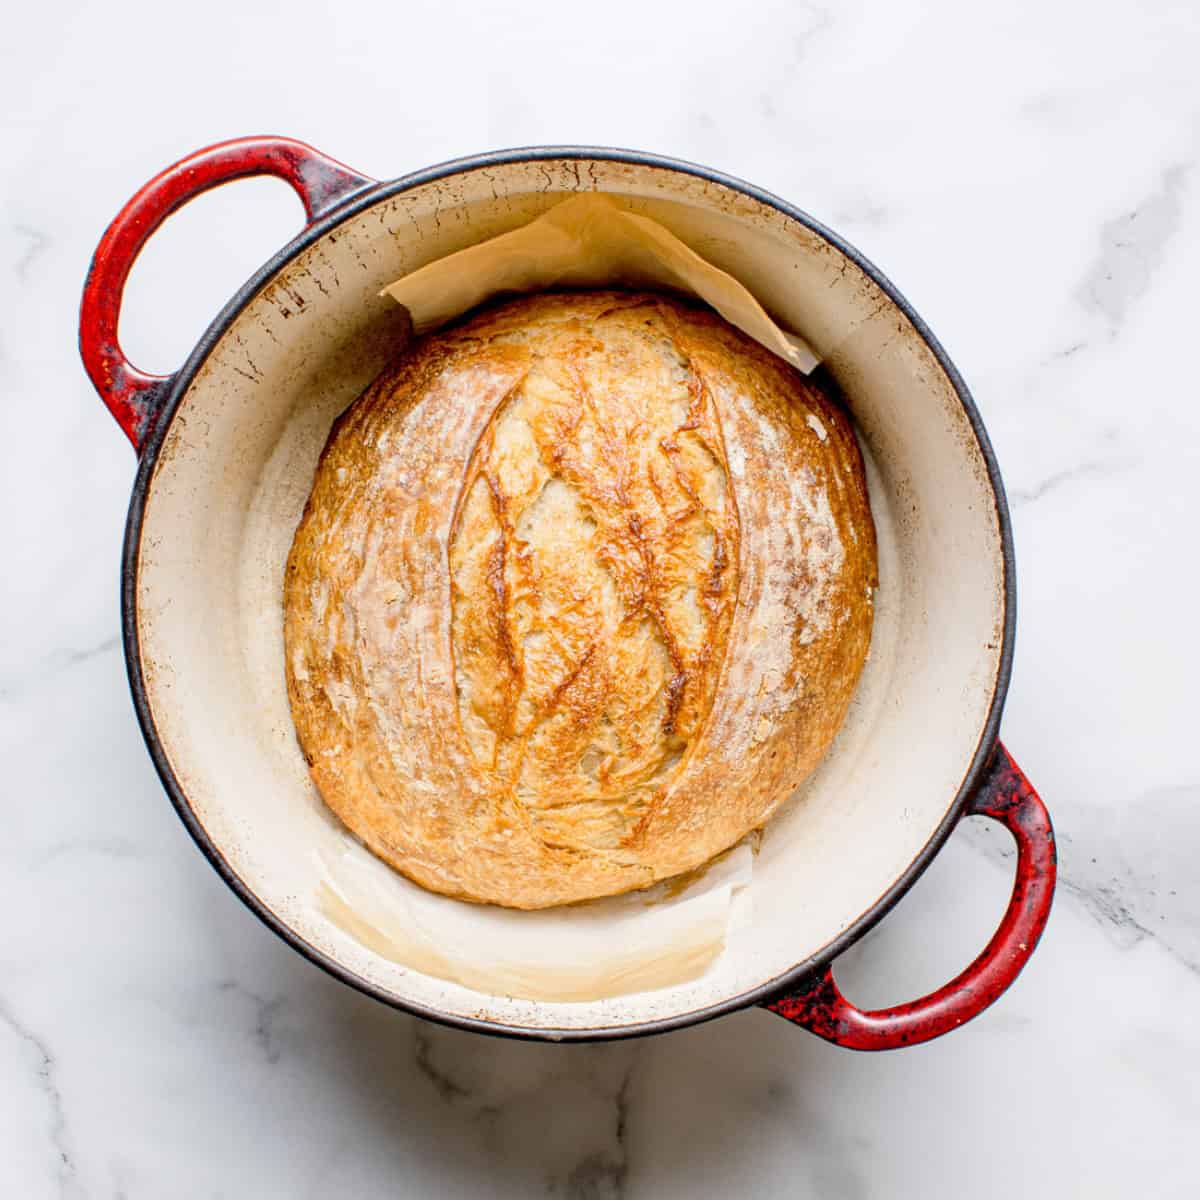
Step 13. Baking: Bake the bread covered for 30 minutes. Remove the lid and bake it until it turns golden brown. If the top browns too quickly, loosely cover it with foil. This usually takes 20-25 minutes.
Step 14. Cooling: Remove the Dutch oven from the oven and let the bread sit for a few minutes.
Then lift the bread out using the parchment paper. Let it cool for at least 1-2 hours before slicing.
Recipe Tips and Tricks
Recipe Tips and Tricks
Build strength before adding butter. This will make sure that your dough will hold its shape after adding the butter.
Use your fridge as a tool. If the dough feels too soft or sticky while doing the stretch and folds, chill it briefly.
Use a damp hand while stretching and folding. This will keep your hands from sticking to the dough.
Add ice cubes for steam. Steam delays crust formation and improves oven spring.
Rotate your Dutch oven halfway through uncovered baking. Doing this ensures that the loaf is evenly brown.
Storage and Reheating
Storing at Room Temperature
Store the bread in a paper bag or wrapped in a towel.
It's best consumed within 1-2 days.
Avoid placing it in airtight containers. They tend to soften the crust.
Refrigeration
I don't recommend doing this for whole loaves (they tend to dry it out).
If sliced, store the slices in an airtight container for up to 4 days.
Freezing
Freeze your whole or sliced loaf for up to 2 months.
Wrap it tightly in plastic and place it in a freezer bag.
Reheating
For slices: Toast them directly from frozen or room temperature.
For a whole loaf: Reheat it at 350°F for 10-15 minutes. This brings back the crisp crust and soft interior.
Your Questions Answered
After the stretch and folds, let the dough bulk ferment until it has noticeably increased in size and looks puffy and airy. For me, this took about 4–6 hours. After shaping, refrigerate the dough overnight (8–12 hours) before baking.
A small amount of melted butter is normal. Chilling the dough overnight and using cold or frozen butter can help reduce butter leakage, but some butter may still melt out during baking.
Bulk fermentation time depends on the temperature of your kitchen and the strength of your starter. Rather than watching the clock, look for the dough to become puffy, airy, and increase by about 50–75% in volume.
In a Dinner Rut?
Sign up for our newsletter!
Please Rate this Recipe!
We hope you love this ! If you make it, be sure to leave a rating so we know how you liked it!
More Recipes You'll Love
Looking for other easy and delicious recipes? Try these:


Recipe
Sourdough Croissant Loaf
Ingredients
Method
- In a large bowl, add the water and sourdough starter. Whisk them both until they are fully combined. Add the flour and salt. Mix them all until a shaggy dough forms and all the flour is fully incorporated. No dry spots should remain. Cover the bowl and let your dough rest for 20-30 minutes.
- Perform your first set of stretch and folds:Stretch one side up and fold it over the center. Rotate the bowl 90 degrees and repeat this for a total of 4 times. Cover the bowl and let the dough rest for 20-30 minutes.Perform a second set of stretch and folds using the same method. Cover and let it rest for 20-30 minutes. Your dough should feel smoother and slightly elastic at this stage. This step is important before adding butter.
- Sprinkle half of the grated butter over the dough then perform a gentle stretch and fold set to incorporate it. Don't worry if it looks messy at first. It will come together. Cover and rest for 20-30 minutes.
- Add the remaining butter and perform another set of stretch and folds. If the dough becomes too soft or the butter starts melting, place the dough in the fridge for 5-10 minutes, then continue. The dough should become smoother but still be soft and slightly sticky.
- Cover and let the dough rest at room temperature for about 3-5 hours, depending on your room temperature.Watch for these visual signs the dough is ready:Dough has risen by about 50-75%Surface looks smooth and slightly domedSmall bubbles are visible under the surfaceDough jiggles when you gently shake the bowlIt feels airy and lighterPlease do not rely on time alone. Watch the dough. That's what I do.
- Lightly flour your surface and gently turn out the dough. Gently flatten the dough into a rectangle. Fold the top down to the centerFold the bottom up to the center (like a letter)Roll it up tightly like a burrito and place it seam-side up into a lightly floured banneton.
- Place the shaped dough into the freezer for 15-20 minutes. This helps firm up the butter, make scoring easier, and hold the shape better during baking.
- You have two options:Option A: Room Temperature ProofProof it for 1-2 hoursOption B: Cold Proof (Recommended)Place it in the fridge for 8-12 hoursThe dough is ready to bake when:It has puffed up noticeablyIt springs back slowly when gently pressed (not instantly, and not too slowly either)
- Place your Dutch oven inside and preheat it to 475°F (245°C).
- Remove the dough from the fridge and turn the dough onto parchment paper. Score the top with a sharp blade in your favorite pattern.
- Carefully place the dough into the hot Dutch oven and add 4-5 ice cubes between the parchment paper and the Dutch oven wall. The ice creates steam, which helps the bread expand, delays crust formation, and gives you a crisp, golden crust.
- Bake the bread covered for 30 minutes. Remove the lid and bake it until it turns golden brown. If the top browns too quickly, loosely cover it with foil. This usually takes 20-25 minutes.
- Remove the Dutch oven from the oven and let the bread sit for a few minutes.Then lift the bread out using the parchment paper. Let it cool for at least 1-2 hours before slicing.


We'd Love to Hear From You